Mit der Data Reviewer-Lizenz verfügbar.
Creating the administrator database connection
You need to create an administrator database connection when the Reviewer workspace is stored in an enterprise geodatabase. Create a database connection in ArcCatalog with the REV user as your Reviewer workspace location.
For more information, see Database connections in ArcGIS Desktop.
The Reviewer workspace is a geodatabase that contains the tables and dataset needed to store the results of the data validation. Using the REV user database connection created previously, you will use this to set the Reviewer workspace location and create the schema.
You can create the connection using the Enable Data Reviewer geoprocessing tool or by following the steps below.
- Start ArcMap.
- On the main menu, click Customize > Toolbars > Data Reviewer.
- If you want the spatial reference of the Reviewer dataset to automatically match that of the data you are validating, load your data into ArcMap.
- Click the Reviewer Session Manager button
 on the Data Reviewer toolbar.
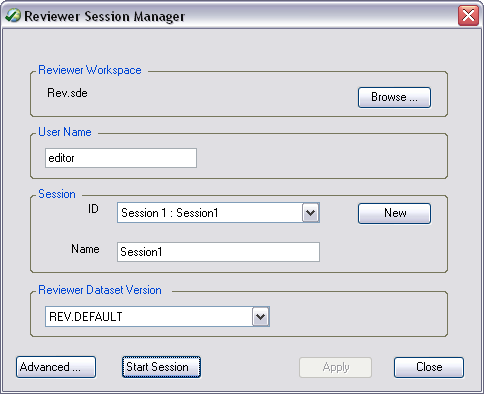
The Reviewer Session Manager dialog box appears.

- Click Browse in the Reviewer Workspace area.
The Reviewer Workspace dialog box appears.
- Navigate to the database connection created.
- Klicken Sie auf Hinzufügen.
- Click New to start a new Reviewer session.
- Choose an option for the spatial reference.
- Use Default Spatial Reference (WGS-84)—Sets the Reviewer dataset's spatial reference to GCS_WGS_1984. This is the default spatial reference for ArcMap.
- Use Active Data Frame Spatial Reference—If data is loaded in ArcMap, the default is this option. This is the ideal option to use. This will ensure that the Data Reviewer dataset's spatial reference matches your data's spatial reference.
- Browse To Spatial Reference—Sets the Reviewer dataset's spatial reference to one you choose.
- It is recommended that you choose the Use configuration keyword option to choose a configuration keyword.
This allows you to use the DBTUNE you updated for table storage locations.
- Click the Use configuration keyword drop-down arrow and choose the DEFAULT or ##REVIEWER configuration keyword.
- Click OK.
The ID and Name text boxes are automatically populated in the Session area.
- If necessary, type a custom name for the current Reviewer session in the Name text box.
By default, the name matches the ID.
- If necessary, click the Reviewer Dataset Version drop-down arrow and choose the geodatabase version to be used.
The geodatabase version you choose from the list is the one in which the Reviewer table records are going to be stored.
- Click Start Session.
The button name changes to End Session.
- Klicken Sie auf Schließen.