There are two basics ways to find tools:
- Search using the Search window.
- Browse using the Catalog or ArcToolbox window.
Using the Search window to search for tools
To open the Search window, do one of the following:
- Click Geoprocessing > Search For Tools.
- Click the Search
 button.
 - Click Windows > Search.
- Press CTRL+F.
Tool home page
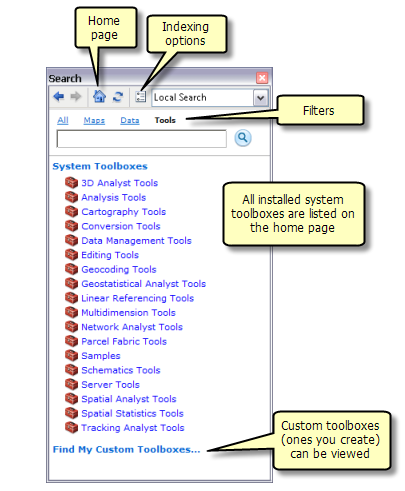
As illustrated below, the Search window has four filters: All, Maps, Data, and Tools. Both the All and Tools filters will return tool results. When searching for tools, the best results are obtained using the Tools filter.
The Search window Home page button  takes you to the geoprocessing tools home page, illustrated below. The home page lists all installed system toolboxes. You can click the toolbox name to examine the contents of the toolbox—its toolsets and tools. Custom toolboxes (toolboxes that you create) can be examined by clicking the Find My Custom Toolboxes link.
Searching by name or keyword
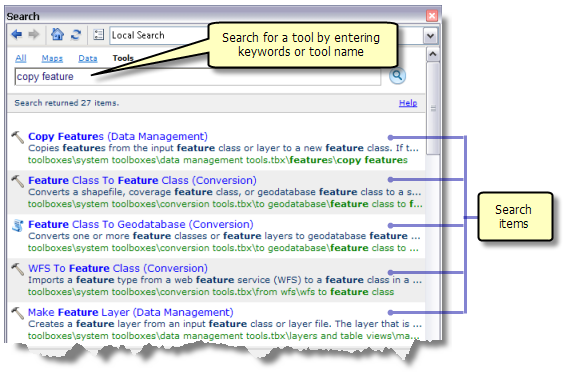
If you know the name of a tool, you can enter it in the Search window. If you don't know the name of a tool but can think of some words that describe what you want the tool to do, you can enter the words and search for all tools that match the words.
Working with a search result
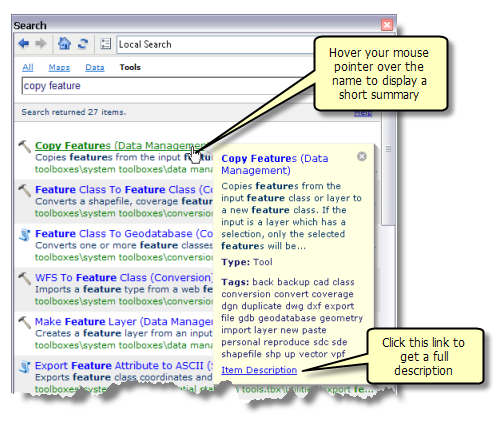
There are a number of things you can do with a search item. If you pause the pointer on the item, a short description of the toolbox, tool, or geoprocessing package will be displayed (toolsets do not have descriptions), as illustrated below. The Item Description link in the short description will open the description of the toolbox, tool, or geoprocessing package. You can also open the item description by clicking the first line of text below the tool name.
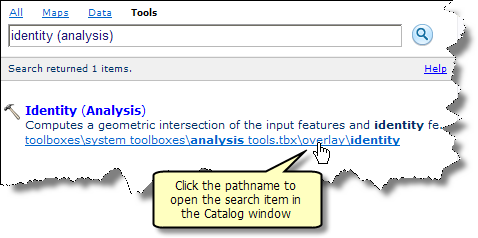
A search item contains the path to the item. Click this path to open the Catalog window with the item expanded.
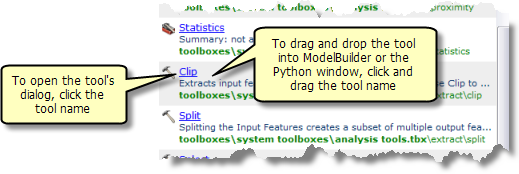
You can open the tool dialog box directly from the search item by clicking the tool name. You can drag a tool into the ModelBuilder window or the Python window by selecting the name.
Using the Catalog window to browse for tools
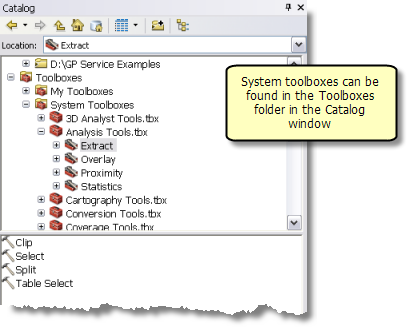
System toolboxes (those installed on your system with ArcGIS) can be found in the Catalog window by expanding the Toolboxes folder, as illustrated below.
Custom toolboxes can be found by browsing to the folder or geodatabase in which they reside.
Once you've found the tool, you can open the dialog box by double-clicking the tool or right-clicking the tool and clicking Open. You can also drag tools into the ModelBuilder or Python window.
Using the ArcToolbox window
In any ArcGIS for Desktop application, you open the ArcToolbox window with the Show/Hide ArcToolbox Window button  found on the standard toolbar or by clicking Geoprocessing > ArcToolbox.
You can customize the contents of the ArcToolbox window—adding and removing system and custom toolboxes until you have just those toolboxes that you use most often. The contents of the ArcToolbox window is saved with your map document. The illustration below shows the ArcToolbox window with six system toolboxes and two custom toolboxes (My Data Conversions Tools and My Favorites).
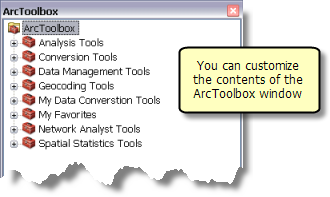
You browse and open tools just as you would with the Catalog window, expanding toolboxes and toolsets until you find the tool you want, then double-clicking the tool to open its dialog box. You can drag tools from the ArcToolbox window into the ModelBuilder or Python window.
Tools as menu choices or buttons
The Geoprocessing menu comes with six tools on its menu: Buffer, Clip, Intersect, Union, Merge, and Dissolve. You can customize this list by removing tools or adding your own tools. You can add or remove tools on any menu or toolbar.