
In this topic
- References tab
- Assemblies list
- Group assemblies option
- Filter by option
- Selected assemblies list
- Namespaces tab
- Selected references list
- Available namespaces list
References tab
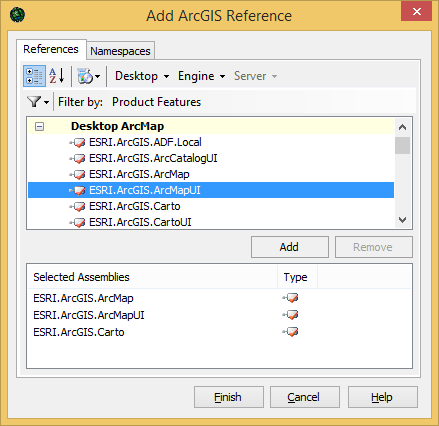
To use the References tab on the Add ArcGIS Reference dialog box, choose Add ArcGIS Reference from the Project menu. Alternatively, right-click the References or Project node in Solution Explorer and choose Add ArcGIS Reference. The References tab is also an option in the ArcGIS Project Wizard. See the following screen shot:
Assemblies list
The assemblies list shows all the ArcGIS assemblies available for referencing. To add assemblies, select the required assemblies in the list, and click the Add button to include those assemblies in the Selected Assemblies list. Context menu commands are also available to batch select assemblies in this list. See the following screen shot:
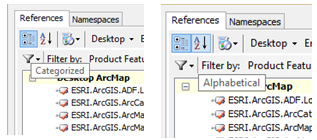
The contents of this list changes depending on the settings of the Filter by option. The list is in alphabetical order or grouped by category, depending on the setting in the Group assemblies option.
Group assemblies option
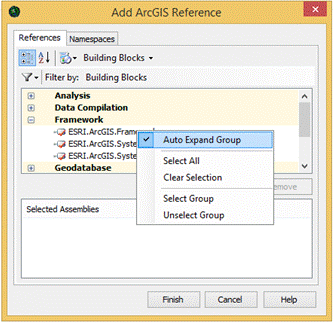
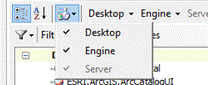
Choose this option to show the available assemblies, which can be listed alphabetically or grouped by product, feature, or functional area; the order depends on the current filter. If the assemblies are categorized, some assemblies can appear in the list under more than one category. For example, the ESRI.ArcGIS.ADF assembly can be listed under Desktop, Engine, Server, and so on. See the following screen shot:
Filter by option
By changing the filter, you can restrict the listed assemblies on the dialog box. To change the assembly filter, click the filter icon and select Products, Product Features, or Building Blocks from the drop-down list. See the following screen shot:
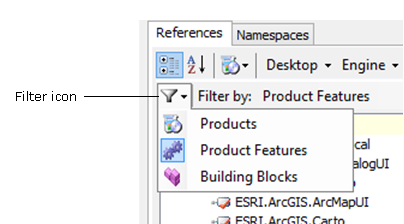
This section describes each filter type.
- Products - The Products filter restricts the assemblies list to Desktop, Engine, or Server products. See the following screen shot:
- Product Features - The Product Features filter selects groups of assemblies associated with Desktop, Engine, or Server products and their extensions. For example, you can restrict the assemblies listed to only ArcCatalog and ArcCatalog extensions if you are developing for the ArcGIS Desktop ArcCatalog application or to just core Engine assemblies. See the following screen shot:
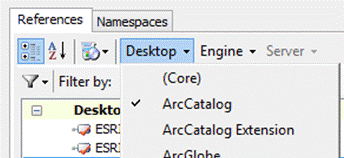
In addition, you can use the product subfilter to enable or disable each product drop-down menu. See the following screen shot: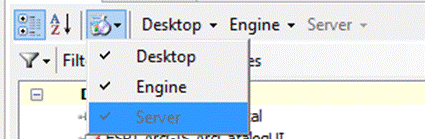
- Building Blocks - The Building Block filter selects groups of assemblies associated with particular areas of functionality. For example, you can restrict the assemblies listed to only those associated with accessing the geodatabase. In addition, by selecting the product subfilter, you can further restrict the assemblies by product. See the following screen shot:
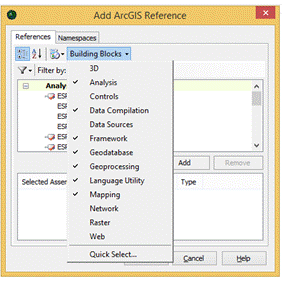
The Quick Select option from the Building Blocks drop-down menu can be used for batch checking on and off functional areas from the Batch Select dialog box.
Selected assemblies list
This list shows all the assemblies that are added as references to your project when you click the Finish button. The Type column indicates with an icon if a selected assembly is added, has already been referenced in the project, or cannot be found. To remove assemblies from the list, select the assemblies in the list and click the Remove button. See the following explanation of each icon:

Namespaces tab
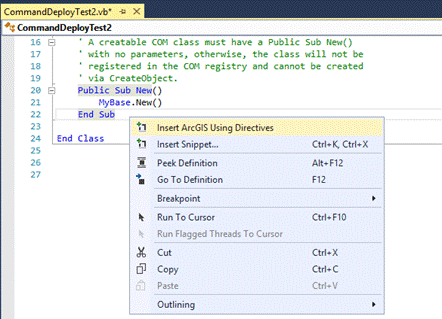
The Namespaces tab is used with the Insert ArcGIS Using Directives command on the code editor context menu. This command inserts import and using statements to the top of the code file for the selected namespaces. See the following screen shot:
The first time you use the Insert ArcGIS Using Directives command in the code editor context menu, a dialog box might appear with the following message:
ArcGIS Using Directives
You have not selected any ESRI.ArcGIS namespaces to insert by this command yet. Do you want to do it now?
Yes No
You have not selected any ESRI.ArcGIS namespaces to insert by this command yet. Do you want to do it now?
Yes No
If you click Yes, the Add ArcGIS Reference dialog box opens. You can add ESRI.ArcGIS Assemblies under the References tab, then select assemblies under the Namespaces tab to insert Using (C#) or Imports (VB .NET) directives into your code. When this is done, you cannot re-open the Add ArcGIS Reference dialog box from the Insert ArcGIS Using Directives context menu - only adds Esri directives to the top of your code editor. To re-open the Add ArcGIS Reference dialog box and change the ESRI.ArcGIS Assemblies that are specified for directive insertion, access it via Solution Explorer or by choosing Add ArcGIS Reference from the Project menu.
Importing a namespace allows you to use elements (for example, classes, interfaces, and enumerators) from that namespace in your code without fully qualifying the type name. For example, to implement a command with the ICommand interface in the ESRI.ArcGIS.SystemUI assembly, you can import the ESRI.ArcGIS.SystemUI namespace and refer to the interfaces as ICommand. See the following code example:
[VB.NET] Public Class MyCommand
Implements ESRI.ArcGIS.SystemUI.ICommand
...
End Class
public class MyCommand: ESRI.ArcGIS.SystemUI.ICommand
{
    ...
}
Insert an import or using statement to the code file. See the following code example:
[VB.NET] Imports ESRI.ArcGIS.SystemUI
Public Class MyCommand
Implements ICommand
...
End Class
using ESRI.ArcGIS.SystemUI;

public class MyCommand: ICommand
{
    ...
}
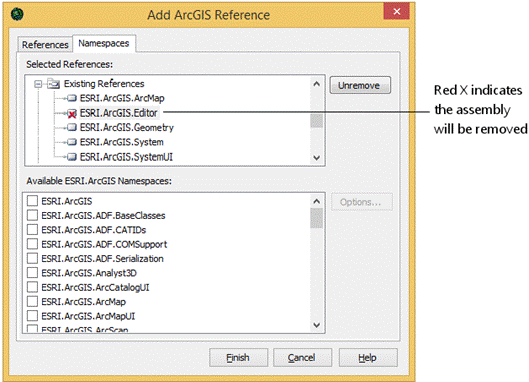
Selected References list
The assembly is marked with a red X to indicate it will be removed when the Finish button is clicked. If you select an assembly that has been marked to be removed, the Remove button changes to Unremove so you can revert the change. See the following screen shot:
This list shows all the available namespaces included in the ArcGIS assembly references. Check the namespaces to be inserted with the Insert ArcGIS Using Directives command. The checked namespaces are saved with the project. If your current project is in VB .NET, the imported namespaces project property is updated.
The Options button is only enabled in a C# project. When the Options button is clicked, the Options dialog box opens, and you can automatically add using statements when a new item is added to the project.
See Also:
ArcGIS Visual Studio IDE Integration Framework for extending ArcObjectsArcGIS Project Wizard