Sometimes realignments are performed against routes that are concurrent to other routes. Concurrency occurs when two highways share the same pavement. Realigning one highway does not necessarily impact the concurrent highway. Since events typically reference sections of pavement rather than route designations, you need to think carefully about what happens to your event data when realigning a concurrent route.
You need to decide whether the events will stay with the pavement they are on or move with the new alignment. ArcGIS Roads and Highways provides additional options for determining what happens to events during a realignment when concurrent routes are present. See Realigning a route for more information about realigning routes.
- Start ArcMap and set up your edit environment for using Roads and Highways.
- Use the ArcMap navigation controls to zoom to the location of your realignment.
For more information on how to start an edit session, see About edit sessions.
- Click the Networks drop-down menu on the Roads And Highways Editing toolbar to choose the LRS Network layer you want to edit.
- Click the Choose Centerlines button
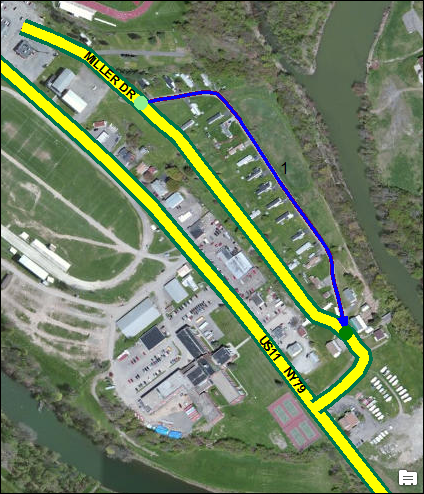
 on the Roads And Highways Editing toolbar and click an existing centerline in the map at the location of the route segment to be realigned.
The selected centerline is highlighted in blue and the arrow shows the direction of digitization. The centerline provides the location and geometry of the realigned portion of the route.
Press the Shift key and click the individual centerlines to select or deselect them. The centerline features are labeled on the map based on the order of selection.
- Click the Realign Route button
 on the Roads And Highways Editing toolbar.
 For more details, see Realigning a route.
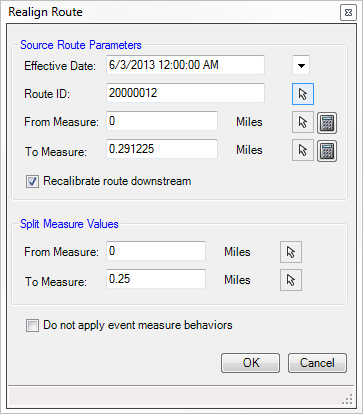
The Realign Route dialog box appears.


- Type a date in the Effective Date field.
You can also click the calendar drop-down arrow and select the alignment date from the calendar.
The time is automatically set to 12:00:00 AM. You can edit this value.
- Type a route ID in the Route ID text box. You can also click the Select Location From Map button
 to choose the route to realign.
 - Verify the values on the Realign Route dialog box and click OK.
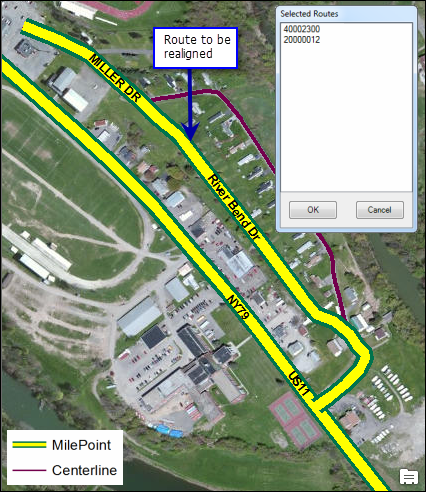
Roads and Highways determines that route concurrency has occurred when you select the route to be realigned and opens the Route Dominance dialog box.

- Use the Dominant Route drop-down arrow to select the dominant route.
Dominance is given to routes you want events to snap to. When you realign a concurrent route, you are essentially pulling the route off the existing pavement and putting it somewhere else.
When the portion of the route you are moving shares pavement with another route, you must tell the system that this route has dominance over the realigned route. You may have multiple routes that are concurrent in different locations along the realignment section. By assigning the dominance to the routes, you can tell Roads and Highways which routes to snap to in the presence of other routes. The route that was realigned shows up at bottom of the route selection list.
For more information on route dominance, see Configuring route dominance and Retiring a concurrent route.
- Click OK.
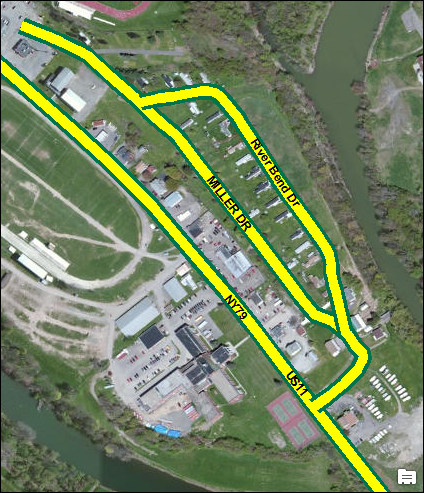
The original route is realigned, but the concurrent routes stay where they are.

- Verify event behavior.
Events with snap behavior will remain on the original alignment rather than move to the new alignment, assuming the original alignment has been given dominance. The portions of the events that extend beyond the concurrent section will be split with the portion in the concurrent section that is assigned to the underlying route.