In versions prior to ArcGIS 10, labeling and symbology required a lot of configuration to create schematic attributes and properties just to get attributes from the "real" features associated with schematic features contained in a diagram. Since schematic features contained in diagrams are now standard features, attributes from the real features can be quickly retrieved when configuring a join. If your schematic diagrams are based on real features in geometric networks, network datasets, or any other tables managed by the GIS, the join gives you access to all the schematic feature fields and the related real feature fields.
Once you have generated a diagram, you can follow these steps for each layer composing the schematic layer that needs a join:
- Right-click a feature layer in the ArcMap table of contents.
- Choose Properties.
The Layer Properties dialog box opens.
- Click the Joins & Relates tab.
- Click Add in the Joins section at the left.
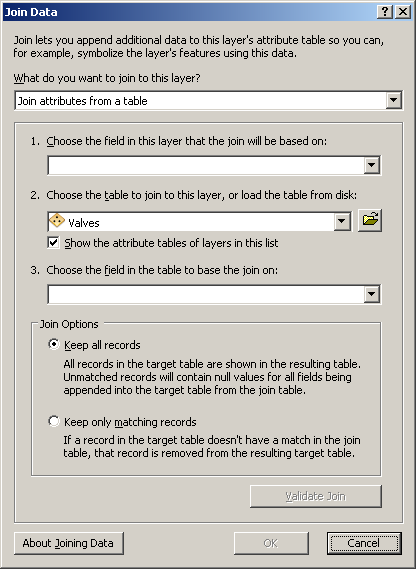
This opens the Join Datadialog box.

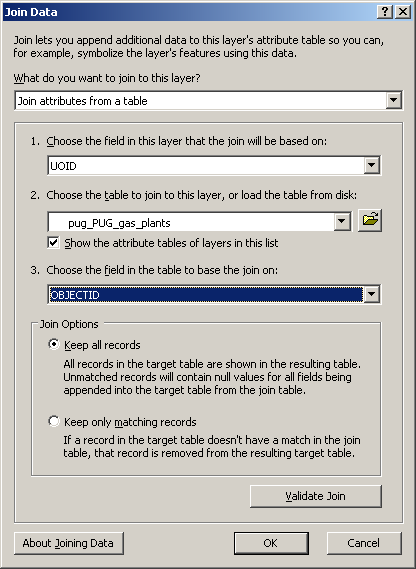
- Choose UOID from the Choose the field in this layer that the join will be based on list.
UOID is the field where Schematics stores the ObjectID of the real feature.
- Click the browse button next to the Choose the table to join this layer, or load the table from disk list.
The Add dialog box opens.
- Navigate to and select the real feature class associated with this schematic feature layer.
- Click the Add button.
- Choose OBJECTID from the Choose the field in the table to base the join on list.
You have now created a join from the schematic feature class to the real GIS feature class:

- Click OK.
- Choose UOID from the Choose the field in this layer that the join will be based on list.
You can now use the Labels and Symbology tabs to set up labeling and symbology. All fields are available from the schematic feature class and the related real feature class.