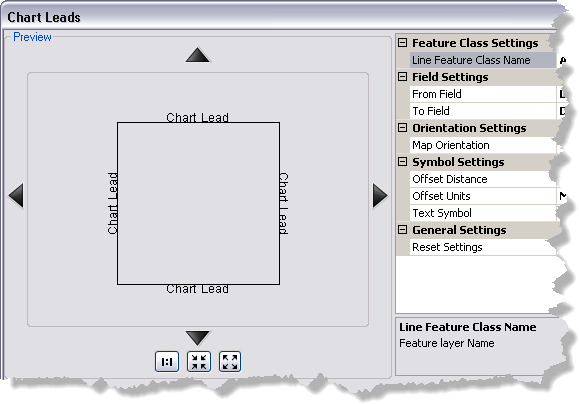
Before creating the chart leads, properties such as Layer Name, From Field, and To Field need to be set on the Chart Leads dialog box, which can be opened from the Aviation Properties pane on the Production Properties dialog box.
- Start ArcMap.
- On the main menu, click Customize > Production > Production Properties.
The Production Properties dialog box appears.
- Click Aviation Properties in the list on the left side of the Production Properties dialog box.
- Ensure the Production Workspace property is set under Aviation Production Database.
- Click the cell next to Chart Leads, then click the ellipsis button (...) that appears.
The Chart Leads dialog box appears.

- Click the cell next to Line Feature Class Name, click the drop-down arrow that appears, and choose the layer in the map for which you want to create chart leads.
- Click the cell next to From Field, click the drop-down arrow that appears, then choose the field that contains the text for the from attribute.
- Click the cell next to To Field, click the drop-down arrow that appears, then choose the field that contains the text for the to attribute.
- Click the cell next to Map Orientation, click the drop-down arrow that appears, then choose an option for the orientation of the map.
- Standard (North Is Top)—Text along three sides is placed facing in; text on the bottom side is placed facing out.
- North Is Left—Text along three sides is placed facing in; text on the right side is placed facing out.
- North Is Right—Text along three sides is placed facing in; text on the left side is placed facing out.
- North Is Bottom—Text along three sides is placed facing in; text on the top side is placed facing out.
- Click the cell next to Offset Distance and type a value to offset the lead from the edge of the data frame.
- Click the cell next to Offset Units, click the drop-down arrow that appears, then choose the unit of measure.
- Click the cell next to Text Symbol, click the ellipsis button (...) that appears, then modify the symbol properties.
- Click OK.