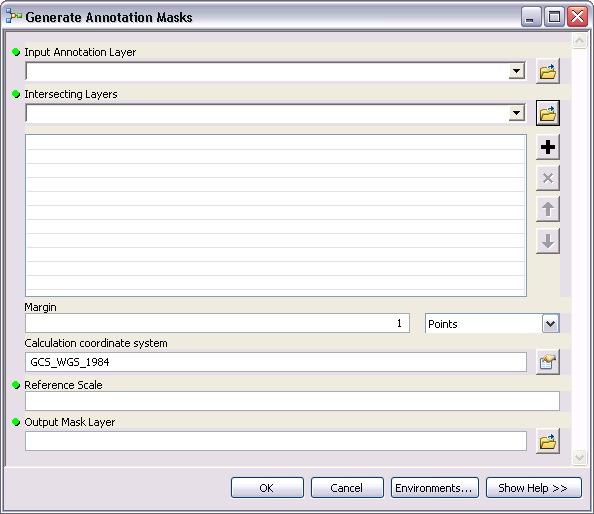
The Generate Annotation Masks tool creates masks for annotation, or other features, where the annotation features intersect another layer, or list of other layers, that you choose. For example, you may want to create masks where sounding annotation intersects depth contours, grid lines, submarine cables, and pipelines. The benefit of using the Generate Annotation Masks tool over the Feature Outline Masks tool is that it will not create mask features where they are not required.
- Start ArcMap.
- On the main menu, click Customize > Toolbars > Nautical Cartography.
- On the Nautical Cartography toolbar, click Geoprocessing > Generate Annotation Masks.
The Generate Annotation Masks dialog box appears.

- For the Input Annotation Layer, choose the annotation layer for which you want to create mask features.
- For the Intersecting Layers, choose the layer, or layers, that you want to mask if the annotation layer intersects it.
- Type a value in the Margin text box for the output mask layer.
- Click the Spatial Reference Properties button and choose the calculation coordinate system.
- Type the value of the mask reference scale in the Reference Scale text box.
- Click the browse button for the Output Mask Layer and choose the location to save the new annotation masks layer.
- Click OK.
When the process is complete, the output mask layer is added to the Table Of Contents window.
- Double-click the symbol under the newly created output mask layer in the Table Of Contents window.
The Symbol Selector dialog box appears.
- Change the symbology to No Color for the fill and the outline.
- In the Table Of Contents window, right-click Data Frame and click Advanced Drawing Options.
The Advanced Drawing Options dialog box appears.
- Check the Draw using masking options specified below check box.
- In the Masking Layers list, choose the newly created output mask layer.
- In the Masked Layers list, check the layers you want to mask with the mask layer.
- Click OK.
The masked layers are now hidden where the masking layers intersect them. Repeat these steps as needed for annotation feature classes that require masking.