The Identify LRS Route Locations tool is accessible from the Roads And Highways Editing toolbar and is used to discover measure value information from LRS Networks. You can use this tool to discover m-values from interpolated linear referencing methods (LRM) or offsets from referent locations. See Multiple linear referencing methods to learn more about LRMs.
Clicking the Identify LRS Route Locations tool and clicking a map location displays the Identify LRS Route Locations dialog box. This dialog box shows information about the route features available in the map.
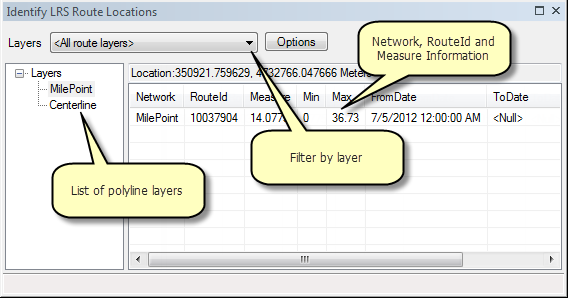
The following table describes the contents of the Identify LRS Route Locations dialog box:
| Feature | Description |
|---|---|
Layer filter | Allows you to view information about a single route layer. |
Layer list | Shows a list of all visible route layers in the map. This includes polyline shapefiles and feature classes as well as LRS Network layers. |
Options button | Allows you to set referent offsets. |
NetworkId | The name of the LRS Network if applicable. |
RouteId | The unique identifier of the route feature at the target map location. |
Measure | The measure value of the route feature at the target map location. |
Min | The minimum measure value of the route feature at the target map location. |
Max | The maximum measure value of the route feature at the target map location. |
Length | The total length of the route. |
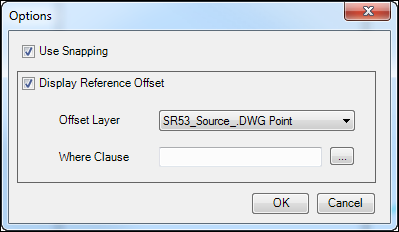
You can configure snapping or set referent offsets by clicking Options. If you enable snapping, the LRS Identify tool will use ArcGIS for Desktop snapping settings. These options will be stored in the Windows Registry for future use but can be changed at any time.
- Start ArcMap.
- Add an LRS Network to your map.
- Click the Identify LRS Route Locations button
 and click a location on your map.
 - Choose an LRS Network layer in the Layers column of the Identify LRS Route Locations dialog box.
- Right-click the route layer to find out more information about it.
View Measures from All Networks
Removes the layer filter
Identify
Shows attribute information about the selected route
Draw Route Location
Places a map marker at the selected location
Flash Route Location
Flashes the selected location temporarily so you can see where you clicked
Zoom to Route Location
Zooms the map to the selected location
- Click Options to display the Options dialog box.
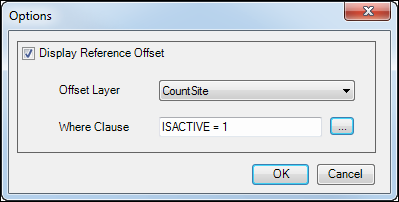
- Check the Display Reference Offset check box to see route locations as a distance from a known location.
- Choose the referent using the Offset Layer drop-down list.
- You can filter your referents by clicking the browse button next to the Where Clause or typing an expression in the text box.
Show referent offsets from traffic count sites that are currently active.
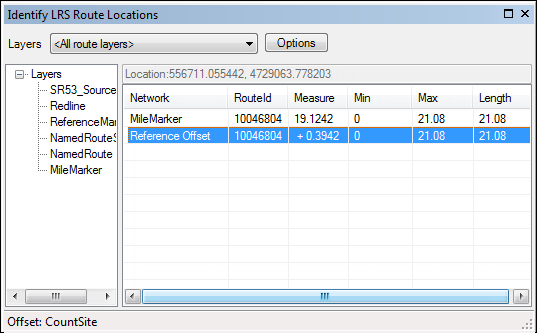
- Optionally configure the number of decimal places displayed in the measure, min, and max fields with the Editor toolbar options.
- Click Options from the Editor drop-down menu and click the General tab.
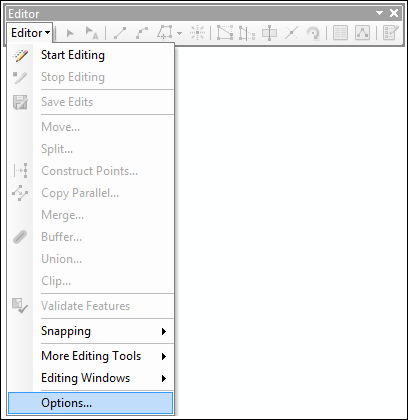
- Browse to Display measurements using to specify the number of decimal places.
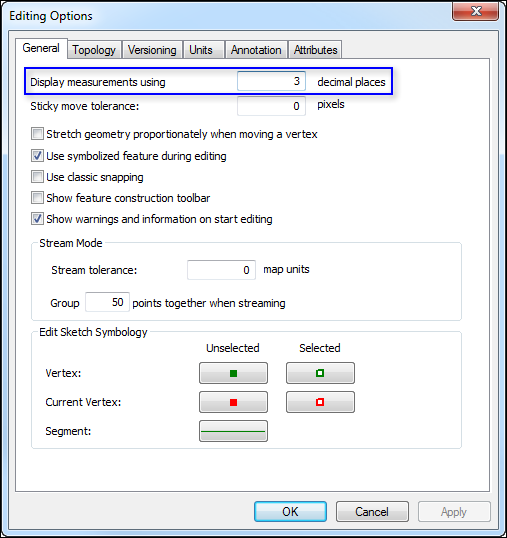
- Click OK to save your configuration.
- Click Options from the Editor drop-down menu and click the General tab.