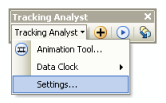
- On the Tracking Analyst toolbar, click Tracking Analyst > Settings to bring up the Tracking Analyst Global Settings Properties dialog box.

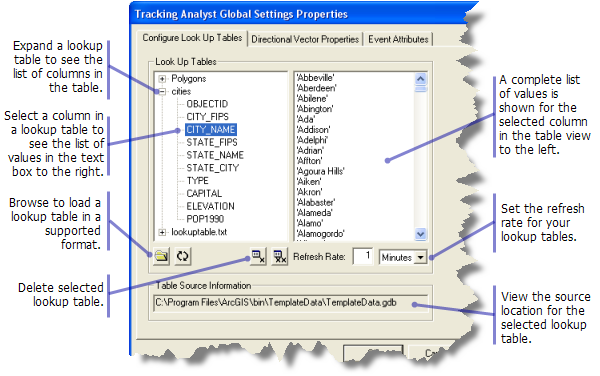
- Click the Configure Look Up Tables tab.

- Click the load button on the Look Up Tables panel to bring up the Select Look Up Table form and browse to the directory where your lookup table is stored.
- Choose a lookup table and click Add. The lookup table you added now appears on the left side of the Look Up Tables panel.
- Expand the lookup table to see a list of the available columns contained in that lookup table.
- Select a column in the expanded lookup table. Notice that the list on the right side of the Look Up Tables panel is updated to show all the values contained in the lookup table for that field.
- Repeat steps 3 and 4 to add more lookup tables to Tracking Analyst, if needed.
- If you want Tracking Analyst to automatically refresh your lookup tables, type a value for the refresh rate in the Refresh Rate text box. A drop-down list is provided to indicate the unit of time in either minutes, hours, or days.
If you do not want Tracking Analyst to automatically refresh your lookup tables (or if your lookup tables are static and therefore do not need to be updated), leave the refresh rate set to zero.
- Click OK or Apply on the Tracking Analyst Global Setttings Properties to save the settings for your lookup tables.
You are now ready to set attribute triggers using the lookup tables you have configured.
If you see an error message when you expand the lookup table, this indicates that the lookup table is not compatible for use with Tracking Analyst.
Buttons are also provided to remove individual lookup tables, remove all lookup tables, and manually refresh lookup tables.