Testing an add-in
It is important to fully test an add-in before it is shared or used.
Here are the steps necessary to test an add-in:
- Make the add-in file.
Go to your working folder and run the makeaddin.py script by double-clicking it. This script copies all the files and folders needed by the add-in to a compressed add-in file in the working folder. The name of the file includes the working folder name and an .esriaddin extension.
- Install the add-in.
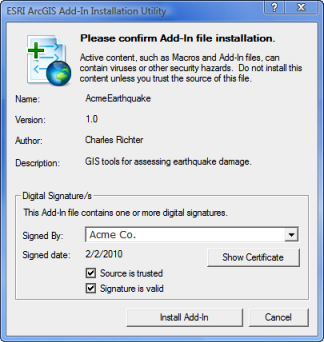
Double-click the new add-in file to launch ESRI ArcGIS Add-In Installation Utility. When this utility is invoked, it analyzes config.xml within the add-in file and displays the project settings that were entered when the add-in was created and whether the add-in contains a trusted digital signature, as illustrated below.

Once the add-in information is confirmed, click the Install Add-In button. The utility copies the add-in file to your default ArcGIS add-in folder.
The installation utility copies the add-in file to a generated subfolder under the default add-in folder; the subfolder is automatically generated using a globally unique identifier (GUID). This prevents file naming conflicts that might occur if several add-ins have the same file name. Although add-ins can be manually copied to a default add-in folder, doing so bypasses the security and name conflict checks the add-in installation utility performs.
- Use the add-in.
You are now ready to use the customization in the ArcGIS for Desktop application it is designed for. Start the desktop application (ArcMap). The custom toolbar or menu may already be visible and ready to test. If it is not visible, go to the Customize menu and click Add-in Manager. The Add-In Manager dialog box lists the installed add-ins that are targeting the current application. Add-in information, such as name, description, and image, entered as project settings should be displayed.
If the add-in is listed in the manager, click the Customize button to open the Customize dialog box. To add a toolbar to the application, click the Toolbars tab and choose the toolbar you created. To add a menu to the application, click the Commands tab and scroll down the list of categories to [ MENUS ] and find your custom menu. Drag the menu onto an existing menu or toolbar. If the add-in is an extension, be sure it is enabled. Open the Extensions dialog box and check it to enable it.
For more information about configuring the user interface, see About configuring the user interface.