Available with Standard or Advanced license.
To see another way users with nonadministrative permissions can edit the data, you will log in as editor1, edit a feature class in ArcMap, and reconcile and post the edits to the edit version.
Log in as editor1
Log off the computer and log back in as editor1.
- Log in to the computer as editor1.
On most Windows operating systems, you can use switch users to log in as editor1.
- Start ArcMap, open the Catalog window, and expand the Database Servers folder in the Catalog tree.
Connect to a different version and save the connection
By default, database server connections are always to the Default version. To change which version of a geodatabase you are connected to, you will use the Change Version dialog box. If you were to close ArcMap, the next time you started ArcMap and connected to the geodatabase through the database server node, you would again be connected to the Default version.
To save your connection to a specific version, you can save a database connection to this version. This creates a connection file under the Database Connections node in the Catalog tree.
Database connections save the connection properties you assign until you change them. That means the next time you start ArcMap as editor1, you will still have a connection to the version of the geodatabase you want without having to change any settings.
- Double-click your database server in the Catalog window to connect to it.
- Right-click the Osokopf geodatabase and click Change Version.
- Make sure the Transactional or Tree View tab is active.
- Choose the railroadv1 version and click OK.
The connection for the Osokopf geodatabase now shows you are connected to railroadv1.
- To save the connection to this version of the geodatabase, right-click the Osokopf geodatabase and click Save Connection.
This creates a connection file for this version of the geodatabase under the Database Connections node.
- Expand the Database Connections node in the Catalog window.
You can see a new connection has been created to the geodatabase. The default connection name is Connection to <machine_name>_<sql_server_express_instance>.
- Right-click this connection and click Connection Properties.
As you can see, all the connection information has been completed for you. The Database Platform is set to SQL Server, the SQL Server Express instance name is in the Instance text box, operating system authentication is chosen for the authentication mode, and the database name is in the Database text box.
- Click OK or Cancel to close the Database Connection dialog box.
- Right-click the database connection and click Geodatabase Connection Properties.
The Geodatabase Connection Properties dialog box opens and the railroadv1 transactional version is highlighted to show it is the version to which you are connected.
- Close the Geodatabase Connection Properties dialog box.
Edit a versioned dataset
In Exercise 8, manager1 imported a feature class—railroads—and registered it as versioned. You are going to edit that feature class in the railroadv1 version.
Prepare to edit
Add the versioned dataset and reference data to ArcMap.
- Expand the new database connection to the Osokopf geodatabase.
- Click and drag the railroad feature class into ArcMap.
- For reference, add the streets and villages feature classes and the parks feature dataset to the map.
- Expand the buildings08 geodatabase on the database server and drag the gov_bldgs, schools, and utilities feature classes onto the map for reference as well.
- If necessary, drag the villages feature class to the bottom of the Layers list in the table of contents.
To help orient yourself on the map, you will label the streets feature class.
- Right-click the Streets layer in the ArcMap table of contents and click Label Features.
The names of streets for which a name attribute exists are drawn on the map.
Since the data you will edit is registered as versioned, be sure ArcMap is set to perform versioned edits.
- Open the Editor toolbar if it is not already open.
Customize > Toolbars > Editor
- Click Editor on the Editor toolbar and click Options on the drop-down list.
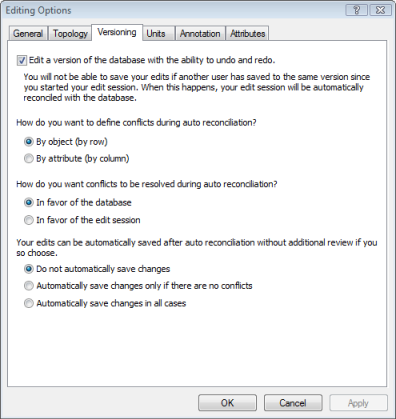
This opens the Editing Options dialog box.
- Click the Versioning tab.
- Be sure the Edit a version of the database with the ability to undo and redo box is checked. If not, check it.
- You will use the default settings, so click OK to close the Editing Options dialog box.
- Click Editor on the Editor toolbar and click Start Editing.
Edit
You will add one new rail line and one side rail to the railroads feature class. You will also extend an existing side rail.
As noted earlier in this tutorial, when editing actual data, you would be more accurate, using coordinates or tracing from a georeferenced image. For the purposes of this tutorial, you will simply draw the features.
Add a rail line
- Click the Zoom In button on the ArcMap Tools toolbar.
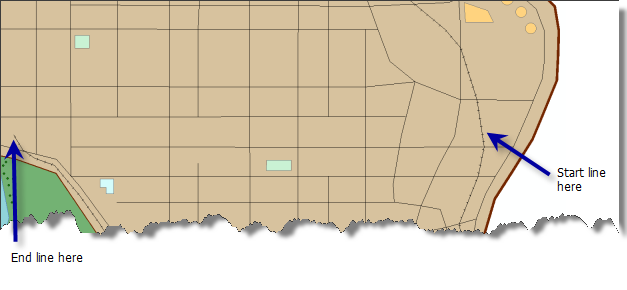
- Hold down the mouse button and draw a box around the northeastern portion of the island.
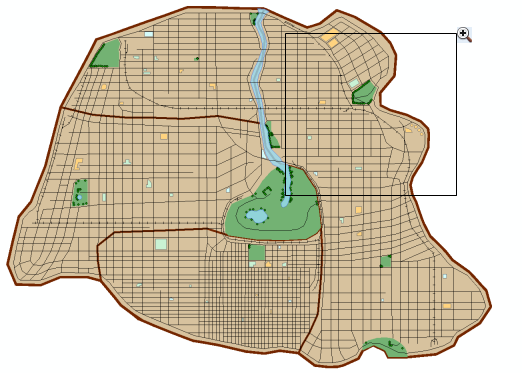
- Click Railroads in the Create Features window.
- Click Line under the Construction Tools.
- Pause the pointer on the Cross Island line between Serpent and Sandpiper until you see you are on the edge of the railroad line.
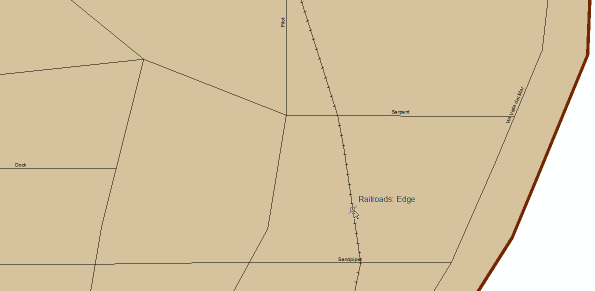
- Right-click, click Snap to Feature, and click Edge.
This snaps the first vertex of the new line to the edge of the Cross Island line.
- Extend the line between Dock and Sandpiper until you reach the end of the Centremont East line.
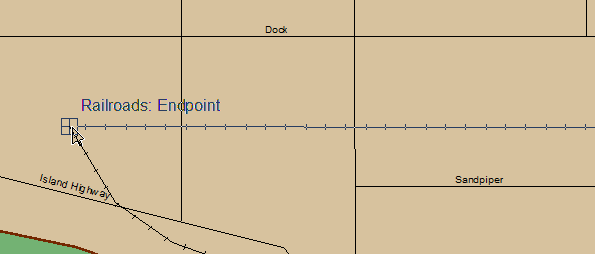
- Right-click, click Snap to Feature, and click Endpoint to place an end vertex for your new feature.
- Right-click and click Finish Sketch to add the new feature to the railroads feature class.

- Click Editor on the Editor toolbar and click Save Edits to save the changes you have made so far.
- Click the Attributes button
 on the Editor toolbar.
The Attributes dialog box opens.
- Click in the field next to rail_owner and type Oso Rail.
Add a side rail
Change your extent by panning to the area where the next feature will be added.
- Click the Pan button
 on the ArcMap Tools toolbar.
Your cursor changes to the pan symbol.
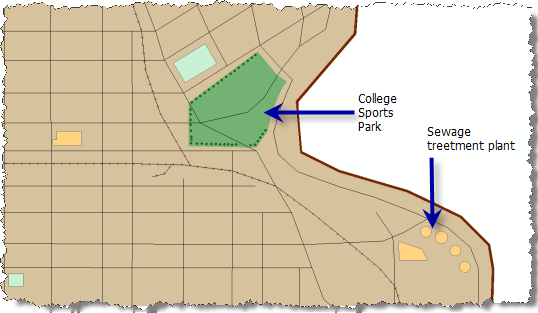
- Click in the center of the map, hold down the mouse button, and pull the map down until both the College Sports Park and the sewage treatment plant are visible.
- Click railroad in the Create Feature window and click line.
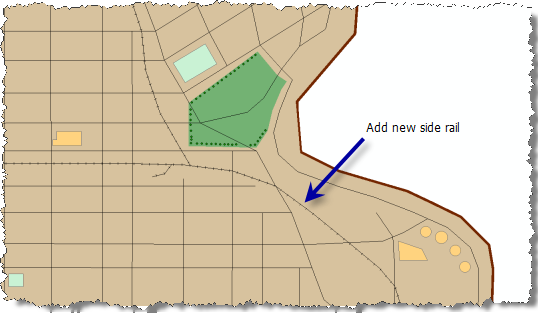
- Pause the pointer on the Cross Island rail line in the location indicated in the previous graphic until you are over the railroad edge.
- Right-click, click Snap to Feature, and click Edge.
- Draw a curved line that tends toward the northeast. Click to add vertices to create the curve.
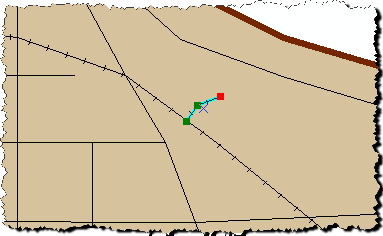
- Double-click the end vertex to finish the sketch.
- Click the Attributes button on the Editor toolbar.
- Type Oso Rail in the field next to rail_owner.
- Click Editor on the Editor toolbar and click Save Edits to save the changes you have made so far.
Extend the Cross Island college side rail
The college side rail should be visible in your current extent. If it is not, pan to it.
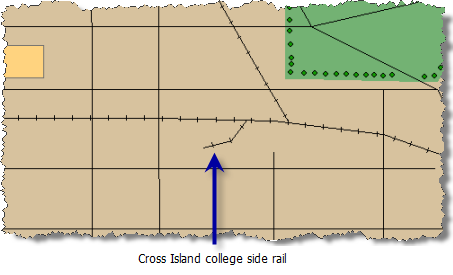
You are going to extend this line.
- Click the Edit Tool button
 on the Editor toolbar.
- Click the Cross Island college side rail to select it.
- Click the Edit Vertices button
 on the Editor toolbar.
The vertices of the college side rail are visible on the map.
- Right-click the college side rail line just before the end vertex and click Insert Vertex.
- Pause the pointer on the end vertex until handles appear around the vertex.

- Click and drag the vertex until it is closer to Morris Street.
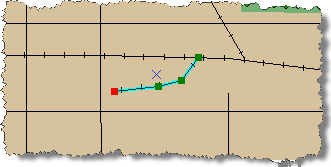
- Right-click and click Finish Sketch.
- Click Editor on the Editor toolbar and click Save Edits to save the changes you have made so far.
Reconcile edits and post changes
You have finished the edits you will do on the railroads feature class. Now you will reconcile and post your edits to the Default version.
- Open the Versioning toolbar if it is not already open.
Customize > Toolbars > Versioning
- Click the Reconcile button
 on the Versioning toolbar.
The Reconcile dialog box opens.
- Click In favor of the Edit Version on the Reconcile dialog box.
- Click OK.
- Click the Post button
 on the Versioning toolbar.
Your edits are moved into the Default version. Now, anyone who connects to the Default version can see your changes.
- Click Editor on the Editor toolbar and click Stop editing.
Since you did not encounter any conflicts, you can now post your changes to the Default version.
You logged in with a login that has read and write access to the geodatabase and performed a set of versioned edits on a feature class. You then reconciled and posted your edits to the Default version of the geodatabase. In Exercise 10, you will log in as manager1 and compress the geodatabase.