Available with Standard or Advanced license.
About geodatabase topology
Geodatabase topology is a set of rules that define how the features in one or more feature classes share geometry. Geodatabase topology is created in the Catalog window or ArcCatalog and can be added to ArcMap as a layer, just like any other data. After editing has been performed on the feature classes, you validate the geodatabase topology to see if the edits break any of the topology's rules. An ArcGIS for Desktop Standard or ArcGIS for Desktop Advanced license is required to create, edit, or validate geodatabase topology.
In this exercise, you will create a simple geodatabase topology rule to help you find digitizing errors in lot line data that has been imported from CAD, then use the topology and editing tools to fix these errors.
Creating a geodatabase topology
Prerequisite:
Start ArcMap and display the Editor and Topology toolbars.
- Click the Open button
 on the Standard toolbar.
- Navigate to the GeodatabaseTopology.mxd map document located in the \Editing\Topology directory where you installed the tutorial data. (C:\ArcGIS\ArcTutor is the default location.)
- Click the map and click Open.
- If you still have the map document open from the previous exercise and are prompted to close it, you can do so without saving your changes.
- If the Catalog window is not already open, click the Catalog Window button
 on the Standard toolbar to display it. The Catalog window allows you to manage your datasets and is where you will add the topology. You can dock the window to the ArcMap user interface by clicking the pin in the upper righthand corner.
- If necessary, expand the Home - Editing\Topology folder, which displays the contents of the Topology folder installed with the tutorial data.
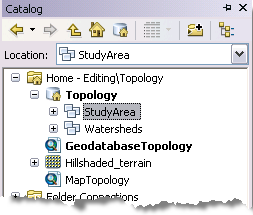
- Expand the Topology geodatabase, if needed, and click the StudyArea feature dataset. Now you will create a geodatabase topology to help you find errors in the lot lines data. The topology will be simple, involving one feature class and one topology rule.
- Right-click the StudyArea dataset, point to New, then click Topology.
- Click Next on the introduction.
- Accept the default name and cluster tolerance and click Next.
- Now you can choose which feature classes in the dataset to include in the topology. Check LotLines and click Next.
- Accept the default ranks and click Next.
- Click Add Rule.
- Click the Rule arrow and click Must Not Have Dangles.
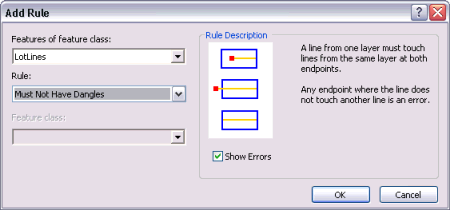
- Click OK.
- The rule is added to the list of topology rules. Click Next.
- Review the summary and click Finish.
A message appears informing you that the topology is being built, then another asks whether you want to validate the topology now. Validation discovers errors in the layer.
- Click Yes.
Adding the topology to the map
Now you'll use the topology to help you find the dangle errors in the lot lines data. In the future, you may need to build polygon lot features from these lines. Therefore, it is important to clean up this data first because only one lot polygon will be created if a line dividing two lots does not completely separate them.
- In the Catalog window, expand the StudyArea feature dataset, if needed, then click StudyArea_Topology and drag it onto the map.
- Click No when you are asked whether to add all the layers that participate in the topology, since the layers are already in the map.
- Close the Catalog window.
Finding topology errors
The next step to make this data useful is to identify the topology errors that are present. Lot lines that have a dangle, where one end of the line is not connected to another lot line, are errors that you need to find to clean up this data so you can create lot polygons. Some dangles need to be extended to close a polygon; others overshoot the line that they should snap to and need to be trimmed. You will find some of these errors now.
- Click Bookmarks and click Dangle errors.
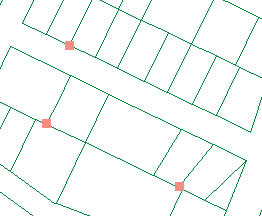
The map zooms to the bookmarked area. Now you can see three dangle errors, which you will fix in this exercise.
- Click the Editor menu on the Editor toolbar and click Start Editing.
- Click Error Inspector
 on the Topology toolbar.
- Make you sure can see the same three errors on the map with the Error Inspector window open. You may need to pan the map to make them visible again.
- Check the Errors and Visible extent only check boxes on the Error Inspector window.
- Click Search Now on the Error Inspector window.
Correcting an overshoot error
All the errors on the map are violations of the Must Not Have Dangles rule. However, there are several different problems that can cause this type of error. A dangle error can be caused by a line that extends too far beyond the line it is supposed to touch or by a line that doesn't extend quite far enough. These are overshoots and undershoots, respectively.
Dangles can also occur where features have been digitized from adjacent map sheets. These lines sometimes need to be snapped together so they connect to form a continuous line. Other dangle errors occur at the edge of map sheets, where a line is cut off on the original source data.
You will now correct one of the errors on this map.
- Click in the Feature 1 column on the Error Inspector window until the northernmost feature on the map flashes and turns black to show that it is selected.
- Zoom in to the error until you can see where the lot line with the error crosses the other lot line.
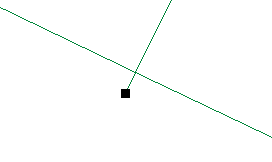
- Right-click the error on the Error Inspector window and click Trim.
- Type 3 in the Maximum Distance text box and press ENTER.
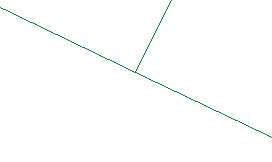
The dangling segment is trimmed back to where the lines intersect, and the error disappears. The Error Inspector shortcut menu provides a list of potential fixes for this error. You trimmed the line feature to fix this error. You also could have marked the error as an exception or snapped or extended the line until it reached another feature.
Correcting an undershoot error
- Click the Go Back To Previous Extent button
 on the Tools toolbar until you can see the two remaining errors in this area of the data. Now you'll correct another type of dangle error.
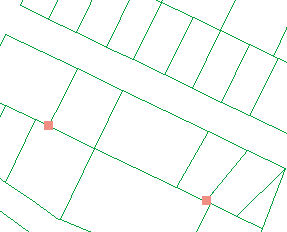
- Zoom in to the westernmost of the two remaining errors.
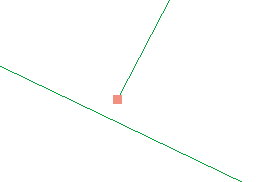
- Zoom in again, if necessary, until you can see where the lot line with the error fails to connect to the other lot line.
- Click the Fix Topology Error tool
 on the Topology toolbar. This tool lets you interactively select and apply predefined fixes to topology errors on the map.
- Drag a box around the error.
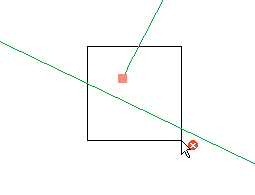
- Right-click the map and click Extend.
- Type 3 in the Maximum Distance text box and press ENTER.
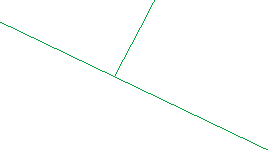
You have corrected the undershoot by extending the line with the dangle to the other line. If the distance to the next line had been greater than the three-meter maximum distance you specified, the line would not have been extended.
Correcting a double-digitized line
Sometimes a given line or part of a line is digitized twice in the course of creating the data. This may happen with CAD drawings or with lines digitized on a digitizing tablet.
- Click the Go Back To Previous Extent button
 on the Tools toolbar until you can see the one remaining error in this area of the data.
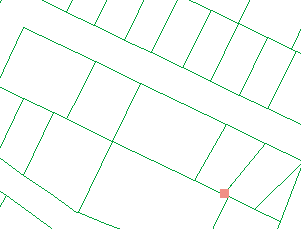
- Zoom in to the remaining error.
- Click Search Now on the Error Inspector window.
- Click the numeric value in the Feature 1 column.
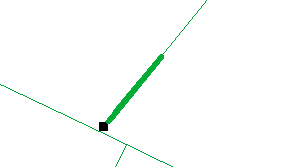
The line feature with the dangle flashes. Notice that the whole lot line did not flash.
- Zoom in until you can see that there are two nearly parallel lot lines, one of which has the dangle.
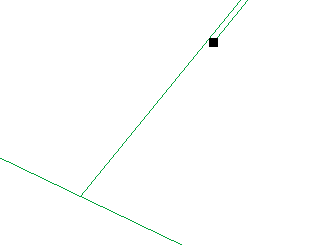
- Right-click the numeric value in the Feature 1 column, click Select Features, then press the DELETE key. This deletes the extra line.
- Click the Go Back To Previous Extent button
 on the Tools toolbar until you can see the area in which you have been working.
Reviewing the areas you have edited
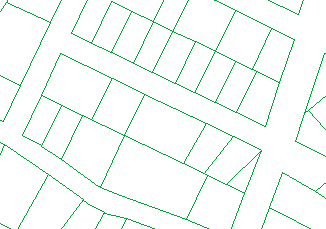
You have fixed three errors that resulted from violations of the Must Not Have Dangles rule. In each case, the error was corrected by editing the geometry of a lot line feature by trimming, extending, or deleting the feature.
Viewing topology errors is useful for tracking where there are problems with your data, but correcting the error requires you to correct the data—you cannot edit the topology error feature layer directly.
When you edit features in a topology, the topology tracks where changes have been made. These places are called dirty areas because a topology rule could potentially have been violated by the edits, but the error, if it exists, cannot be found until the dirty area is validated again. When you validate the topology again, it just checks the dirty areas.
You can see the areas that have been edited by showing the dirty areas in the topology layer.
- Right-click the topology in the table of contents and click Properties.
- Click the Symbology tab.
- Check Dirty Areas.
- Click OK.
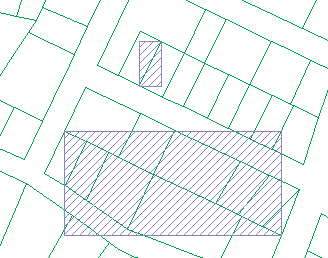
- Click the Validate Topology In Specified Area button
 on the Topology toolbar.
- Drag a box around the northern dirty area.
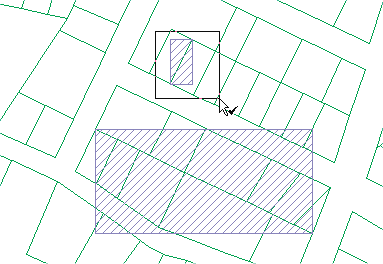
The dirty area is removed, and no errors are found in the area you validated.
- Click the Validate Topology In Current Extent button
 on the Topology toolbar.
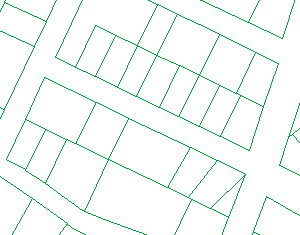
The topology is validated for the other areas you edited, and the dirty area is removed.
Creating a report of the status of the data
- Right-click the topology in the table of contents and click Properties.
- Click the Errors tab.
- Click Generate Summary.
- Click OK.

Fixing multiple errors at once
Many errors, like the double-digitized line, need to be fixed one at a time by deleting, modifying, or moving individual features. Some errors must be fixed by creating new features. However, sometimes a feature class contains a number of errors, such as overshoots and undershoots, that are simple to fix. When this is the case, you can select multiple errors at once with the Fix Topology Error tool and apply the same fix to all of them. If you prefer, you can individually check each error using the Error Inspector window. This is a workflow and quality assurance decision that your organization should make before you begin applying topology fixes to multiple errors.
It is also a good idea to look at your data and evaluate whether the fixes are appropriate. You would not want to trim lines with dangles that actually needed to be snapped to another line, or extend a line that actually needed to be trimmed. In this case, if you extend dangling lines that are within three meters of another line, you're not likely to cause problems with your data, since the parcels and rights-of-way are larger than three meters.
Now you'll use this method to clean up several errors at one time.
- Click the Full Extent button
 on the Tools toolbar.
- Click the Fix Topology Error tool
 on the Topology toolbar.
- Drag a box around all the errors on the map. This selects all of the errors. Now you'll fix the undershoots.
- Right-click the map and click Extend.
- The maximum distance you set when you fixed the other undershoot is fine, so press ENTER. The process may take a few seconds while all the features with dangles are checked to see if there is a feature within three meters to which they can be extended.
The undershoots are fixed, and a number of dirty areas appear on the map. Each dirty area marks the bounding box of a feature that was edited by the extend error fix.
- Click Search Now on the Error Inspector window. (If you closed the Error Inspector window, you can open it again from the Topology toolbar.)
- Click the Editor menu on the Editor toolbar and click Stop Editing.
- Click Yes to save your edits.
- Close ArcMap if you are done working with the tutorial. You do not need to save the map document.
- To continue to the next exercise, click Exercise 5a: Transforming data.
In this exercise, you created a geodatabase topology with simple rules to help you clean up data. You learned how to use the Error Inspector to find errors of a particular type and how to use some of the editing tools to fix errors in your data.