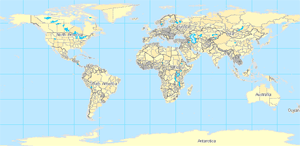
Clicking the Full Extent button  on the Tools toolbar zooms your map to show you all the data in your map. In one click, you can see everything in your map. Sometimes, though, clicking the Full Extent button zooms you out much further than desired. In these cases, you might like to set your own full extent.
For example, in a map of France, you might have layers that cover the world, and clicking Full Extent will zoom you out to the whole world.

You can specify a custom extent, such as France, as the full extent of your data frame. Then, when you click the Full Extent button, you are taken just to your area of interest.

Steps for setting a custom full extent
Each data frame can have its own custom full extent, which is set in the Data Frame Properties dialog box. Here are the steps:
- Right-click the Data Frame name in the table of contents and click Properties.
- Click the Data Frame tab.
- In the Extent Used by Full Extent Command section, click Other and click the Specify Extent button.

- This displays the Full Extent dialog box where you can set your custom extent. You can choose to
- Use the current extent of your data frame.
- Use the outline of features in a particular layer (and choose all features, selected features, or those that are visible).
- Use the outline of selected graphics.
- Type in your own coordinate values (in decimal degrees or display units) to define an extent. Display units are specified on the General tab of the Data Frame Properties dialog box.
Once you choose an option and click OK, the next time you open the dialog, the Custom Extent option will be automatically selected and will show you the top, left, right, and bottom coordinates of the extent you specified. When you choose an option that is based on an extent that can change, such as the extent of the map, the features in a layer, or the outline of the selected graphics, the dialog gets that current extent and stores its actual coordinates, so that any further changes made in the map or to layers, and so on, that would otherwise change this extent are ignored. In other words, when you are defining an extent using this dialog, the option you choose isn't dynamic—it is just a convenient way to specify an extent to save you having to type in its actual coordinates.