To change the appearance of a model, right-click in the model canvas and click Diagram Properties, or from the Model menu click Diagram Properties. The Diagram Properties window opens with three tabs:
- General
- Layout
- Symbology
The General and Layout tabs control how elements are arranged in the model, and the Symbology tab controls the overall shape and appearance of model elements.
Learn more about changing model symbology
General options
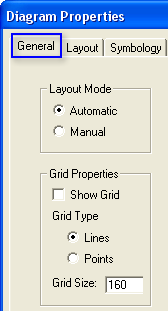
General options include settings to change the layout mode and grid properties of a model. Under Layout Mode
- Automatic enables the Auto Layout button
 , which can be used to automatically arrange the elements in a model. This is the default mode.
 - Manual disables the Auto Layout button
 , and any arrangement of model elements must be performed manually.
Under Grid Properties, a visual grid can be added to help line up elements. When the grid is turned on, model elements will snap to the grid when moved.
Layout options
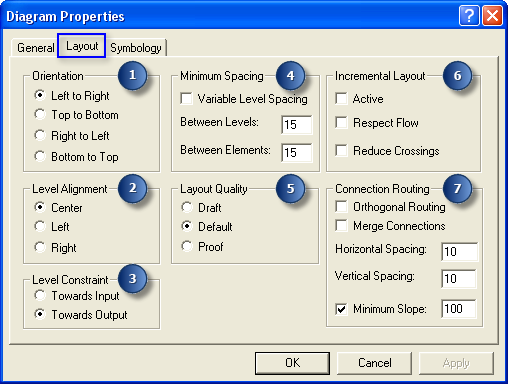
Below are the options available from the Layout tab.
| Layout options | Layout option examples |
|---|---|
Orientation (1) Determines the visual direction of flow in the model. Changing the layout does not affect a model's processing flow and logic. | 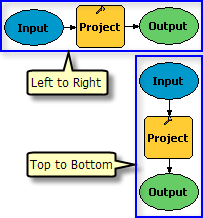 |
Level Alignment (2) Determines whether elements will align to the center, left, or right of a level line. | |
Level Constraint (3) Determines how the elements in different chained processes are aligned. The illustration shows the default constraint (Towards Output) and the level constraint Towards Input. | 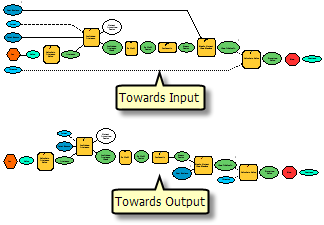 |
Minimum Spacing (4) You can set the spacing between levels and elements. The default is 15 diagram units for each. Check Variable Level Spacing to let ModelBuilder readjust the spacing between levels. This primarily affects models that contain crossed connector lines—the spacing between levels is distributed so that levels with crossed lines are given more space. | 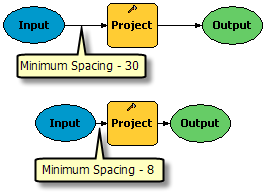 |
Layout Quality (5) Layout Quality controls how rigorously the diagram layout adheres to the layout settings you make. In Draft mode, there is the least adherence to the layout settings—a simple computation is used, making the layout of elements quicker. In Proof mode, the maximum amount of adherence to the layout settings is attained. The default is a compromise between Draft and Proof. | |
Incremental Layout (6) Incremental Layout is a kind of compromise between automatic and manual layout. By enabling Incremental Layout, once you place an element or connector, it will be moved as little as possible, minimizing the amount of reorganization that occurs within ModelBuilder. Incremental Layout can be turned on and off while you work. The effects of Incremental Layout are applied whenever the Auto Layout button When the Respect Flow option is checked, ModelBuilder assigns elements to levels incrementally as much as possible while respecting the flow of the connector lines. When the Reduce Crossings option is checked, ModelBuilder assigns elements to levels incrementally and preserves their ordering within levels as much as possible while trying to reduce the number of crossings. | 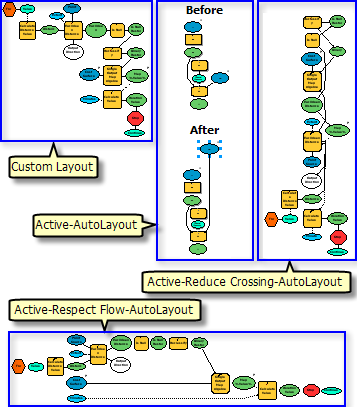 |
Connection Routing (7) Connection Routing sets whether diagonal or orthogonal connector lines will be used. When Orthogonal Routing is unchecked (the default), diagonal connector lines are used. When Orthogonal Routing is checked, connector lines are straight and make 90-degree bends, as shown in the illustration. When the Orthogonal Routing option is checked, you can use the Merge Connections option to merge the connector lines that connect to the same input element so all vertical lines meet at the same point. You can also set the vertical and horizontal spacing between connectors. The Minimum Slope option sets the lowest slope value that any diagonal connector line can have. When the model orientation is vertical, slope is measured by the angle of the connector line from a horizontal line. When the model orientation is horizontal, slope is measured by the angle of the connector line from a vertical line. Slope is measured in percentages: 0 percent is flat, and the value of a perpendicular slope approaches infinity. In practice, increasing the minimum slope by approximately 300 percent has no noticeable effect. | 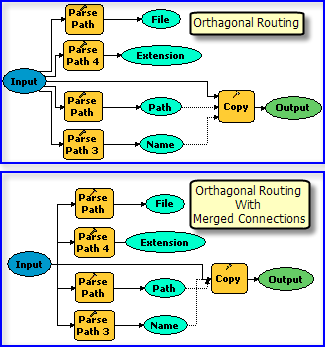 |