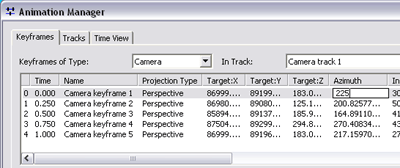
The Animation Manager allows you to manage and preview animation tracks and modify keyframes and their properties.
Modifying track and keyframe properties
Once you've created tracks, you can modify the properties of each track and each keyframe within a particular track. For instance, you might have created a temporal animation of a layer or table and want to include another layer or table in the animation. Perhaps you created a camera track and want to alter particular keyframe properties slightly, such as the camera inclination or azimuth.

Using the Time View tab
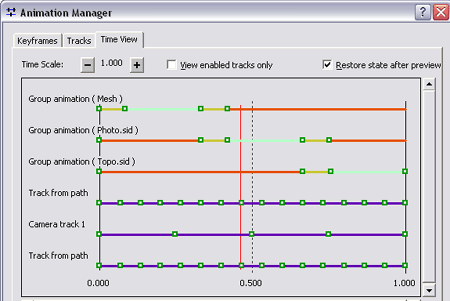
The Time View tab of the Animation Manager displays a representation of how the tracks and keyframes of each track are arranged along the animation time, which is normalized from 0.0 to 1.0.
Use the Time View tab to specify when keyframes of one track are played relative to others or organize how tracks are synchronized with one another. You can manually play your animation through the Time View tab by clicking in the track display and dragging the red slider that appears. You can alter the position of keyframes within a particular track so that the properties of the object or objects to which the track is bound are altered either later or earlier in the animation. Keyframes can be deleted by clicking them, then clicking Delete Keyframes. After manipulating keyframe properties, you can see the results using the red slider.

On the Time View tab, the timing of all tracks is normalized to one time unit, and there is no indication of duration. Use the duration setting on the Animation Controls dialog box to determine how long your animation will play.