Prerequisite:
Before executing this procedure, you must have a tracking layer in your map document.
When a tracking layer is initially added to a map document, all events in the tracking layer are assigned the same default symbology. This procedure will show you how to customize unique symbols for your tracking events based on unique values of an attribute in your data.
- Double-click the tracking layer in the Contents window to open the Layer Properties dialog box. Click the Symbology tab.
- ClickEventson the Show panel, and make sure that the check box next to Events is checked.
You will notice that several options exist on the Drawn As panel below the Show panel.
- Under the Categories heading on the Drawn As panel, clickUnique Values.
The appearance of the Symbology tab now displays the options for symbolizing tracking data based on unique values.
- Click the Value Field drop-down arrow to expand a drop-down list containing all the fields in your tracking layer. Click the field that you want to base your symbology on.
- Click the Add All Values button to add a unique symbol to the table in the middle of the Symbology tab for each unique value in the field selected.
You can also use the Add Values button to add a unique symbol for a subset of the unique values from the selected field. When you add values, the initial symbol displayed is based on the default event symbol and the color ramp selected on the Color Ramp drop-down menu.
- Now you can customize the symbol for each unique value appearing in your selected field. In the table in the middle of the Symbology tab, double-click a symbol you want to change to open the Symbol Selector dialog box.
- Select the symbol you want. You can change basic symbol properties, such as color and size in the Symbol Selector dialog box. For more advanced options, click the Edit Symbol button to open the Symbol Property Editor dialog box.
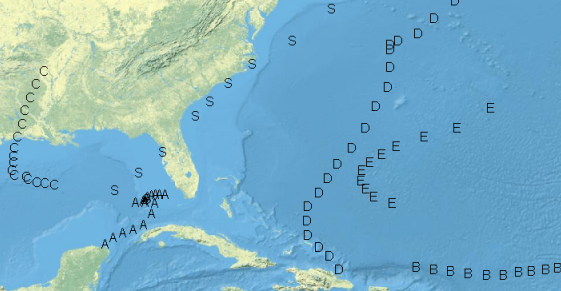
Depending on whether your tracking layer contains point, line, or polygon data, different options exist on the Symbol Selector and Symbol Property Editor forms. For example, if you are working with a point tracking layer, you can select Character Marker Symbol in the Type drop-down list on the Symbol Property Editor dialog box to symbolize your point data using character markers.

You will find that the full capabilities of ArcGIS Desktop symbology are available to be used in your tracking layer.
- Repeat the steps above to set a unique symbol for all the unique values shown in the table on the Symbology tab. Click OK to close the Layer Properties dialog box and save your changes.