This workflow shows you the steps needed to create a mosaic dataset using the Vector Field template.
Create a mosaic dataset using the Vector Field template
First, create a multidimensional mosaic dataset using the Vector Field template.
- Create a mosaic dataset using the Create Mosaic Dataset geoprocessing tool.
- Add data
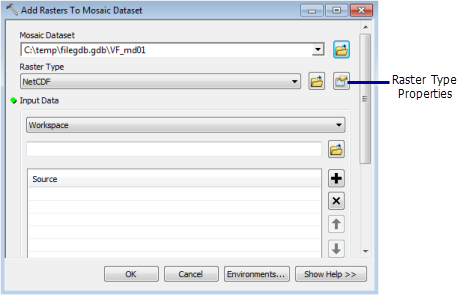
using the Add Rasters To Mosaic Dataset geoprocessing tool.
- Choose one of the multidimensional raster types: GRIB, HDF, or
NetCDF.

- Specify the
input file or workspace containing the files.
If your input is only one or two files, choose the File option rather than the Workspace option, as it performs faster.
- Click the Raster Type Properties button.
- Click the General tab and choose the Vector Field processing template.
- Click the
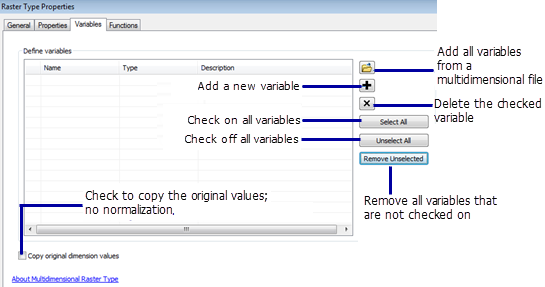
Variables tab and choose two variables that are used.

- Set the
variable type by choosing proper entries in the Typecolumn.
Your data may be vector-magnitude and vector-direction, or vector-u and vector-v.
- Click OK to close the Raster Type Properties window.
- Check Estimate Mosaic Dataset Statistics in the Mosaic Post-processing section.
- Click OK to run the tool. The output result is automatically added to the map.
- Choose one of the multidimensional raster types: GRIB, HDF, or
NetCDF.
Visualize a mosaic dataset using the Vector Field renderer
Now you can visualize your data using the Vector Field renderer.
- Add the mosaic dataset to the map.
- Open the mosaic dataset properties.
- Click the Vector Fieldrenderer.
- Adjust the renderer properties accordingly.
- If the data contains vertical dimension, specify a z-value on the Multidimensional tab within the properties.
- Click OK to display the mosaic dataset with the Vector Field renderer.
-
Use the time
slider to visualize the mosaic dataset dynamically.
For more information about using the time slider, see Using the time slider.