Available with Workflow Manager license.
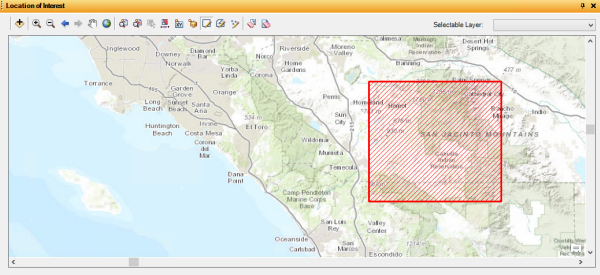
The location of interest (LOI) represents the geographic extent of the job. Its purpose is to highlight where the work related to the job needs to be done. The location of interest for a job can be a polygon or point and the LOIs for all the jobs are stored in a respective polygon or point feature class in the Workflow Manager repository. The polygon extent of the job is the area of interest (AOI) and the point extent of the job is the point of interest (POI). This helps to confine the unit of work to a geographic area. It also helps managers and users track where edits are in progress to avoid conflicts and prioritize and coordinate activities among many users and user groups.

The Location of Interest window provides many tools to assist in defining the location of interest for a job:
- Add Data Layer
 —Adds additional data layers to the LOI view.
 - Zoom In
 —Allows you to change the current extent to a larger scale.
 - Zoom Out
 —Allows you to change the current extent to a smaller scale.
 - Zoom To Previous Extent
 —Allows you to go back to the previous extent.
 - Zoom To Next Extent
 —Allows you to go forward to the next extent.
 - Pan
 —Allows you to move the current extent to a new area.
 - Full Extent
 —Zooms to the full extent of the data view.
 - Zoom To LOI
 —Updates the current view to the extent of the current LOI.
 - Zoom To New LOI
 —When a new LOI has been created but not yet saved, this tool becomes available. Clicking the button updates the view to display the extent of the new LOI.
 - Select Feature For Single LOI
 —This tool is used in conjunction with the Selectable Layer menu. Click a feature present in the selected layer or drag a box around several features to create a larger LOI. If the feature selected is a point you will be prompted to choose whether to save it as a POI or to buffer the point feature to create an AOI.
 - Select By Attribute
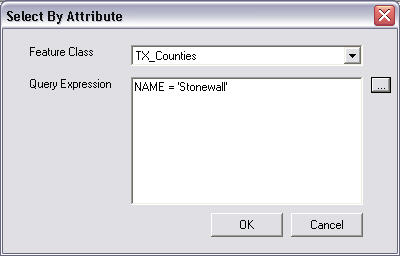
 —Allows you to create a query to select a feature from a data layer. If the feature selected is a point you will be prompted to choose whether to save it as a POI or to buffer the point feature to create an AOI.
- Define LOI by entering coordinates
 —Displays a dialog box to input the coordinates for the location of interest. The polygon requires defining the upper right and lower left x,y coordinates, while to store the point you must check the Store Point check box and define the x,y coordinates.
 - Get LOI From Source Extent
 —Draws an LOI around the extent of a selected source.
 - Draw Rectangle AOI
 —Allows you to draw a rectangle to create an AOI.
 - Draw Polygon AOI
 —Allows you to create an AOI of any size and shape by clicking once to add a vertex and double-clicking to finish the AOI.
 - Draw Point POI
 —Allows you to create a POI point by clicking in the map.
 - Clear Existing Selection
 —Allows you to clear a feature selected as an LOI before it has been saved.
 - Clear LOI
 —Allows you remove the currently saved LOI for the job.
 - Refresh View—Allows you to refresh the LOI view.
- Selectable Layer—Determines which layer features may be selected. The layers in the window are determined by the predefined LOI configuration, as well as any data added via the Add Data button.