The Label Manager lets you create and manage the label classes within the map. It also allows you to view and change labeling properties for all the label classes in your map without repeatedly visiting the layers' property dialog boxes.
The Maplex Label Engine uses the same Label Manager as the Standard Label Engine, with the addition of new label placement options and functionality not available in the standard labeling user interface.
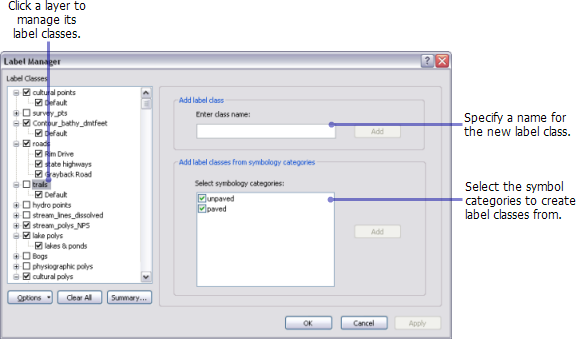
You can create label classes for the layers in your map by either specifying a name for the label class or creating the label class from the layers' symbology. Once the classes are created, you can delete or rename a label class or copy the parameters of a label class and paste them into another by right-clicking the label class in this list and working with the commands in the context menu.

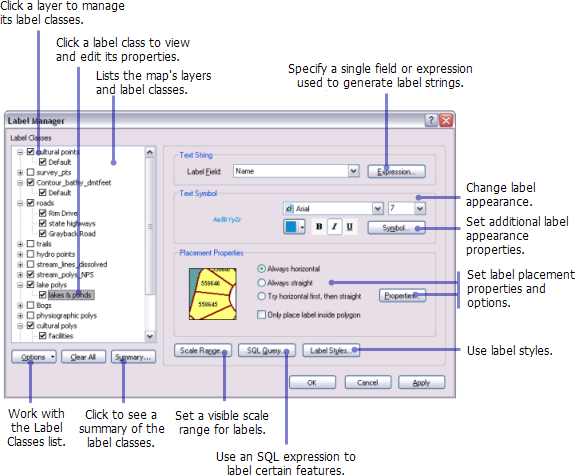
When you choose a label class from the list, you are able to view and modify the labeling properties.
The image below shows the Label Manager with the Standard Label Engine enabled:

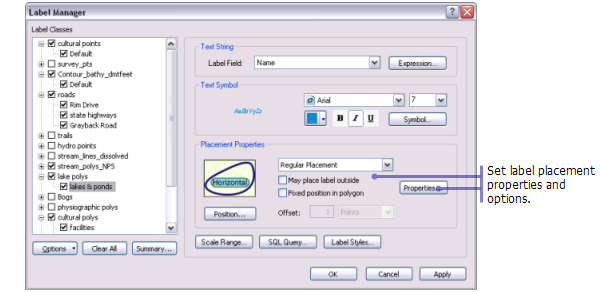
The image below shows the Label Manager with the Maplex Label Engine enabled. The only change is the Placement Properties box being enabled with Maplex Label Engine parameters.

- Learn more about setting label placement properties using the Standard Label Engine
- Learn more about setting label placement properties using the Maplex Label Engine
- Learn more about displaying labels with symbols and label styles
- Learn more about using SQL expressions to label certain features
- Learn more about using visible scale ranges to display labels
- Learn more about the Labeling Summary dialog box
- Click the Label Manager button
 on the Labeling toolbar.
- Check the box next to the layer you want to label.
Optionally, select the layer and create label classes.
- Choose a label class under the layer.
- Click the Label Field drop-down arrow and click the attribute field you want to use as a label.
Optionally, set any other label placement parameters for the label class.
- Click OK.