Summary
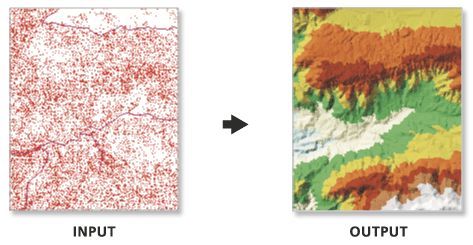
Loads data from one or more input features to modify the surface of an existing triangulated irregular network (TIN).
Illustration

Usage
This tool modifies the input TIN. Consider using the Copy TIN tool to maintain a backup if you wish to retain an unmodified version of the source TIN.
-
The surface feature type defines how the input features will contribute to the definition of the triangulated surface.
- Point features can be specified as mass points, which provide data nodes whose Z values are used in the triangulation of the surface.
- Line features can be specified as mass points and breaklines, which represent locations along a surface with linear discontinuities in slope, such as ridge lines, shore lines, pavement edges, building footprints, and so on.
- Polygon features can also be specified as mass points and breaklines, along with clip features that define the data area, replace features that define regions with constant Z values (e.g. water bodies), and erase features that indicate interior areas where data does not exist.
-
The maximum number of nodes supported by a TIN depends primarily on the free, contiguous memory resources available on the computer. Consider limiting the total number of nodes to under 6 million to maintain responsive display performance and overall usability. Larger triangulated surfaces are best managed using a multi-resolution terrain dataset.
Syntax
EditTin_3d (in_tin, in_features, {constrained_delaunay})| Parameter | Explanation | Data Type |
in_tin | The TIN dataset to process. | TIN Layer |
in_features [[in_features, height_field, tag_value, SF_type, use_z],...] | False The input features and their related properties that will contribute to the definition of the TIN.
| Value Table |
constrained_delaunay (Optional) | Specifies the triangulation technique used along the breaklines of the TIN.
| Boolean |
Derived Output
| Name | Explanation | Data Type |
| derived_out_tin |
Code sample
EditTin example 1 (Python window)
The following sample demonstrates the use of this tool in the Python window.
import arcpy
from arcpy import env

arcpy.CheckOutExtension("3D")
env.workspace = "C:/data"
arcpy.ddd.EditTin("my_tin", "clip_polygon.shp <None> <None> hardclip false; "\
                 "new_points.shp Shape <None> masspoints true", "Delaunay")
EditTin example 2 (stand-alone script)
The following sample demonstrates the use of this tool in a stand-alone Python script.
'''****************************************************************************
Name: EditTin Example
Description: This script demonstrates how to use the
             EditTin tool to add features to a output of the CopyTin tool.
****************************************************************************'''

# Import system modules
import arcpy
from arcpy import env

# Obtain a license for the ArcGIS 3D Analyst extension
arcpy.CheckOutExtension("3D")

# Set environment settings
env.workspace = "C:/data/LAS"

try:
    # Set Local Variables
    origTin = "elevation"
    copyTin = "elev_copy"
    inFCs = [["Clip_Polygon.shp", "<None>", "<None>", "hardclip", False],
             ["new_points.shp", "Shape", "<None>", "masspoints", True]]
    # Execute CopyTin
    arcpy.CopyTin_3d(origTin, copyTin, "CURRENT")
    # Execute EditTin
    arcpy.EditTin_3d(copyTin, inFCs, Delaunay)

except:
    # Returns any other error messages
    print arcpy.GetMessages(2)

del arcpy
Environments
Licensing information
- ArcGIS Desktop Basic: Requires 3D Analyst
- ArcGIS Desktop Standard: Requires 3D Analyst
- ArcGIS Desktop Advanced: Requires 3D Analyst