Available with Production Mapping license.
When product classes and series are created in the product library, map documents are also created for them by default. The map documents automatically created at the product class and series levels are intended to be used as templates. By default, the ArcMap document associated with a product class or series is named after the product assigned to the respective level.
However, there can be occasions where you have already set up a document that you want to associate with a product class or series. For instance, a blank .mxd file is created when you add the JOG product class, but you may already have an existing .mxd file that could be used as the template.
- Start ArcMap.
- If necessary, open the Product Library window by clicking Customize > Production > Product Library on the main menu.
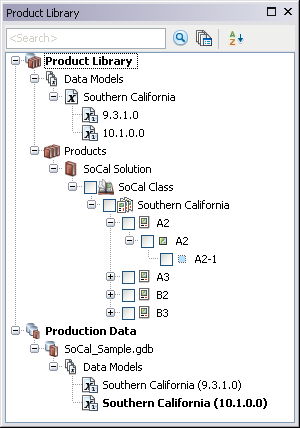
A tree view of the product library appears.

- Expand Product Library and Products.
- Navigate to the product class or series whose template file you want to change.
- Right-click the product class or series and click Properties.
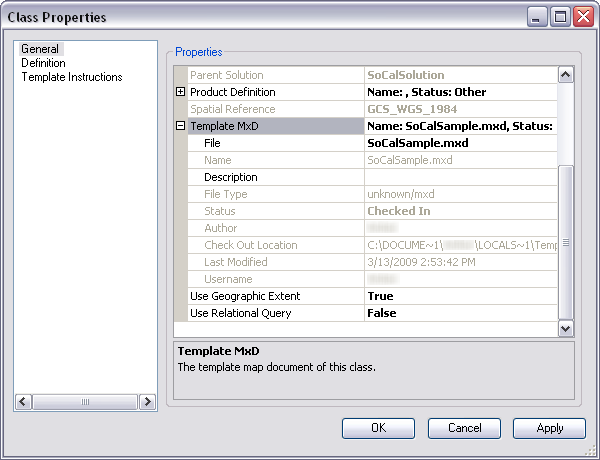
The properties dialog box appears for the product class or series.
- Click the plus sign next to Template MxD to view the template properties.
- Click the cell next to File and delete the existing text.

- Click the ellipsis (...) in the cell.
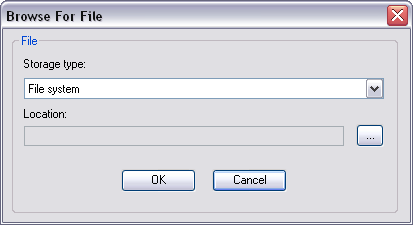
The Browse For File dialog box appears.

- Click the Storage type drop-down arrow and choose an option:
- File system—If the file is stored in a local or network computer
- Database—If the file is stored in a database
- Click the ellipsis (…) next to the Location field.
The Open dialog box appears.
- Navigate to the .mxd file you want to associate.
- Click Open.
The Browse For File dialog box appears with the path to the .mxd file in the Location field.
- If necessary, type a description for the .mxd file in the Description text box.
- Click OK.
The properties dialog box appears.
- Click OK.