ArcGIS Desktop

  • ArcGIS Pro
  • ArcMap

  • My Profile
  • Help
  • Sign Out
ArcGIS Desktop

ArcGIS Online

The mapping platform for your organization

ArcGIS Desktop

A complete professional GIS

ArcGIS Enterprise

GIS in your enterprise

ArcGIS for Developers

Tools to build location-aware apps

ArcGIS Solutions

Free template maps and apps for your industry

ArcGIS Marketplace

Get apps and data for your organization

  • Documentation
  • Support
Esri
  • Sign In
user
  • My Profile
  • Sign Out

ArcMap

  • Home
  • Get Started
  • Map
  • Analyze
  • Manage Data
  • Tools
  • Extensions

Creating a graph template

  1. Right-click the graph window and click Export.
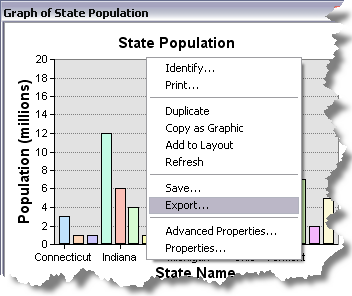
    Graph context menu
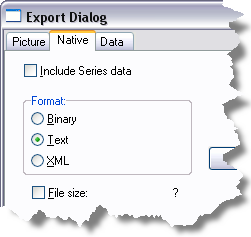
  2. Click the Native tab.
    Native tab
  3. Uncheck Include Series data so that the data will not be written to the output file.
  4. Uncheck the File size control.
  5. Set Format to Text.
  6. Click the Save button.
  7. Navigate to the GraphTemplates folder where you want the template file to be stored, enter a filename, and click Save.
  8. Click Close when you are finished.
Note:

A standard graphic will be used for each new template. To make it easier to distinguish between your templates, you can apply a custom icon to them. To create your own icon, create a 42 x 42 pixel BMP image. Unused pixels in this 42x42 size should be colored white. Place the final BMP file in one of the template file locations.

ArcGIS Desktop

  • Home
  • Documentation
  • Support

ArcGIS Platform

  • ArcGIS Online
  • ArcGIS Desktop
  • ArcGIS Enterprise
  • ArcGIS for Developers
  • ArcGIS Solutions
  • ArcGIS Marketplace

About Esri

  • About Us
  • Careers
  • Esri Blog
  • User Conference
  • Developer Summit
Esri
Tell us what you think.
Copyright © 2019 Esri. | Privacy | Legal