Steps for porting your Add-in from a Previous Version
We assume, for this example:
- The previous version your code was compiled against was 10.3 or lower
- You have installed the .NET SDK for Visual Studio 2013 or 2015 at 10.4
These instructions use screen shots with a C# project. The procedure will be the same for Visual Basic though idiosyncrasies do exist between the two Visual Studio UIs.
1. Two scenarios are described
Scenario 1
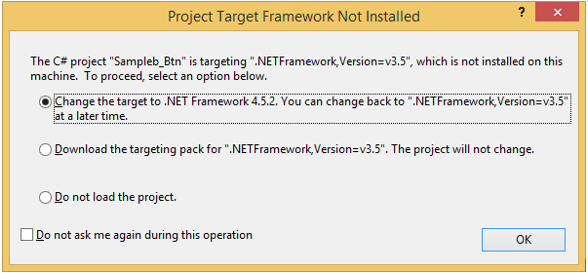
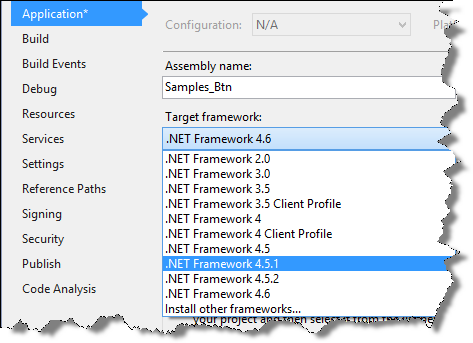
You do not have the .NET Framework 3.5 or earlier installed. When you attempt to open your project in Visual Studio you will be prompted to change the target framework while the project is loading. Select the suggested target framework (in this case .NET 4.5.2). Click OK. Without selecting a supported target framework your project will not load. Once the project has been loaded the target framework can be changed manually on the Application tab of the project properties.

Scenario 2
You do have the .NET Framework 3.5 (or earlier) installed and your project loads without prompting. If this is the case, you must change the target framework manually to a supported target framework version. Go to the project properties, Application tab and change the Target framework to 4.5 or better

2.Open the Config.esriaddinx file and change version attribute on the Target element from version="10.3" to version="10.4".
3. Also in the Config.esriaddinx file, ensure the language attribute of the AddIn element is set to CLR. If it has some variant in it like "CLR4.0" delete the "4.0" bit.

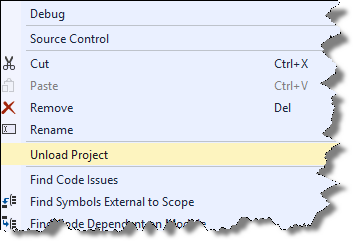
4. Go to the .csproj project file or .vbproj project file entry in the Visual Studio Solution Explorer and unload the project.

4. Go to the .csproj project file or .vbproj project file entry in the Visual Studio Solution Explorer and unload the project.

5. Right click on project name in Solution Explorer (it will have been annotated now with '(unavailable)'). Click on Edit <your project name>. The project file will open in the Visual Studio XML editor.
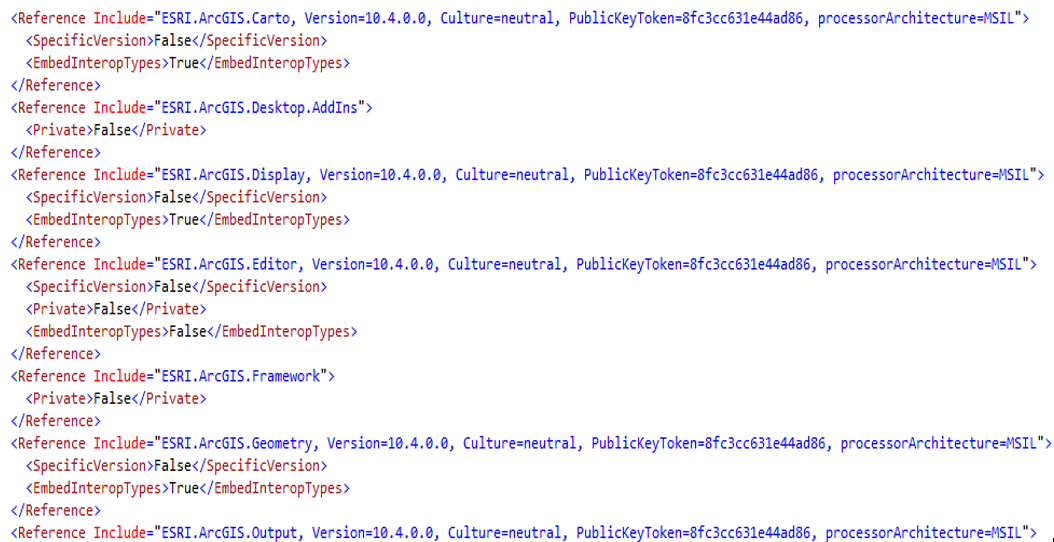
6. Search for your assembly references. If they include a "Include=" tag with a version number, change the version from (in this case) 10.3.0.0 to 10.4.0.0 (substitute for the previous and current versions particular to your install).

7. Look for the Import element with a Project attribute that points to the SDK Addins targets file. Ensure that the Project path (and the Condition path within the Exists clause) is $(MSBuildExtensionPath)\Esri\Esri.ArcGIS.Addins.targets. In previous releases the targets file may have been ESRI.ArcGIS.AddIns.11.targets or ESRI.ArcGIS.AddIns.12.targets (note the ".11" or ".12" have to be removed) depending on which version of the SDK you may have had installed.

8. Finally change the AddInTargetVersion tag to 10.4.

9. Save your edits.
10. Right click on the project name and click "Reload".
10. Right click on the project name and click "Reload".
11. Compile your project.
Note: You may also want to change your Debug executable listed in the "Start external program:" entry from 10.3 to 10.4.
