In this topic
Getting started with templates
Do the following steps to create a working application with ArcGIS Engine. For more information about developing ArcGIS Engine applications in Eclipse, see How to build an application using visual beans, which shows you how to build an application by dragging visual beans onto the Visual Editor and setting its properties.
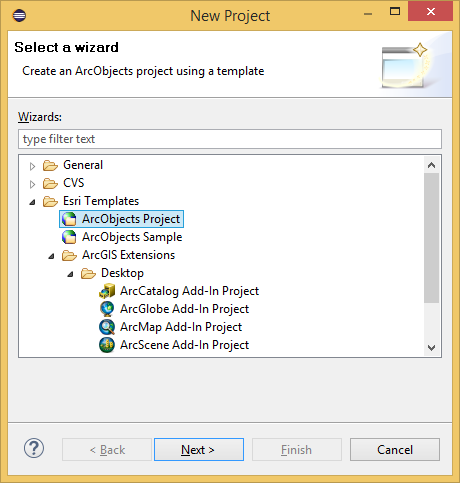
Selecting a wizard
- From the Eclipse main menu, click File, New, and Project. A new project wizard appears.
- Click the ESRI Templates node, then click ArcObjects Project.
- Click Next. See the following screen shot:
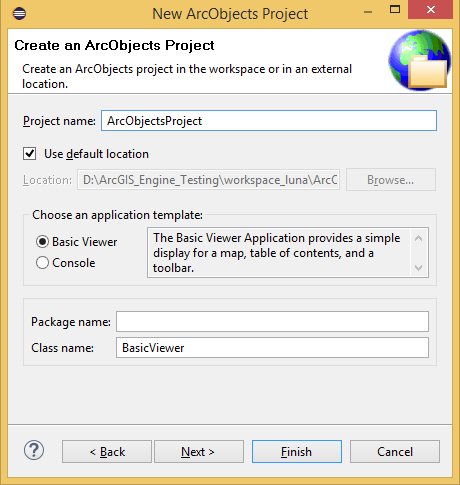
Creating an ArcObjects project
After you click Next in the preceding screen shot, the Create an ArcGIS Engine Project options appear:
- Accept the default project name in the Project name field.
- Select the Basic Viewer radio button to choose an application template.
- Accept the default class name in the Class name field.
- Click Next. See the following screen shot:
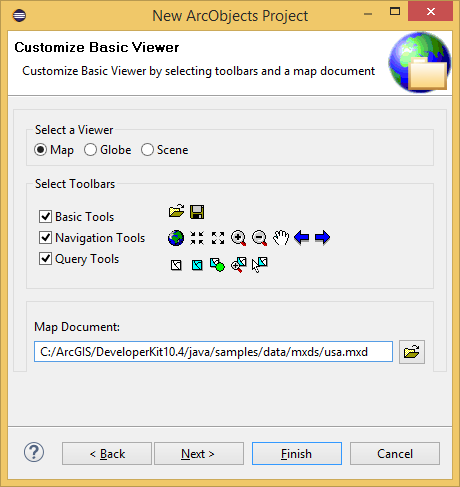
Customizing basic viewer
After you click Next in the preceding screen shot, the Customize Basic Viewer options appear, which allows you to further customize the application:
- Select the Map radio button as the viewer.
- Select the Basic Tools, Navigation Tools, and Query Tools check boxes; the associated icons appear to the right.
- Click the open folder button and browse to a *.mxd file.
- Select the Open in Visual Editor check box. Visual Editor is the graphical user interface (GUI) designer with drag and drop capabilities for building projects.
- Click Next. See the following screen shot:
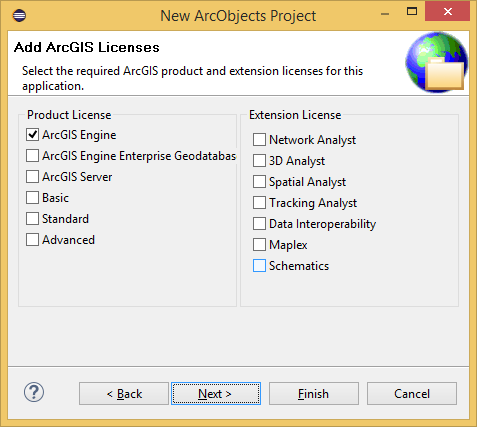
Adding ArcGIS licenses
After you click Next in the preceding screen shot, the Add ArcGIS Licenses options appear. Do the following to specify the license your application should use:
- Select the ArcGIS Engine product license check box.
- Click Next. See the following screen shot:
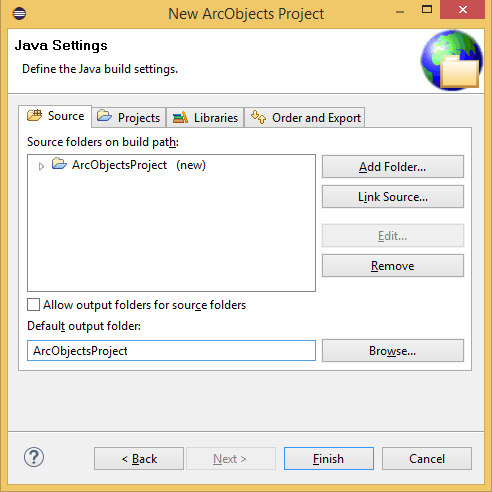
Defining Java build settings
After you click Next in the preceding screen shot, the following Java Settings options appear:
- Select the build path for your project (the arcobjects.jar file is automatically included).
- Click Finish to create the project. See the following screen shot:
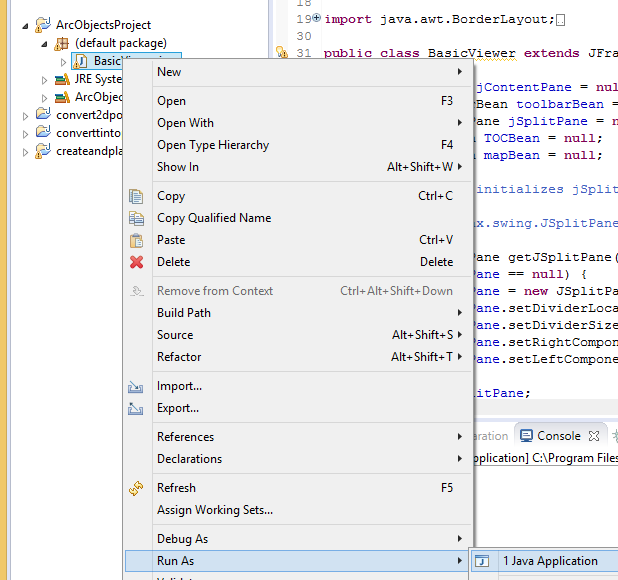
Opening the application
After you complete the previous steps, the ArcObjects application source opens in the Editor. You can now run the application:
- Right-click the BasicViewer.java class in the Package Explorer pane.
- Click Run As, Java Application. See the following screen shot:
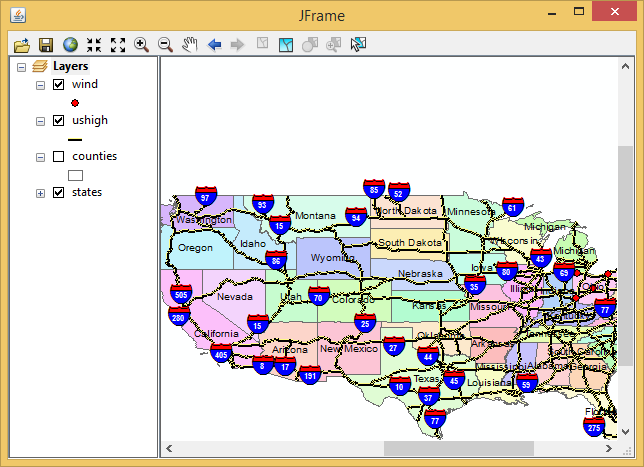
- After you select Java Application in the preceding screen shot, the application appears with the map, TOC, and selected toolbars.
See Also:
How to build an application using visual beans| Development licensing | Deployment licensing |
|---|---|
| Engine Developer Kit | ArcGIS for Desktop Basic |
| ArcGIS for Desktop Standard | |
| ArcGIS for Desktop Advanced | |
| Engine |