Disponible con licencia de Production Mapping.
Adding the text element allows you to insert text as well as set the text properties.
- Verify that you are in layout view if necessary.
- Right-click the graphic table element and click Properties.
The Table Properties dialog box appears.
- Click the Table Format tab if necessary.
The Table Format dialog box appears.
- Click Table Design.
A Table Design dialog box appears, depending on the table format.
- Access the text element in one of the following ways:
- Click to select a cell in the Table Layout area and click Table Layout > Add Element > Text.
- Right-click a cell in the Table Layout area and click Add Element > Text.
- Click to select a cell in the Table Layout area, right-click the associated coordinates in the Elements pane, then click Add Element > Text.
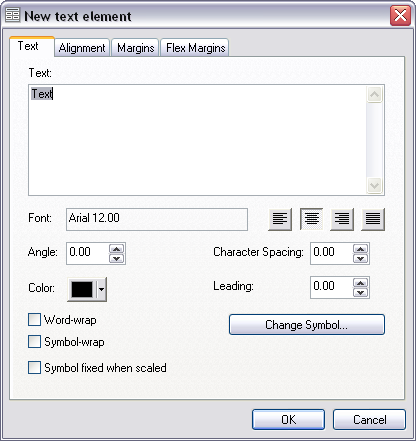
The New text element dialog box appears.

- If necessary, click the Text tab.
The Text tab allows you to type in your text as well as define the angle, color, alignment, character spacing, and leading.
- Check the Word-wrap check box to implement word wrapping properties for the text or check the Symbol-wrap check box for symbol wrapping.
- Click Change Symbol to further modify the text properties.
The Symbol Selector dialog box appears.
- If desired, further modify text font, size, style, and alignment.
- Click OK on the Symbol Selector dialog box once you are finished.
- Click the Alignment tab.
- Click the Horizontal drop-down arrow and choose an option for the alignment.
- Click the Vertical drop-down arrow and choose an option for the alignment.
- Click the Margins tab.
- Type a margin value in the Top, Left, Right, and Bottom text boxes.
- Click the Flex Margins tab.
- Check the Left, Right, Top, or Bottom check box to define the cell coordinates, position, and element for each.
- Click OK.