Disponible con licencia de Production Mapping.
You can change the name of the representation or field rule.
If you choose multiple rules in the rules table, you see only the properties that are common to all the rules appearing in the Properties pane, although you can edit any of them.
- Inicie ArcMap.
- En el menú principal, haga clic en Personalizar > Barras de herramientas > Simbología de producción.
Aparece la barra de herramientas Simbología de producción.
- Click the Visual Specifications button
 on the Production Symbology toolbar.
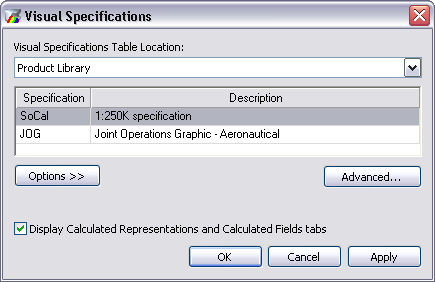
The Visual Specifications dialog box appears.

- Click Advanced.
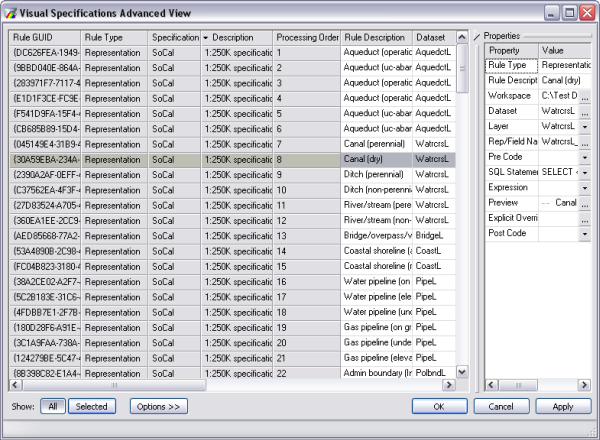
The Visual Specifications Advanced View dialog box appears, displaying rules saved in the selected specifications.

- Click the rule you want to edit in the rules table.
- Click the ellipsis (...) in the Rep/Field Name cell in the Properties pane.
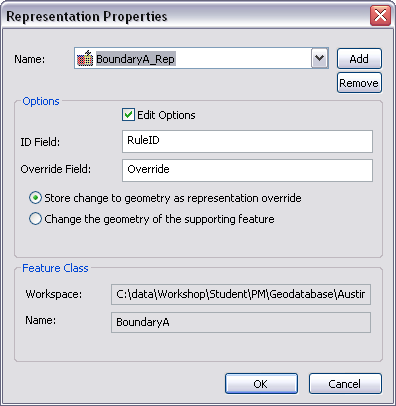
The Representation properties dialog box appears.
- Check the Edit Options check box.
The following become available:
- ID Field text box
- Override Field text box
- Store change to geometry as representation override option
- Change the geometry of the supporting feature option

- To change the name in the Name text box, click Add.
The New Representation Name dialog box appears.
- If necessary, type a new name for the representation rule in the text box.
- Haga clic en Aceptar.
- If necessary, type the name of a different field to use for storing the RuleIDs in the ID Field text box.
- If necessary, type the name of a different field to use for storing override information in the Override Field text box.
- Choose an option for geometry editing behavior.
- Store change to geometry as representation override—Any changes made to feature geometry during an edit session are stored as representation overrides. The original shape is copied, modified and stored in the override field. This allows you to maintain the original feature's spatial integrity and use the representation override for display.
- Change the geometry of the supporting feature—Any changes made to feature geometry during an edit session are stored in the shape, as a standard geometry edit. You can use this option for display only databases.
- Click OK.
The Visual Specifications Advanced View dialog box appears.
- Haga clic en Aceptar.