Schematic diagrams contain schematic features that are created by the diagram template's builder from the input data specified at the beginning of diagram generation. But any schematic diagram, regardless of its related builder, can also contain schematic features that are built from custom queries configured on some schematic feature classes. This means that any diagram content can mix schematic features built from a builder and schematic features built from custom queries. Moreover, when using the Standard builder, diagrams may be entirely built from custom queries.
The section below describes how to determine a query and identifiers for a schematic feature class associated with a Standard builder diagram template that has been configured to generate diagrams, entirely built from custom queries, per gas plant.
- Edit your schematic dataset within Schematic Dataset Editor.
- If the schematic dataset resources are not arranged in a tree view in the Schematic Items window, click Views on the Schematic Dataset Editor toolbar and click Project Tree.
- Click the schematic feature class entry for which you want to specify a custom query in the Dataset Editor tree.
- Click its Properties tab in the Dataset Editor window at the right.
- In the Query section, click the Evaluation Mode arrow and click Query on Generate/Update.
- By default, schematic feature classes are created with the No Query evaluation mode—that is, no custom queries are set to build the related schematic features.
- The Query on Start Editing evaluation mode must be set if you want the query to be dynamically reexecuted each time an editing session starts on the schematic diagram.
Learn more about dynamic custom queries on schematic feature classes
The Edit Query/Identifier button is automatically enabled.
- Click the Edit Query/Identifier button
 .
.
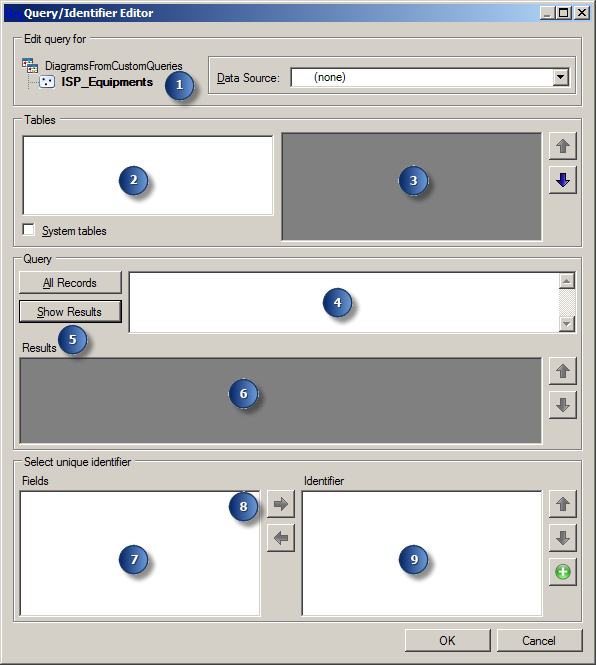
The Query/Identifier Editor dialog box opens:

- From the Data Source list (1), click the desired data source.
All the data sources referenced in the schematic dataset are available in the drop-down list.
- From the Tables list (2), click the table on which the query is going to operate.
The selected table's content is automatically displayed in area 3.
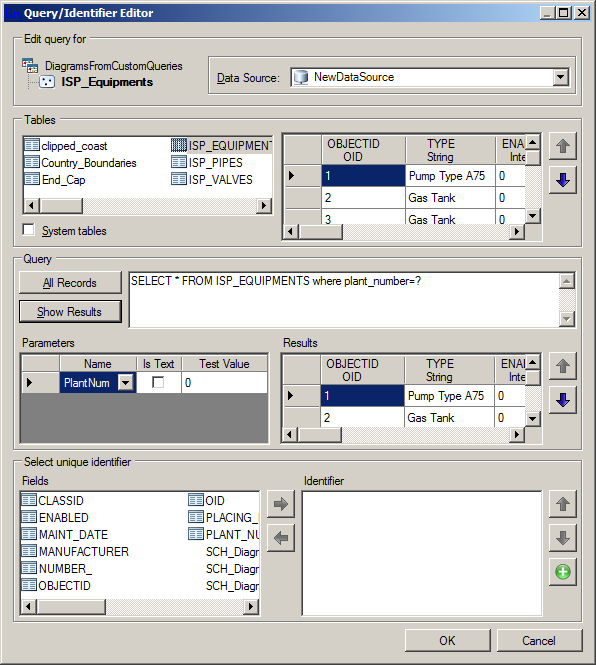
- In the Query area (4), type your query SQL code.
In this example, since you want to filter out the elements related to a given gas plant, define a query that works with the plant_number field as a parameter:

In the Parameters section, do the following:
- Choose the schematic attribute that will be used to run the query from the Name drop-down list. This schematic attribute is often specified for the related diagram template.
- Check the Is Text check box if the type of the attribute values is textual. Uncheck this check box for any other type of value.
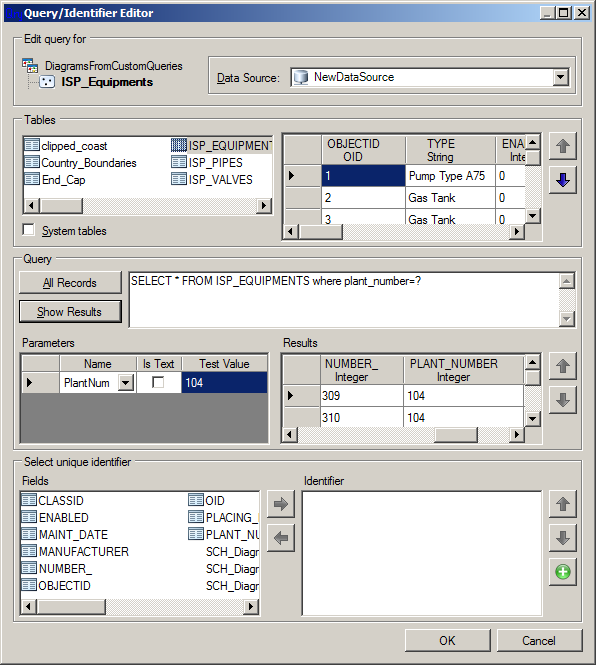
- In the Test Value field, specify a test value before clicking Show Results and testing the query result.
- Click Show Results.
The query result is displayed in the Results section (6):

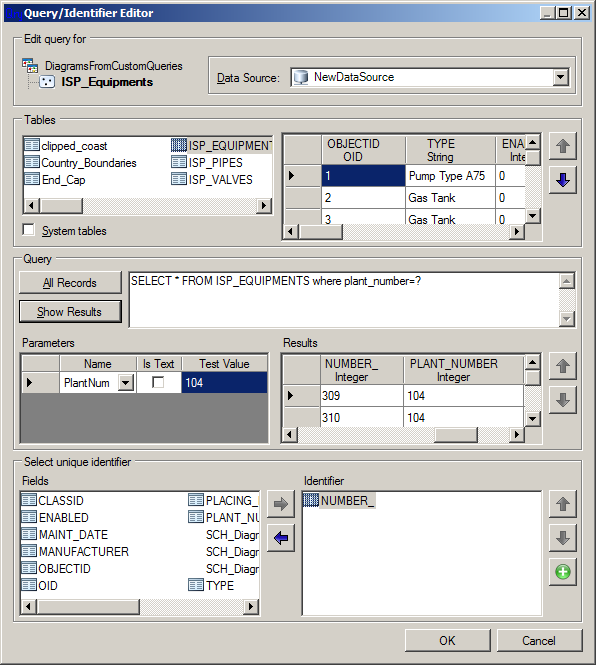
- From the Fields list (7), click the field that will be used to build the identifier for each schematic feature item returned by the query and use the Move Right button (8) to validate.
The chosen field name is automatically displayed in the Identifier list (9):

- Click OK to validate and stop the schematic feature class query definition.
The SQL code is automatically reported in the Query area field on the schematic feature class' Properties tab.