Route processing preferences are reusable and control how the Route Processing tool performs the following functions:
- Selects routes for processing
- Applies rules to routes during processing
- Sets route visibility
- Combines different identifiers for overlapping routes
- Offsets different routes
You create route processing preferences prior to running the Route Processing tool. You can create different preferences by giving each a unique name. You choose a specific named preference to apply to a route processing session.
- Start ArcMap.
- Make sure that the production properties are set correctly.
Properties include the product library workspace, production database workspace, Data Model Version, and Instances Maintained. The Data Model Version needs to be set to an AIS-based data model.
-
On the main menu, click
Customize > Production > Production Properties.
The Production Properties dialog box appears.
- Click Aviation Properties in the list on the left side of the Production Properties dialog box.
- Under Tool Options, click the cell next to Route Processing Preferences.
- Click the ellipsis (...) that appears next to Route Processing Preferences.
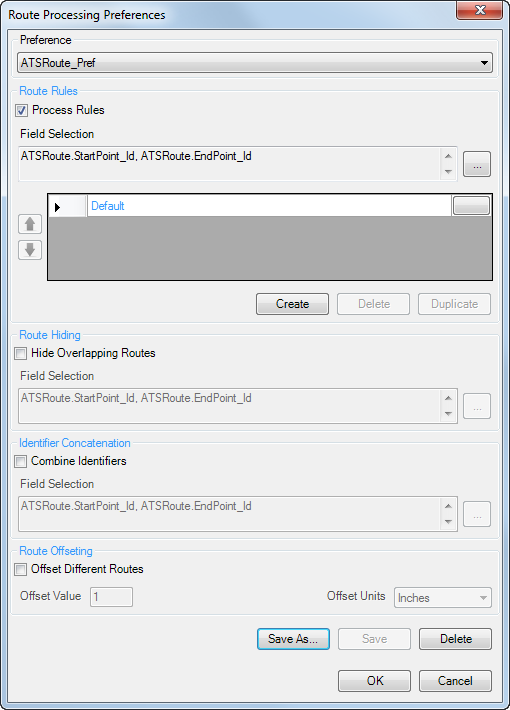
The Route Processing Preferences dialog box appears.
- To add additional fields to the field selection list, complete the following process:
The Process Rules check box is checked by default.
- Click the ellipsis (...) next to the Field Selection text box.
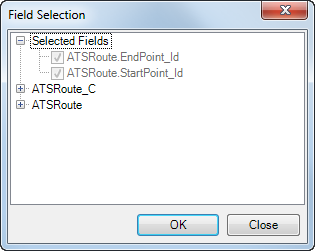
The Field Selection dialog box appears.

- Expand the ATSRoute_C or ATSRoute node to view the list of fields to include in the field selection.
- Check the check box next to any fields you want to include in the initial field selection step.
- Click OK.
The Route Processing Preferences dialog box appears. The Field Selection text box displays the additional fields you selected.
Step 8 covers how to change the default rule.
- Click the ellipsis (...) next to the Field Selection text box.
- To change the default rule, complete the following process:
- Click the button to the right of Default in the Route Rules table.
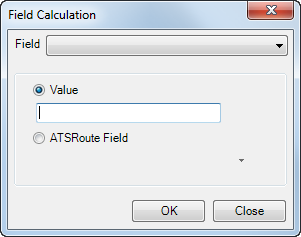
The Field Calculation dialog box appears.

- Click the Field drop-down arrow and choose a field to calculate.
- Depending on the type of field you chose, type a value in the Value text box or click ATSRoute Field and choose a field from the drop-down list.
- Click OK.
The Route Processing Preferences dialog box appears.
- Click the button to the right of Default in the Route Rules table.
- To hide overlapping routes, complete the following process:
- Check the Hide Overlapping Routes check box.
- Click the ellipsis (...) next to the Field Selection text box.
The Field Selection dialog box appears.
- Expand the ATSRoute_C or ATSRoute node to view the list of fields to include in the field selection.
- Check the check box next to any fields you want to include in the initial field selection step.
- Click OK.
The Route Processing Preferences dialog box appears. The Field Selection text box displays the additional fields you selected.
- To enable the tool to combine different identifiers from overlapping routes, complete the following process:
- Check the Combine Identifiers check box.
- Click the ellipsis (...) next to the Field Selection text box.
The Field Selection dialog box appears.
- Expand the ATSRoute_C or ATSRoute node to view the list of fields to include in the field selection.
- Check the check box next to any fields you want to include in the initial field selection step.
- Click OK.
The Route Processing Preferences dialog box appears. The Field Selection text box displays the additional fields you selected.
- To enable the tool to offset different routes, complete the following process:
- Check the Offset Different Routes check box.
- Type a value in the Offset Value text box.
- Click the Offset Units drop-down arrow and choose a unit type.
- Click Save As.
The Preference Name dialog box appears.
- Type a name for the preference in the Enter Name text box.
- Click OK.
The preference name appears in the drop-down list at the top of the dialog box.

- Click OK on the Route Processing Preferences dialog box.