Disponible avec une licence Production Mapping.
The Open Geospatial Consortium (OGC) Web Feature Service (WFS) provides a way to make your maps and data available in an easily accessible and recognized format over the web. The WFS specification is an open specification for serving geographic features to anyone with a supported client application. You can publish a WFS service to ArcGIS Server by enabling the WFS capability when you publish a map or image service in ArcGIS Desktop.
Production Mapping provides a way to consume WFS data, perform edit operations, and publish the resulting changes back to the service. To consume WFS data, you first need to establish a connection to the WFS service. To configure your WFS connection, follow these steps:
- Start ArcMap.
- Open the Catalog window.
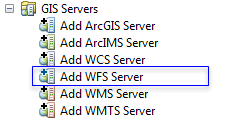
- Under GIS Servers, double-click Add WFS Server.

The Add WFS Server dialog box appears.
- Type the service URL.
- Click the Version drop-down arrow and choose the version of the WFS specification being used.
Versions 1.1 and 2.0 are currently supported. If you choose the Default option, it uses the latest supported version.
- Optionally, expand Advanced Settings and change the defaults required to connect to the service.
- Browse to a workspace schema XML that matches the data on the service.
This allows you to use domains and subtypes if the workspace XML uses them.
- Type the number of maximum features that you want per request when querying features from the service.
- Check the Use field aliases for schema mapping check box if the service is using field aliases for mapping the fields.
The fields specified in the schema file must match all field names or aliases in the service.
- Check the Use HTTP GET requests check box if you want the service requests to be submitted using the HTTP GET method instead of POST.
- Check the Flip axis order check box if you want to override the default ordering.
The default axis ordering is Latitude/Longitude (y, x).
- Check the Flip filter axis order check box to override the default ordering.
The default axis ordering is Latitude/Longitude (y, x).
- Browse to a workspace schema XML that matches the data on the service.
- Click Get Layers to preview what the service contains.
You can choose the layers if you only want a subset of layers hosted by the services.
- If applicable, provide the user name and password.
- Cliquez sur OK.