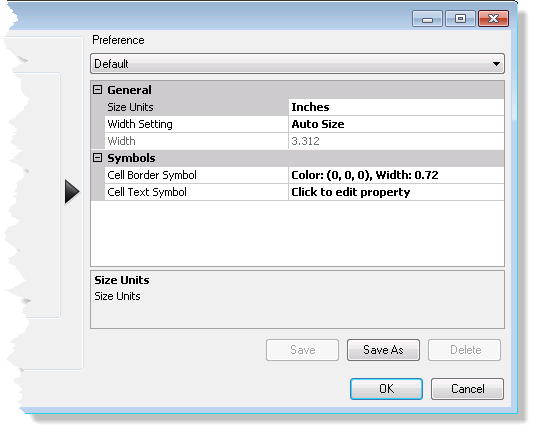
Before a minima table has been added to the map layout, the appearance of the table can be determined to ensure it meets a product specification or organizational standard. Several aspects of the table can be customized, which include all the cell symbols, the table size, and the fonts that create the table.
The properties are described as follows:
- Size Units—Properties related to the unit of measure for the table size
- Width Setting—Properties related to how the table width is sized
- Width—The defined width of the table (in units determined by the Size Units property)
- Cell Border Symbol—Properties related to the line symbols of the table.
- Cell Text Symbol—Properties related to the text within the table cells
When you modify the line symbol or a text element on the table, there is a separate dialog box that appears so you can customize the color, size, and other aspects of the symbol's style.
- Start ArcMap.
- On the main menu, click Customize > Production > Production Properties.
The Production Properties dialog box appears.
- Click Aviation Properties in the list on the left side of the Production Properties dialog box.
-
In the Element Options section, click the cell next to Minima Table and click the ellipsis button (...) that appears.
The Minima Table dialog box appears.

- To modify the general settings, do the following:
- Click the cell next to Size Units and click the drop-down arrow that appears to choose a unit.
This is the unit of measure for the table size.
- Click the cell next to Width Setting and click the drop-down arrow that appears to choose a setting.
This determines how the table width is sized.
- Click the cell next to Width and type a number for the width of the table.
This is the defined width of the table in units determined by the Size Units property.
- Click the cell next to Size Units and click the drop-down arrow that appears to choose a unit.
- To modify the cell border symbol, click the cell next to Cell Border Symbol, click the ellipsis button (...) that appears, and change the color, width, or units for the line.
The updated line symbol appears in the Minima Table dialog box.
- To modify the text symbols, do the following:
- Click the cell next to the symbol name and click the ellipsis button (...) that appears.
The Editor dialog box appears.
- Modify the symbol properties as needed.
Properties that can be modified include the font, size, style, offset, angle, alignment, position, and masking.
- Click OK.
- Click the cell next to the symbol name and click the ellipsis button (...) that appears.
- Click Save to save the settings you have modified in the current preference.
These settings are applied to the new elements you create in the future, unless the settings are modified again.
- Click OK.
The Production Properties dialog box appears.
- [OK] をクリックします。
The Minima Table dialog box appears.