Data frame rules define a data frame's extent, size, scale, rotation, and coordinate system. You can configure data frame rules and apply them to a single data frame. You can save data frame rules to an .xml file. This enables reuse and standardization of rules across your organization. For example, you could use data frame rules to enforce standardized settings for basemaps.
The following steps detail how to create data frame rules for a single data frame.
- Start ArcMap.
- Switch to layout view.
-
Click the Add Data button
 on the Standard toolbar.
The Add Data dialog box appears.
- Navigate to <ArcGIS install folder>\ArcGIS\Desktop10.3\TemplateData\Template.gdb.
- Add the States feature class from the USA feature dataset to ArcMap.
- Zoom to California until it covers the entire data frame.
- On the main menu, click Customize > Toolbars > Production Cartography.
The Production Cartography toolbar appears.
- Click the Layout window button
 on the Production Cartography toolbar.
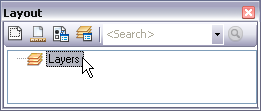
The Layout window appears.
- Click the Layers data frame in the Layout window.

- Click the Apply Data Frame Rules button
 on the Layout window.
The Apply Data Frame Rules dialog box appears.
- Click the Properties button
 .
.The Data Frame Rules dialog box appears.
- Click the General tab.
- Click the Allow drop-down arrow and click Extent.
- Check the Round to Nearest check box.
- Type 1000 into the Round to Nearest text box.
- Click the Rotation tab.
- Click the Rotate to True North option.
- Click the Coordinate Systems tab.
- Click the Type drop-down arrow, then click Calculate UTM Zone.
- Click OK.
The Apply Data Frame Rules dialog box appears.
- Click Apply on the Apply Data Frame Rules dialog box.
The data frame rules you defined are applied to the active data frame. The Status - Data Frame Rules dialog box displays the operation status.
- Click OK to close the Status - Data Frame Rules dialog box.