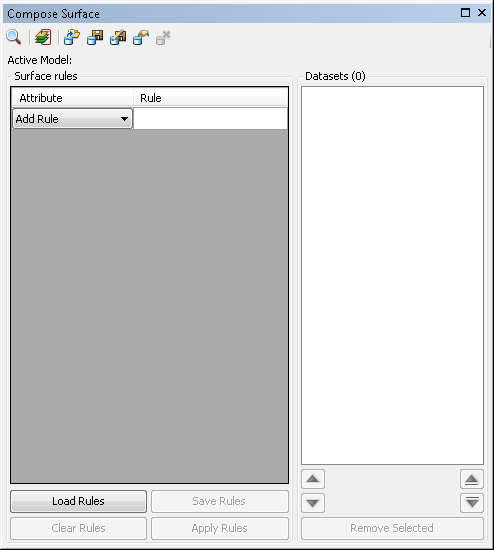
After you have searched and filtered your bathymetry data in the Explore Bathymetry window, you can use it to create a surface. If you have previously defined a rule file, you can load it into the Compose Surface window.
- Start ArcMap.
- On the main menu, click Customize > Toolbars > Bathymetry.
-
Click the Compose Surface button
 on the Bathymetry toolbar.
The Compose Surface window appears.

- Click the Add Datasets From Explore Bathymetry Window button
 located at the top of the Compose Surface window.
The filtered bathymetry is added to the Filtered Datasets list on the Compose Surface window. Files at the top of the list take display priority when generating a preview.
- Click Load Rules.
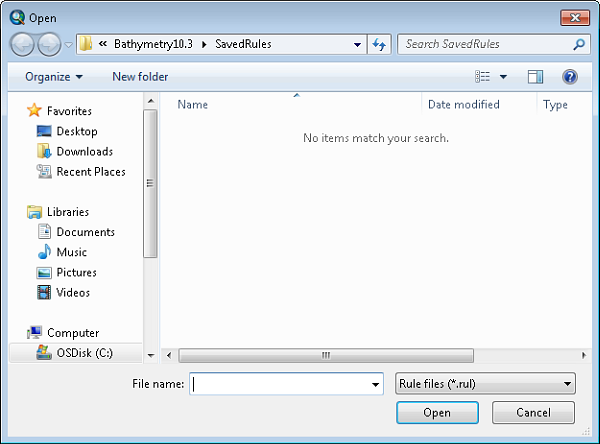
The Open dialog box appears.

- Browse to and select the rule file you want to load into the Compose Surface window.
- Click Open.
The rule file is loaded into the Compose Surface window.
- Optionally select one of the items in the Filtered Datasets list.
- Optionally click the up or down arrows to adjust the display order for that item.
The up and down arrows located at the bottom left of the Filtered Datasets list will move the bathymetry items up or down by one position in the list. The up and down arrows located at the bottom right of the filtered datasets list will move a bathymetry item to the top of the list or to the bottom of the list, respectively.
- Optionally click Apply Rules.
- Click the Preview button
 to generate a preview of the ordered surface.
A mosaic dataset containing all sorting and display rules is added to the table of contents in ArcMap.