Curved approach obstruction identification surfaces
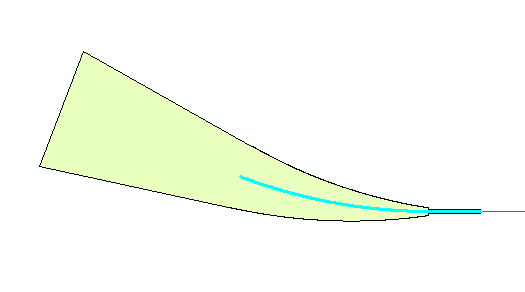
Obstruction identification surfaces (OIS) are imaginary surfaces that surround airfields and identify obstruction areas. Each OIS contains several parts that vary depending on whether it is for civilian or military purposes. The Create Curved Approach Obstruction Identification Surfaces tool allows you to generate a curved approach surface based on five different specifications: FAA Advisory Circular 150/5300-13A, FAA Advisory Circular 150/5300-18B, FAA Regulations Part 77, ICAO Annex 14, and ICAO Annex 15.

Create a curved approach based on an existing flight path
The following steps will allow you to create a curved approach surface based on an existing flight path.
- 启动 ArcMap。
- On the main menu, click Customize > Toolbars > Aviation Airports.
- Select runway and flight path features in the map for which to create the surface.
- Click the Create Curved Approach Surface button
 on the Aviation Airports toolbar.
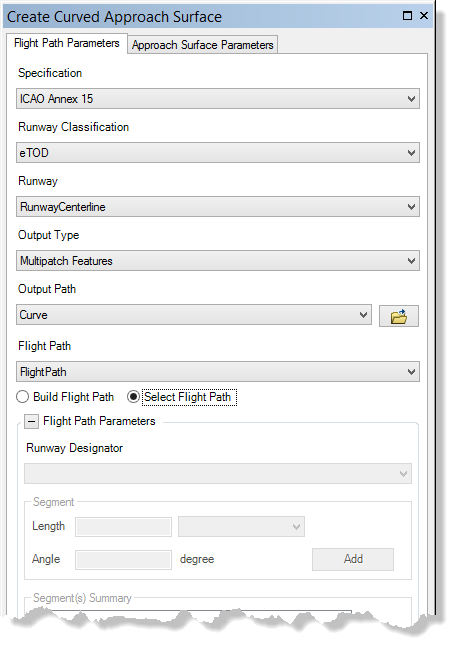
The Create Curved Approach Surface dialog box appears.
- Click the Specification drop-down arrow and choose a specification for the approach surface.
- Click the Runway Classification drop-down arrow and choose a classification for your runway end.
- Click the Runway drop-down arrow and choose the layer for your runway feature class.
- Click the Output Type drop-down arrow and choose an output type for the OIS features.
- Polygon Shapefile—The OIS features are generated in a new or existing polygon shapefile. If an existing shapefile is selected, the features are appended to it. All the OIS features are written to a single shapefile.
- Multipatch Shapefile—The OIS features are generated in a new or existing multipatch shapefile. If an existing shapefile is selected, the features are appended to it. All the features are written to a single shapefile.
- TIN—The OIS features are generated in a new TIN. One TIN is created for each surface.
- Polygon Features—The OIS features are appended to an existing polygon feature class. All the features for the runways are appended to the same feature class.
- Multipatch Features—The OIS features are generated in a new or existing multipatch feature class. All the features for the runways are appended to the same feature class.
- Click the Output Path drop-down arrow and choose the output path for the OIS features.
If the feature class or shapefile is loaded in the map
Click the Output Path drop-down arrow and choose the feature class or shapefile that will store the OIS features.
If the feature class or shapefile is not loaded in the map, or the output type is a TIN
Click the ellipsis button (...) next to the Output Path text box and browse to the feature class or workspace in which the shapefile or TIN will be created.
- Click the Flight Path drop-down arrow and choose the layer that will store the generated flight path.
- Click the Select Flight Path option.

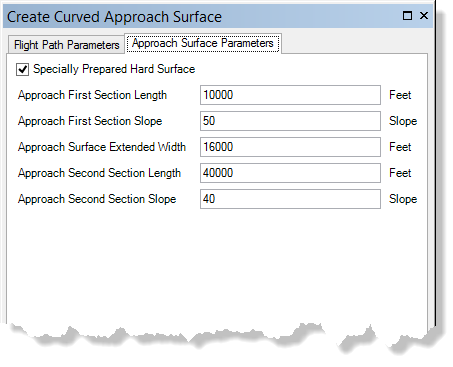
- Optionally click the Approach Surface Parameters tab and change the values as necessary.

- Click Generate.
Create a curved approach based on parameters
The following steps will allow you to create a curved approach surface that is built based on input parameters such as length and angle.
- 启动 ArcMap。
- On the main menu, click Customize>Toolbars>Aviation Airports.
- Select a runway feature in the map.
- Click the Create Curved Approach Surface button
 on the Aviation Airports toolbar to open.
The Create Curved Approach Surface dialog box appears.
- Click the Specification drop-down arrow and choose a specification for the approach surface.
- Click the Runway Classification drop-down arrow and choose a classification for your runway end.
- Click the Runway drop-down arrow and choose the layer for your runway feature class.
- Click the Output Type drop-down arrow and choose an output type for the OIS features.
- Polygon Shapefile—The OIS features are generated in a new or existing polygon shapefile. If an existing shapefile is selected, the features are appended to it. All the OIS features are written to a single shapefile.
- Multipatch Shapefile—The OIS features are generated in a new or existing multipatch shapefile. If an existing shapefile is selected, the features are appended to it. All the features are written to a single shapefile.
- TIN—The OIS features are generated in a new TIN. One TIN is created for each surface.
- Polygon Features—The OIS features are appended to an existing polygon feature class. All the features for the runways are appended to the same feature class.
- Multipatch Features—The OIS features are generated in a new or existing multipatch feature class. All the features for the runways are appended to the same feature class.
- Click the Output Path drop-down arrow and choose the output path for the OIS features.
If the feature class or shapefile is loaded in the map
Click the Output Path drop-down arrow and choose the feature class or shapefile that will store the OIS features.
If the feature class or shapefile is not loaded in the map, or the output type is a TIN
Click the ellipsis button (...) next to the Output Path text box and browse to the feature class or workspace in which the shapefile or TIN will be created.
- Click the Flight Path drop-down arrow and choose the layer that will store the generated flight path.
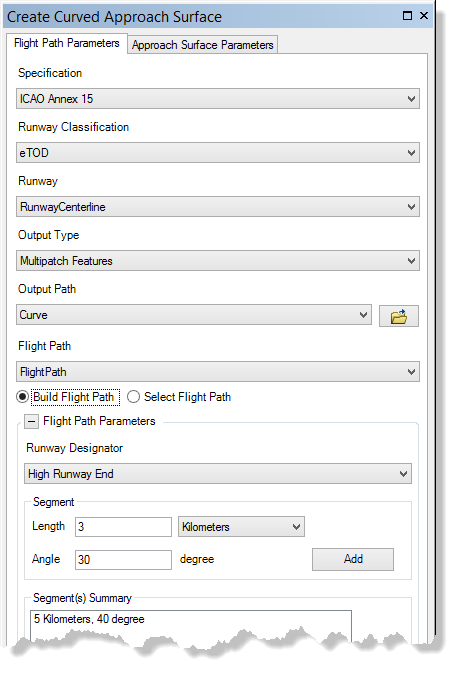
- Choose the Build Flight Path option.
- Click the Runway Designator drop-down arrow and choose a runway end for which you want to create a surface.
- Add the length, the length unit of measure, and the angle for the curves you wish to create and click Add.
- Optionally click the Approach Surface Parameters tab and change the values as necessary.
- Click Generate.
