获得 Production Mapping 许可后可用。
You can upgrade most PLTS for ArcGIS 9.3.1 grid template XMLs to version 10.x grid template XMLs. If you have created the template with the 9.3.1 PLTS Grid Designer, you can use the Grids and Graticules Designer tool in Esri Production Mapping to upgrade it.
The upgrade allows you to use new tags and modify settings such as primary coordinate system, reference scale, rotation, geometry, and representation preferences. If you save these modifications, the Grids and Graticules Designer tool will upgrade the grid template XML to 10.x. The 9.3.1 grid feature datasets cannot be automatically upgraded. However, the grids stored in the 9.3.1 feature dataset can be migrated to a 10.x grid feature dataset using the steps in the section 'Saving grids stored in a feature dataset into an XML file' below.
Saving grids stored in a feature dataset into an XML file
This section is optional and used only if you have grids stored in a 9.3.1 feature dataset. These grids can be migrated to a 10.x grid feature dataset by first saving the grid to an XML file. If you do not have grids stored in a feature dataset, or only in grid templates, skip this section and use the procedure in 'Upgrading a grid template'.
- Start ArcMap using version 9.3.1 and load grid data into your table of contents.
- Click the Grid Designer button on the PLTS Grid Manager toolbar.
The Grid Designer window appears.
- In the tree view, choose the grid you want to save.
- Save a copy of the grid to a 9.3.1 version XML.
- Click the Save button.
The Save As dialog box appears.
- Browse to a file location where you want to save the grid.
- Type a name for the grid XML file in the File name text box.
- Click Save.
- Click the Save button.
After you have upgraded your 9.3.1 grid definition to 10.x, upgrade the XML file using the steps in the section 'Upgrading a grid template' below.
Upgrading a grid template
You can upgrade PLTS for ArcGIS 9.3.1 grid template XMLs to version 10.x grid template XMLs in the Grids and Graticules Designer window.
- 启动 ArcMap。
- On the main menu, click Customize > Toolbars > Production Cartography.
-
Click the Grids and Graticules Designer
window button
 .
.
The Grids and Graticules Designer window appears.
- Click the Open button
 on the Grids and Graticules Designer window.
The Open dialog box appears.
- Navigate to the 9.3.1 grid template XML and click Open.
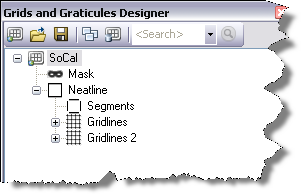
The grid template appears in the tree view of the Grids and Graticules Designer window.

- Right-click the grid and click Properties.
The Grid Properties dialog box appears.
- If necessary, click the General tab on the Grid Properties window.
- If necessary, modify the primary coordinate system.
- If necessary, add coordinate system zones feature classes when creating zippers.
- Click the Feature Settings tab on the Grid Properties window.
- If necessary, modify the Reference Scale value.
- If necessary, modify the Rotation value.
- If necessary, modify the Geometry settings.
- If necessary, verify that the XY Tolerance is equal to or greater than the geodatabase tolerance used for saving the grid features.
- If necessary, click Representation Preferences.
The Representation Preferences Option dialog box appears.
- If necessary, set representation preferences.
- Click OK.
The Grid Properties window appears.
- Click the Save as button
 on the Grids and Graticules Designer window to save the upgraded grid XML.
When you have completed the upgrade, you will also need to use the Make Grids And Graticules Layer tool to create a new grid for your AOI.