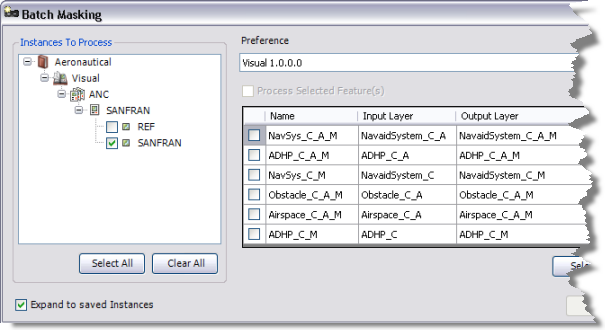
The Batch Masking tool creates masks based on the rules defined in the Batch Masking Preferences dialog box. You can create masking features for a selected set of features or for an entire instance. Masks are only created for the selected rules.
- 启动 ArcMap。
- Add all the necessary masking layers and corresponding feature layers to the Table Of Contents window in your MXD.
- Ensure that the correct product library and production database are set.
- Ensure that the data frame is associated with a product instance.
- On the main menu, click Customize > Toolbars > Aviation Data Management.
- Optionally select the features for which you want to create masks.
If no features are selected, masks will be created for the instances you select in step 9.
- Click the Batch Masking button
 on the Aviation Data Management toolbar.
The Batch Masking dialog box appears.

- Click the Preference drop-down arrow and choose a set of preferences for masking.
Each set of rules typically corresponds with products stored in the product library. For example, if you have imported masking rules from an older product library, you will have those masking preferences available from the drop-down list.
- Check the box next to the instance in the Instances to Process list for which you want to create masks.
- Check the boxes next to the masking rules of the layers for which you want to create masks.
- Optionally check the Process Selected Feature(s) check box to create masks only for the features you selected.
- Click OK to begin processing.
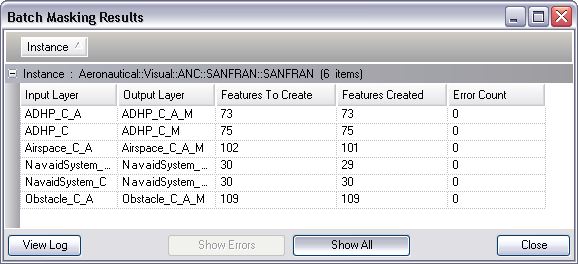
The Batch Masking Results dialog box appears.
- Expand the tree view next to the instance to review the results.

- Click Close on the Batch Masking Results dialog box.
- 单击关闭。
Values for the Name, Input Layer, and Output Layer columns are displayed. If a rule is not valid for the particular instances selected, the results will show up as red in the grid and will not be selectable.
A rule is invalid for an instance if one or both of the layers the rule uses is missing from the table of contents, the input layer has 0 features in the current map, or if the reference scale is not set for the data frame. A ToolTip appears when you hover the pointer over the red text and tells you why the rule is invalid. A reference scale must be set on the instance to run the Batch Masking tool. If a reference scale is not set, all rules will show up as red and will be invalid for that instance; you will not be able to create masks for that instance.