With an appropriate representation rule applied, the Localizer Feather geometric effect allows you to customize the localizer feather while retaining the size, shape, scale, fill pattern, and line weight. You can edit the default size of the generated symbol and stretch it to the length needed by using the representation editing tools. This addresses issues seen using font glyphs, such as fill dots becoming exponentially larger or line weight increasing when stretching to the desired size, and the geometric effect controls the shape of the outer polygons with regard to their angles.
There are four default localizer feather symbols included with ArcGIS Aviation Charting in the PLTS_ICAO style as representation rules: fill on the top half, fill on the bottom half, fill in the whole feather, and no fill.

To be able to use the localizer feather symbols, you need to have data that you want to symbolize as the localizer feather.
- 启动 ArcMap。
- On the main menu, click Customize > Toolbars > Representation.
- On the main menu, click Customize > Toolbars > Aviation Editing.
- Click the Production Start Editing button
 on the Aviation Editing toolbar.
- Click the Select tool
 on the Representation toolbar.
 - Click to select the localizer feather you want to modify.

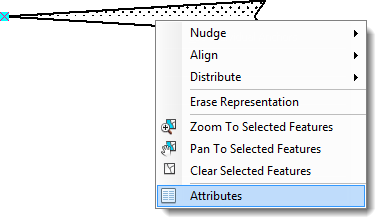
- Right-click the representation and click Attributes.

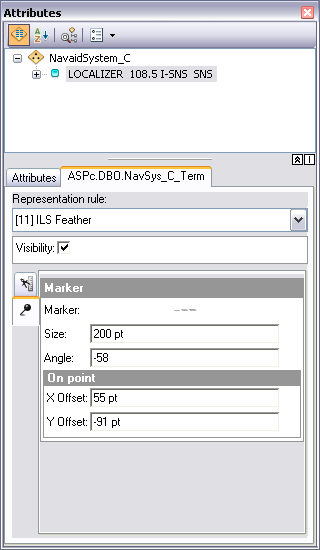
The Attributes window appears.
- Click the representation in the Attributes window.

- Manually modify the attributes of the representation marker as needed.
- Click the Save Edits button
 .
.
- Click the Stop Editing button
 on the Production Editing toolbar.
The geodatabase becomes uneditable. If you have made edits, you will be prompted to save the changes if you want.