As you use ArcGIS Roads and Highways, there may be a time when the LRS Network properties need to be changed. Examples of situations when the properties would be edited include the following:
- Changing the field mapping for the network required fields (such as the From Date)
- Changing the fields that compose the route ID for the network
- Editing the padding and null settings for the fields that compose the route ID
- Updating the configuration of the lookup table or configuring one for the first time
- Adding, updating, or removing route dominance rules
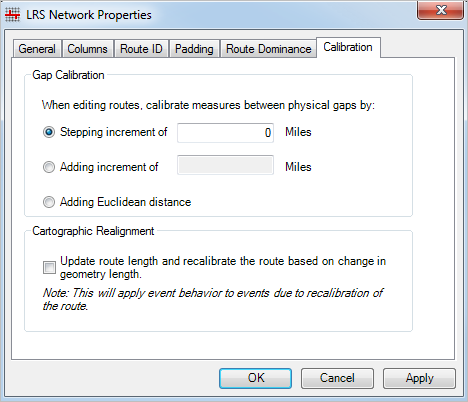
- Changing the calibration method when editing physically gapped routes
- Updating whether routes are recalibrated due to changes in geometry length when performing a cartographic realignment
To edit the properties of an LRS Network, use the following steps.
- 启动 ArcMap。
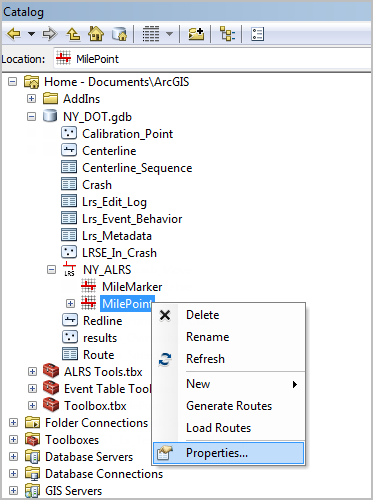
- In the Catalog window, expand the LRS in the target geodatabase.
- Right-click the LRS Network and click Properties.

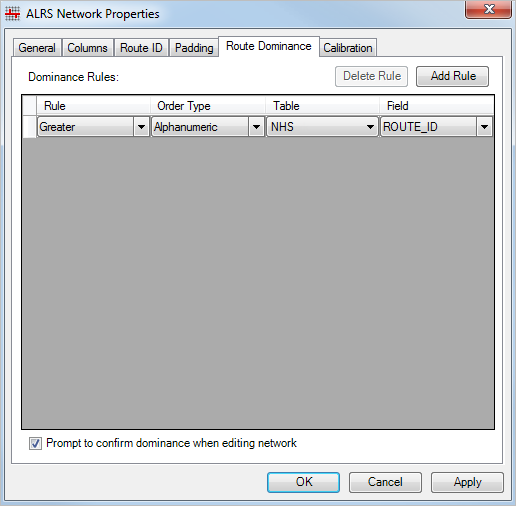
The ALRS Network Properties dialog box appears.

- To edit the field mapping of the network required fields, such as the From Date, click the Columns tab.

- To edit the fields that compose the route ID, click the Route ID tab.
Learn more about constructing the route ID in the network using concatenated route identifiers

A message will appear when browsing to another tab or saving your changes, informing you that some of the feature classes and tables have Route ID field lengths less than the minimum required if changes to fields composing the route ID will create a route ID greater than the length of the Route ID field in any of the following: centerline sequence table, calibration points feature class, network feature class, intersection feature class, or event feature classes for the network. Complete the substeps if this is the case.
No message will appear when saving your changes or browsing to another tab if no changes to the fields composing the route ID were made or changes to fields composing the route ID will create a route ID less than or equal to the length of the Route ID field in all of the following: centerline sequence table, calibration points feature class, network feature class, intersection feature class, or event feature classes for the network.
- To update the Route ID field length in each table and feature class, click Yes if you see a message that the field lengths are not long enough.

If the tables and feature classes requiring updates are empty, the Route ID field length in each table and feature class will be updated.
If any of the tables and feature classes requiring updates have one or more records, a message will appear informing you that the route ID was not able to be altered in some tables and feature classes. A list of tables and feature classes will be provided. After saving the changes to the network properties, manually update the Route ID field in the tables and feature classes listed.

- To update the Route ID field length in each table and feature class, click Yes if you see a message that the field lengths are not long enough.
- To edit the padding, null, and lookup table settings for the fields in the route ID, click the Padding tab.
Learn more about configuring padding, null, and lookup table settings

- To edit the route dominance rules for the network, click the Route Dominance tab.
Learn more configuring route dominance

- To edit the calibration rules for physical gaps, click the Calibration tab.
- Once you are finished making all the changes to the network properties, click Apply to save the changes.
- Click OK to close the window.
