Time is very important with respect to event data. Not only do users need to see how events looked on the highway at the time of the highway alignment, they also need to see how events may change or accumulate over time. ArcGIS Roads and Highways supports both the temporal view date (TVD) and the time slider for viewing time-aware event data. Setting and viewing events by TVD works exactly like viewing LRS Networks based on time. The steps below explain how to use the time slider for displaying linear referencing system (LRS) event layers. Refer to Time-aware LRS to learn more.
- Start ArcMap and add event layers to your map.
- Right-click an event layer in the table of contents (TOC) and click Properties.
- Click the Definition Query tab on the Layer Properties dialog box. Remove all TVD definition query filters prior to using the Time Slider tool.
- Navigate to the Roads and Highways Editing toolbar and click the Set Date Filter button
 .
.
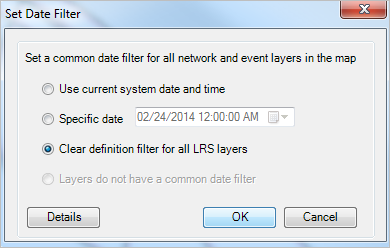
- In the Set Date Filter dialog box, click Clear definition filters for all LRS layers.

- Click OK.
All definition queries have been removed from your layers.
- Navigate to the Roads and Highways Editing toolbar and click the Set Date Filter button
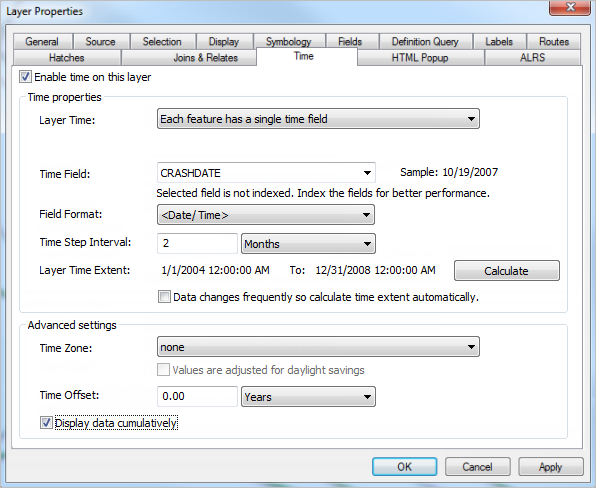
- Click the Time tab on the Layer Properties dialog box.
- Set the time properties for your event layer.
- Check Enable time on this layer.
- Specify the field to be used for visualizing time in the Time Field drop-down menu.
- Specify a Time Step Interval to let ArcMap know how granularly to step through time. For highways, data analysis is usually performed in months, quarters, and years, but you can step through time down to the millisecond level.
- Click Calculate to establish the time interval for your data. Doing this in advance will make time display render more quickly.
- Check Display data cumulatively if you want to see events accumulate over time.
- Click OK.

- Click the Open the Time Slider Window button
 to open the Time Slider window.
 - Move the time slider along the time scale to see changes in your events.

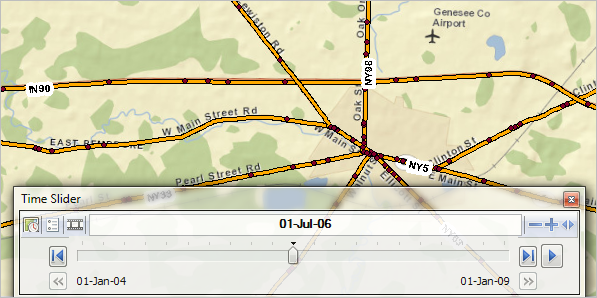
Crashes as of 01-Jul-06 
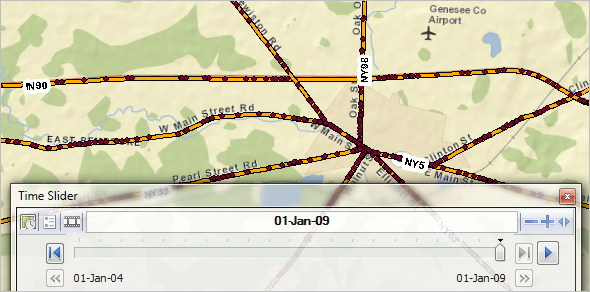
Crashes as of 01-Jan-09