Mit der Data Reviewer-Lizenz verfügbar.
Geoprocessing models can be scheduled to run on a regular basis using the Windows Task Scheduler. Similar to running a batch job using the Reviewer Batch Validate tool, the Task Scheduler runs batch jobs and writes the results to the Reviewer table in a specified Reviewer session. Batch jobs can be scheduled to run once at a specific date and time or to run repeatedly at regular intervals.
In this exercise, you will create a model, export it as a script, and use it to create a Windows task that will run the batch job on a daily basis and write the results to a new Reviewer session.
Exercise 3a: Creating a geoprocessing model
The Create Reviewer Session and Execute Reviewer Batch Job geoprocessing tools can be combined in a model. This allows you to model the process so it can be validated before it is converted to a script that will be run as a Windows scheduled task.
- Start ArcMap.
- Click the ModelBuilder button
 on the Standard toolbar.
The Model window appears.
- In the Catalog window, expand Data Reviewer Tools.
- Drag the Create Reviewer Session and Execute Batch Job geoprocessing tools to the Model window.
- Double-click the Create Reviewer Session tool.
The Create Reviewer Session dialog box appears.
- Click the browse button next to the Reviewer Workspace text box.
The Reviewer Workspace dialog box appears.
- Browse to the Reviewer.gdb file and click Add.
The Reviewer.gdb file is located at C:\ArcGIS\ArcTutor\DataReviewer.
- Type Exercise 3 in the Session Name text box.
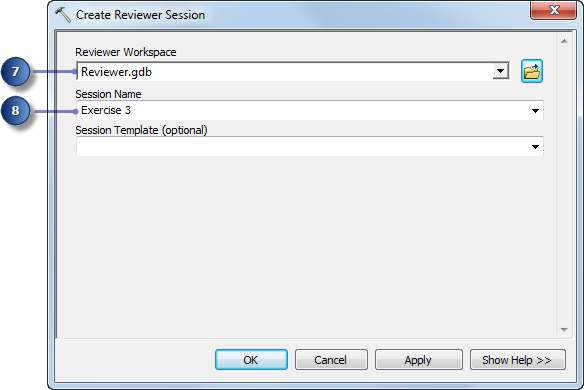
- Click OK.
The Model window appears. The Create Reviewer Session tool is not ready to run in the model.
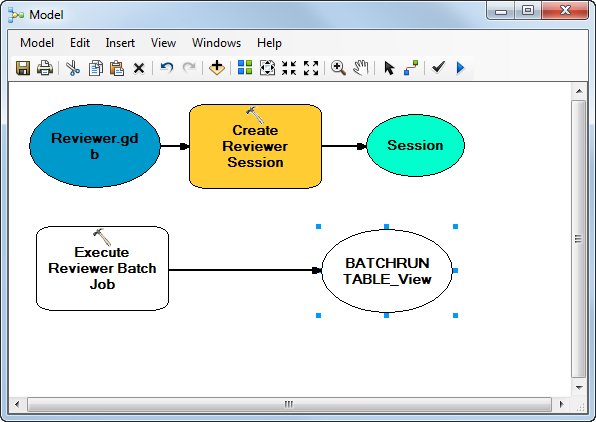
- Double-click the Execute Reviewer Batch Job tool.
- Click the Reviewer Workspace drop-down arrow and choose Reviewer.gdb.
- Click the Session drop-down arrow and choose Session.
The session name is incomplete because it has not been created yet. You will fix this later in the exercise.
- Click the browse button next to the Batch Job File text box.
The Open dialog box appears.
- Browse to the batch job you created in Exercise 2c and click Open.
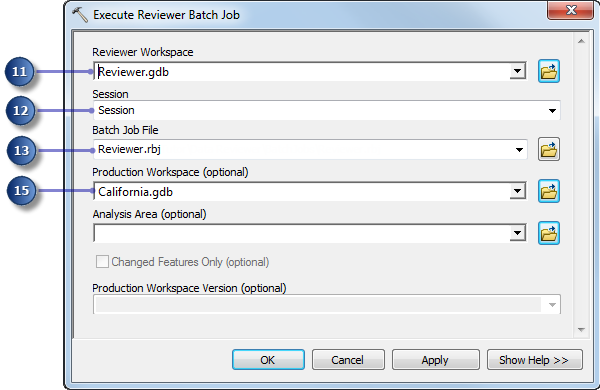
- Click the Production Workspace (optional) drop-down arrow and choose California.gdb.
- Click OK.
The Model window appears. The Execute Reviewer Batch Job tool is now ready to run in the model.
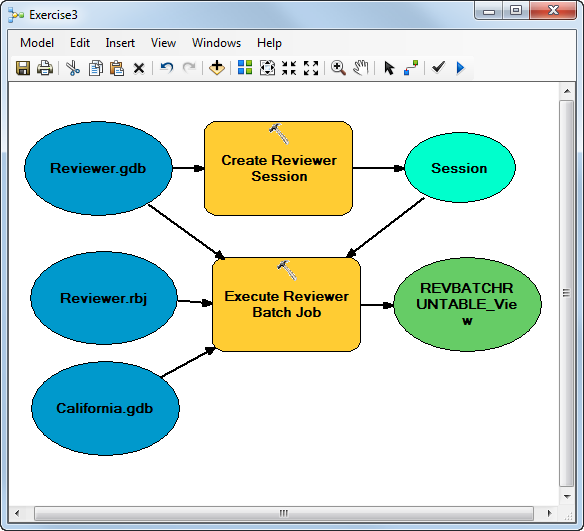
- Click Model and click Validate Entire Model.
There are no messages, which means the model is valid.
Exercise 3b: Exporting the model to a script
After the tools are ready to run in a model and the model has been validated, it can be exported to a Python script. In this part of the exercise, you are going to export the model you created to a script that will be used to create a Windows scheduled task.
- Click Model > Export > To Python Script.
The Save As dialog box appears.
- Type a name for the script in the File name text box, such as Exercise 3.
- Click Save.
- Close the Model window.
- Click No on the Save Model message.
Exercise 3c: Updating the model parameters
To successfully run, the script needs to be modified to include the Reviewer session name.
- Browse to the Exercise 3.py file you created in the previous section.
- Right-click the Exercise 3.py file and click Edit with IDLE.
The Python file opens in the IDLE window.
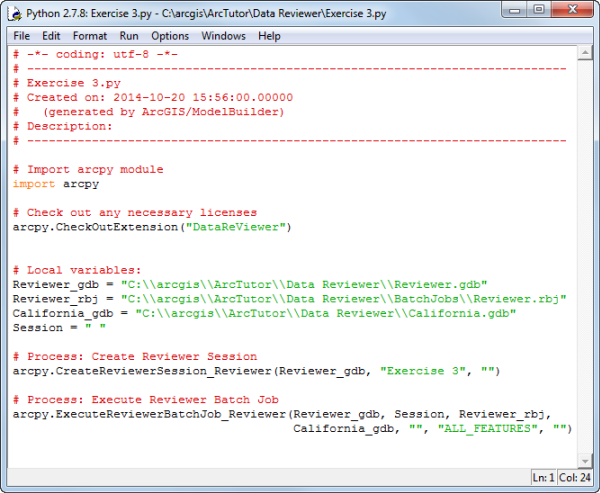
- Under # Process: Create Reviewer Session, type Session =.
- Under # Local variables, delete Session = " ".
The final script will resemble the following.
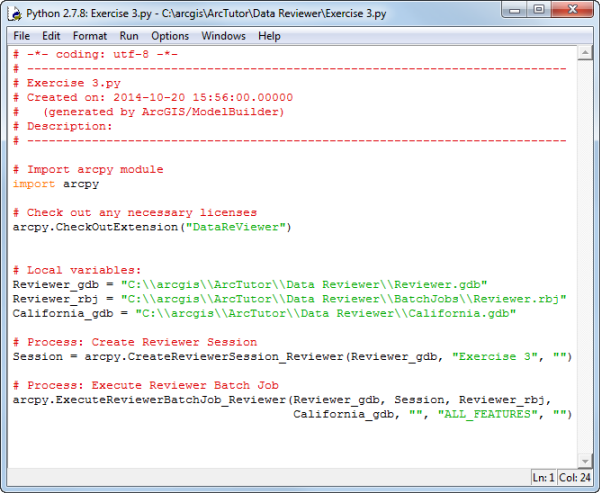
- Click File > Save to save the changes.
- Close the Python editor.
Exercise 3d: Create a Windows scheduled task
The Task Scheduler in Microsoft Windows allows you to schedule a script or application to run at regular intervals. In this exercise, you are going to use the Python script from Exercise 3c to create a scheduled task.
- Start the Task Scheduler by doing one of the following.
- Windows 7: Click the Start menu, type Task Scheduler in the search bar, and press Enter.
- Windows 8: Open the Control Panel and click System and Security. Under Administrative Tools, click Schedule tasks.
The Task Scheduler window appears.
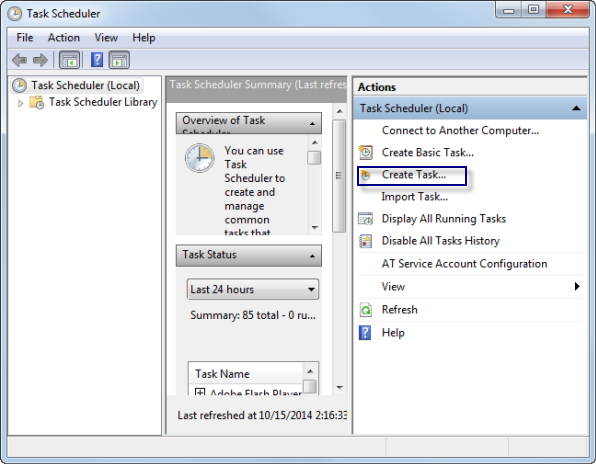
- Click Create Task.
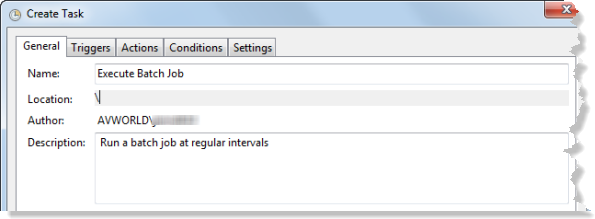
- Click the General tab.
- Type Execute Batch Job in the Name text box.
- Type Run a batch job at regular intervals in the Description text box.
- Click the Triggers tab.
- Click New.
The New Trigger dialog box appears.
- In the Settings area, choose Daily.
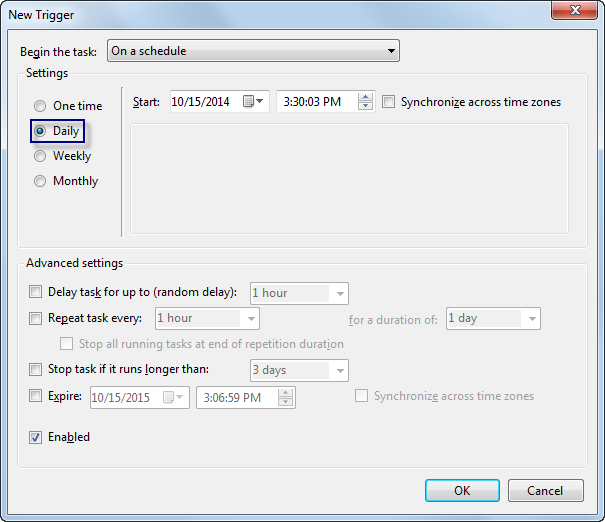
- Set the current date and time for Start using the calendar drop-down arrow and time.
- Klicken Sie auf OK.
- Click the Actions tab.
- Click New.
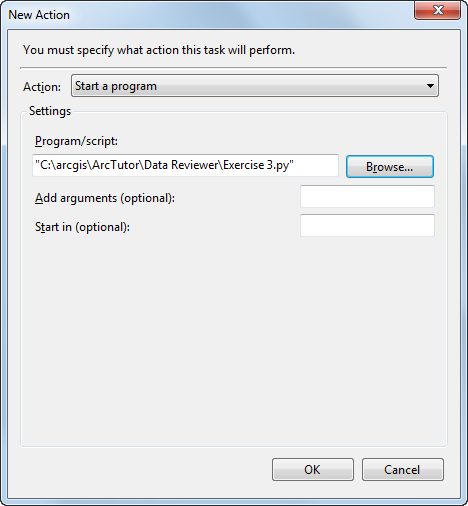
The New Action dialog box appears.
- Click Browse next to the Program/script field.
The Open dialog box appears.
- Browse to the script created in Exercise 3c and click Open.
The New Action dialog box appears with the path to the script.
- Click OK.
The Create Task dialog box appears.
- Click OK.
The Task Scheduler window appears.
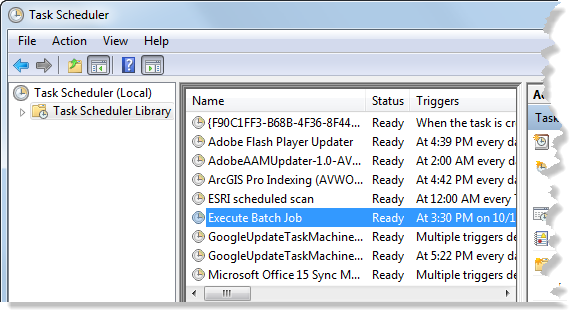
- Click the Task Scheduler Library node and verify that the Execute Batch Job task appears in the list in the center.
In this exercise you created a model and exported it as a Python script. After that, you customized the script and set it up to run as a scheduled task using the Task Scheduler.