Mit der Workflow Manager-Lizenz verfügbar.
Once you have defined a workflow, you will associate it with a job type in the Administrator. If the job type is active, users can create and execute jobs in the main application. An advantage here is that you can reuse a workflow on multiple job types that follow the same sequence of steps.
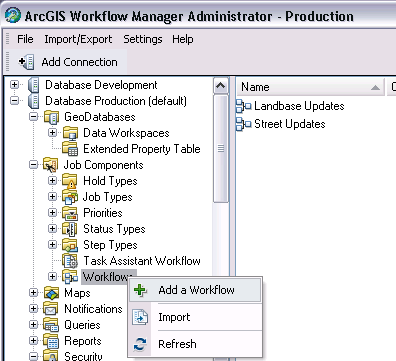
- Open the Workflow Manager Administrator and connect to your Workflow Manager (Classic)database.
- In the Administrator, navigate to the Workflows folder under the job components
The list will contain all the currently configured workflows. If no workflows are configured, the list will be blank.
- Right-click the folder and click Add Workflow or select an existing workflow and click Edit Item.
The Workflow dialog box appears.

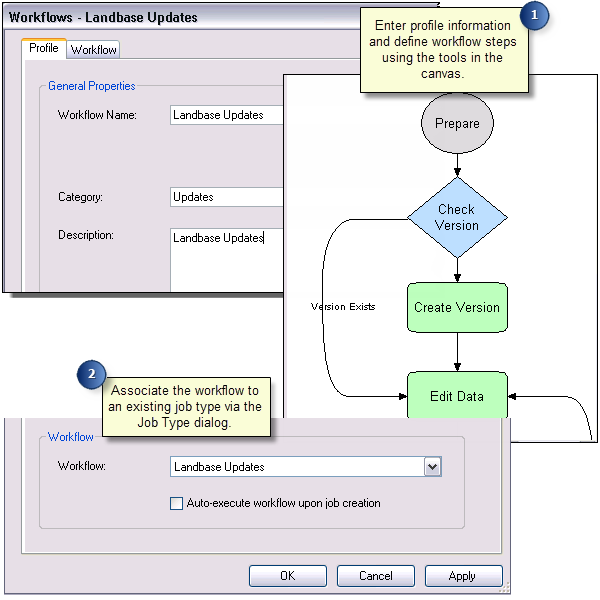
- Enter Profile information for your workflow, such as Name and Description.
- If you want to display step adornments in the workflow, check the Display step and path adornments check box.
The Display step and path adornments setting is defined within Workflow Manager Administrator, however, once applied, this setting is consumed by ArcGIS Pro. This setting is enabled by default for new workflows and disabled for workflows created in a version earlier than 10.4.
- Use the tools to drag steps, connect steps, and define workflow properties in the workflow canvas.
Go to Tools for configuring workflows for information on the tools available.
- Validate and save the workflow once you are satisfied.
- Click OK on the Workflow dialog box.
- In the Administrator, navigate to the Job Types folder under the job components.
The list will contain all the currently configured Job Types. Click here for more information on creating job types.
- Select the job type to associate with the workflow, then right-click and click Edit Item.
The Job Type dialog box appears.
- Select the workflow from the drop-down list to associate it with the job type.
