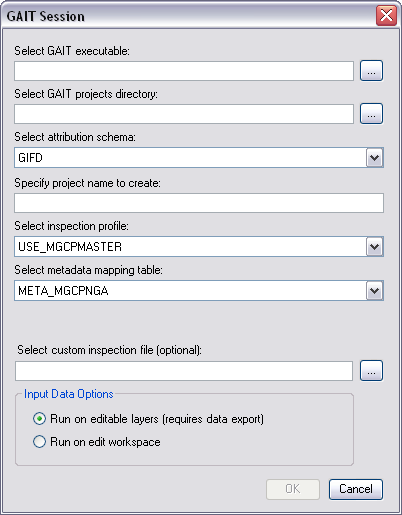
To configure a GAIT session, you need to specify the following:
- Location of the GAIT executable file—The path to the GAIT executable file.
- GAIT projects directory—The directory where your GAIT project will be written. This parameter will not be enabled if the GAIT_PROJECTS environment variable is defined.
- Attribution schema being used—The data model that corresponds to the data.
- GAIT project name—The name of the project, which contains the validation information, such as the checks run on the data and the results.
- Inspection profile—The set of checks that is going to be run on the data. This is specific to the data model that corresponds with the data.
- Metadata mapping table—The metadata mapping table that matches the data model.
- Custom inspection file—Custom inspection file that defines custom checks. This parameter is optional and only available for GAIT version 19 or greater.
- Input data options—Options that define which data is validated: Run on editable layers and Run on edit workspace.

- Start ArcMap.
- If necessary, load data in the map.
- On the main menu, click Customize > Toolbars > Production Editing.
- On the main menu, click Customize > Toolbars > Defense Mapping.
- Click the Production Start Editing button
 on the Production Editing toolbar.
- If you only want to run the GAIT session on a selected set of features, select those features.
- Click the GAIT Session button
 on the Defense Mapping toolbar.
The GAIT Session dialog box appears.
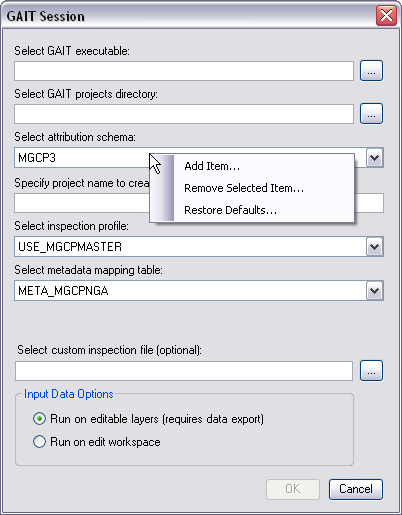
- Right-click the drop-down arrow of the list you want to modify and click Add Item.
You can add items to the Select attribution schema, Select inspection profile, and Select metadata mapping table lists.

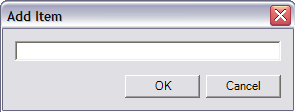
The Add Item dialog box appears.

- Type the name of the schema, profile, or mapping table you want to add to the list in the text box.
- Click OK.
The new item appears in the list.