Creating an add-in menu
A menu is a container for buttons or menus. A menu can be exposed by adding them to an existing toolbar (see Creating an add-in toolbar for more information on creating your own toolbar) or to an existing menu. Unlike toolbars, menus can save space since they are similar to drop-down controls.
This topic guides you through the process of creating a new menu using the Python Add-In Wizard. Before beginning this workflow, make sure that you have created an ArcMap Add-In project and specified the project settings. For more information, see Creating an add-in project. This workflow shows you how to create a menu for ArcMap; however, there are no differences in creating menus for any of the ArcGIS Desktop applications.
Creating a menu
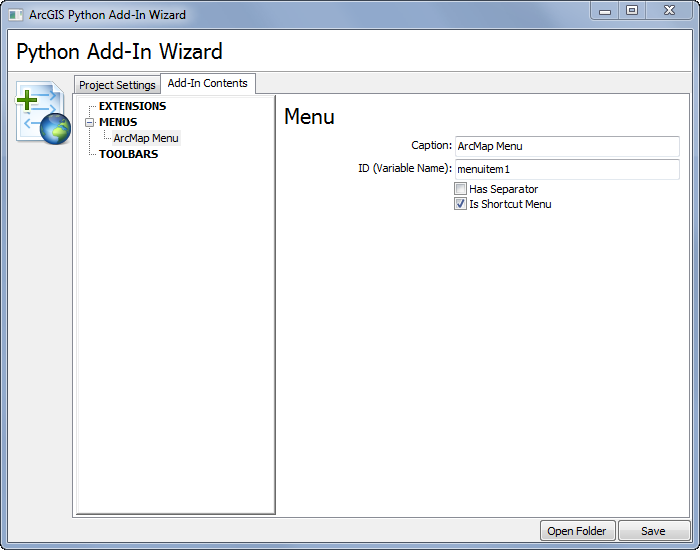
Once you have entered the required project settings, click on the Add-In Contents tab and determine your add-in customizations. To begin, right-click on MENUS and click New Menu.
The menu must have a caption and ID.

The ID represents the unique name and is used to distinguish between different menus. The ID cannot contain spaces.
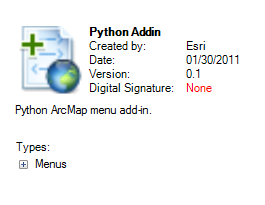
The caption represents the category and is used in two locations after the Add-In is shared and deployed. The first location is in the ArcGIS Add-In Manager. It helps an end user identify the different types of customizations available:

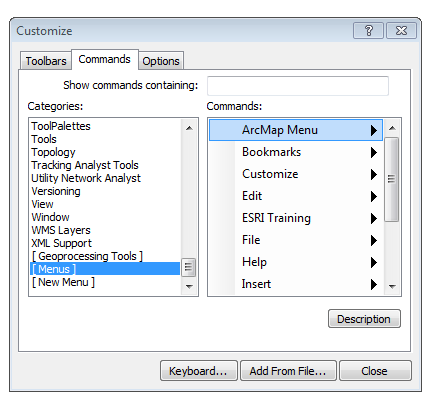
The second location is on the commands tab of the customize dialog box as shown next:

Once you have entered the menu properties, you can begin adding new buttons or additional menus. See Creating an add-in button for information and steps to create an add-in button.