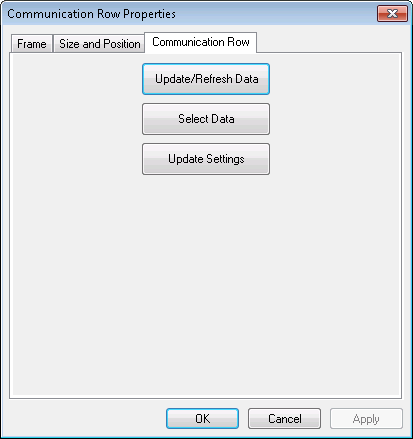
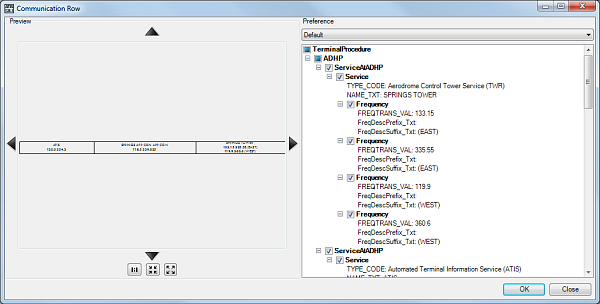
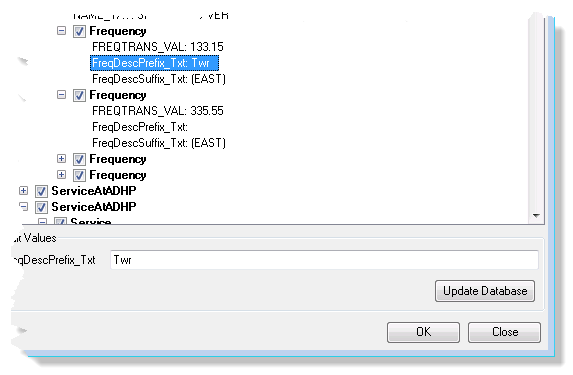
The communication row can be edited using the Frame, Size and Position, and Communication Row tabs on the Communication Row Properties dialog box. The table can be updated or refreshed from the database, and the settings and text properties can be defined and edited.
- Start ArcMap.
- On the main menu, click View > Layout View.
- Add a communication row to the map.
- Right-click the communication row and click Properties.
The Communication Row Properties dialog box appears.

- Click the Communication Row tab.
- To update data changed through the Communication Row settings dialog box or to refresh data changed in the database, click Update/Refresh.
Once the data is updated, the button text indicates Data Updated and becomes inactive.
- To alter data in the database, click Select Data.
The Communication Row dialog box appears.
- Highlight any line of text in the right pane to show the Edit Values text box.
- Type a value or change the current value and click Update Database.
This updates the data in the database directly based on the value entered.
- Click OK.
- To change the symbol settings for the table, click Update Settings.
The Communication Row dialog box appears.

For more information on modifying the appearance of the communication row, see Defining the communication row settings.
- To modify the general settings, do the following:
- Click the cell next to Size Units and click the drop-down arrow that appears to choose a unit.
This is the unit of measure for the table size.
- Click the cell next to Width Setting and click the drop-down arrow that appears to choose a setting.
This determines how the table width is sized.
- Click the cell next to Width and type a number for the width of the table.
This is the defined width of the table in units determined by the Size Units property.
- Click the cell next to Height Setting and click the drop-down arrow that appears to choose a setting.
This determines how the table height is sized.
- Click the cell next to Height and type a number for the height of the table.
This is the defined height of the table in units determined by the Size Units property.
- Click the cell next to Orientation and click the drop-down arrow that appears to choose a setting.
This determines the orientation of the table on the page.
- Click the cell next to Size Units and click the drop-down arrow that appears to choose a unit.
- To modify the text symbols, do the following:
- Click the cell next to the symbol name and click the ellipsis button (...) that appears.
The Editor dialog box appears.
- Modify the symbol properties as needed.
Properties that can be modified include the font, size, style, offset, angle, alignment, position, and masking.
- Click OK.
- Click the cell next to the symbol name and click the ellipsis button (...) that appears.
- To modify the service order, do the following:
- Click the cell next to Service Order, and click the ellipsis button (…) that appears.
The Service Order dialog box appears. The left side of the dialog box contains all available service types in the database, while the right side contains the service types in the order in which they will be displayed in the communication row table.
- Click to select items in either list and click the >> and << buttons to add or remove items from the Service Types in Display Order list.
- Within the Service Types in Display Order list, select items and use the up and down arrow buttons to change the display order.
When a service type is selected in the Service Types in Display Order pane, the Service Display options appear. The Service Display options are used to identify the service either by name from the database or by additional text, based on how it needs to display on the chart.
- Check the Service Name check box to populate the service name from the database.
- Type additional text in the text box, and then click the Prefix and Suffix option buttons to determine where the Service Name text (if checked) is displayed in relation to the additional text.
- Click OK.
The Communication Row dialog box appears.
- Click the cell next to Service Order, and click the ellipsis button (…) that appears.
- Click OK.

The Communication Row dialog box appears.
The changes to the settings are only for the current communication row. If a new table is created, the existing settings defined in the Production Properties dialog box will be used.