Available with Production Mapping license.
Adding the marker element allows you to select the symbol to be inserted into the cell.
- Verify that you are in layout view if necessary.
- Right-click the graphic table element and click Properties.
The Table Properties dialog box appears.
- Click the Table Format tab if necessary.
The Table Format dialog box appears.
- Click Table Design.
A Table Design dialog box appears, depending on the table format.
- Access the marker element in one of the following ways:
- Click to select a cell in the Table Layout area and click Table Layout > Add Element > Marker.
- Right-click a cell in the Table Layout area and click Add Element > Marker.
- Click to select a cell in the Table Layout area, right-click the associated coordinates in the Elements pane, then click Add Element > Marker.
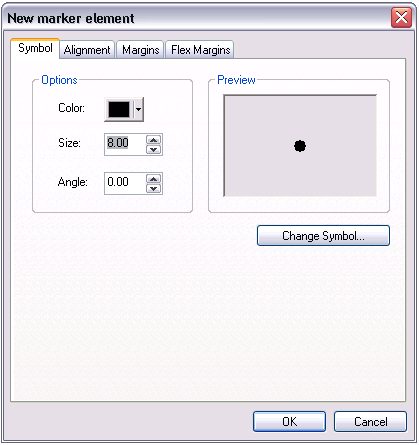
The New marker element dialog box appears.

- If necessary, click the Symbol tab.
- Click the Color drop-down arrow and choose a color if you want to change it.
- Type a value in the Size field or click the arrows to change the marker size.
- Type a value in the Angle field or click the arrows to change the marker angle.
- Click Change Symbol or the Preview area to change the symbol properties using the Symbol Selector dialog box.
- Click the Alignment tab.
- Click the Horizontal drop-down arrow and choose an option for the alignment.
- Click the Vertical drop-down arrow and choose an option for the alignment.
- Click the Margins tab.
- Type a margin value in the Top, Left, Right, and Bottom text boxes.
- Click the Flex Margins tab.
- Check the Left, Right, Top, or Bottom check box to define the cell coordinates, position, and element for each.
- Click OK.