In this topic
- Setting up the Java environment
- Testing the Java environment setup
- Classpath option
- Configuring Arcgisant
Setting up the Java environment
To develop ArcGIS Engine applications using the ArcGIS Engine software development kit (SDK) for the Java platform, you must have a compatible Java development kit (JDK) 8 update 65 or higher as a stand-alone install, or as part of an integrated development environment (IDE). You must also configure your environment correctly. If the environment is not set correctly, the Java proxies will be unable to access core ArcObjects through the Java Native Interface (JNI).
To set up the Java environment for ArcGIS Engine applications, see the Java SE Downloads page on Oracle's Web site to download the JDK.
To develop ArcGIS Engine applications, you need JDK 8 update 65 or higher with 32-bit Java Virtual Machine (JVM) or to deploy ArcGIS Engine applications, Java Runtime Environment (JRE) 8 update 65 or higher with 32-bit JVM. To install, download the JDK/JRE specific to your platform.
After installation, set up the JAVA_HOME environment variable if you have installed the JDK, or set up the JRE_HOME environment variable if you have installed the JRE.
On Linux
-
Set up the JAVA_HOME or JRE_HOME environment variable. For example, when using C-shell, use the setenv command to set up the variables:
-
setenv JAVA_HOME "/mymachine/java/jdk1.8.0_65"
-or- -
setenv JRE_HOME "/mymachine/java/jdk1.8.0_65"
- Modify your PATH variable. See the following C-shell example:
- setenv PATH $JAVA_HOME/jre/bin:$JAVA_HOME/bin:$PATH
-or- - setenv PATH $JRE_HOME/bin:$PATH
The $JAVA_HOME variable should be prepended to the front of $PATH.
Set the PATH variable as previously specified to avoid JVM crashes when running ArcGIS Engine applications from the terminal.
- Source init_java.sh or init_java.csh depending on the user shell. See the following:
- If you use C-shell, source init_java.csh.
- If you use bash or bourne shell, source init_java.sh.
This script is located in the ArcGIS install location. It sets the environment variable (AGSENGINEJAVA) that points to the ArcGIS Engine installation location and other ArcGIS Engine Runtime variables.
Do the previous post installation steps every time you open a new console; hence, an easier approach is adding this to your .cshrc or .bashrc profile.
On Windows
On Windows, post installation configuration to setup environment variables is not necessary until and unless you use the command line as an integral part of your development environment.
On Windows 7 SP1, the JAVA_HOME/JRE_HOME environment variables can be created from the System Properties dialog box.
- To access the System Properties dialog box, click Start, then Control Panel.
- On the Control Panel window, double-click System; the System Properties dialog box appears. See the following screen shot:

- On the preceding System Properties dialog box, click Advanced, then click Environment Variables; the Environment Variables dialog box appears. See the following screen shot:
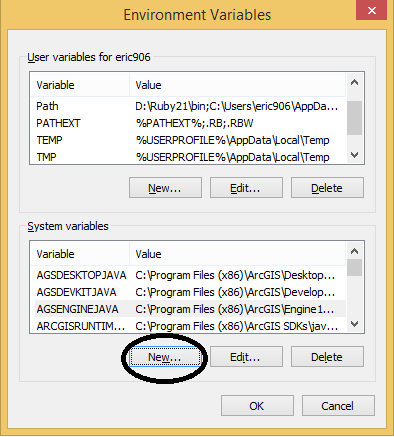
- On the Environment Variables dialog box, click New to create system variables; the New System Variable dialog box appears. See the following screen shot:
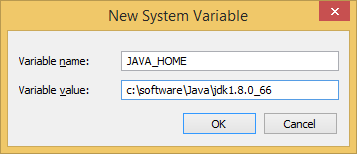
- On the New System Variable dialog box, type JAVA_HOME in the Variable name text box.
- In the Variable value text box, type the path to your Java installation directory.
- Click OK.
- If you installed JRE, type JRE_HOME in the Variable name text box on the New System Variable dialog box.
- In the Variable value text box, type the path to your JRE installation directory.
- Click OK. See the following screen shot:

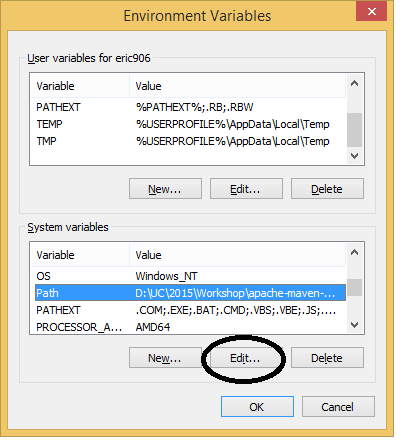
- On the Environment Variables dialog box, click Path under the System variables area.
- Click Edit. See the following screen shot:
- On the Edit System Variable dialog box, prepend the path variable value by typing %JAVA_HOME%\jre\bin;%JAVA_HOME%\bin; in the Variable value text box. If deploying an application, prepend the path variable by typing %JRE_HOME%\bin; in the Variable value text box.
- Click OK. See the following screen shot:

- When OK is clicked on the Edit System Variable dialog box, click OK on the Environment Variables dialog box.
- Click OK on the System Properties dialog box (if applicable, close any open dialog boxes).
Set the path variable previously specified to avoid JVM crashes when running ArcGIS Engine applications from the command line.
Testing the Java environment setup
- To test the Java environment setup for the ArcGIS Engine application, open a command prompt or command shell.
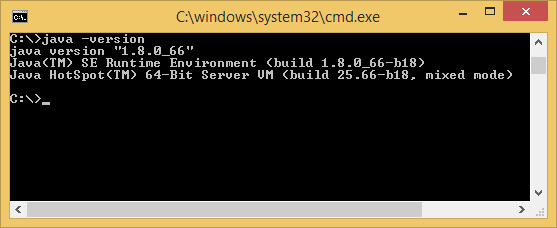
- At the command prompt, type java -version to show the version number of your Java installation. The version number of your Java installation might be different from the following screen shot:
- To further test the Java environment setup, run a simple Esri provided ArcGIS Engine sample from the command line. See the following:
- cd %AGSDEVKITJAVA%\java\samples\arcobjects\visualbeans\mapbean\usemaptoctoolbarbeans\bin
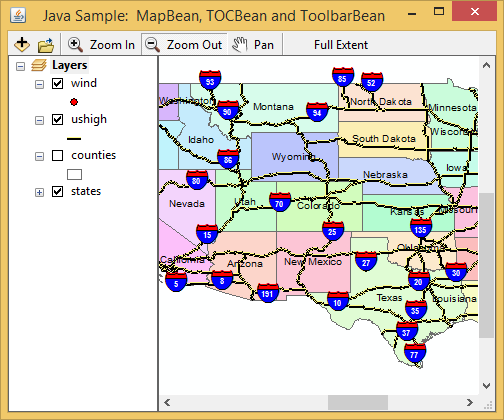
- java -Xss4m -client –jar UseMapTOCToolbarBeans.jar
- Upon executing the preceding commands, a simple map application (Java Sample: MapBean,TOCBean and ToolbarBean) launches. See the following screen shot:
Classpath option
When compiling or running ArcGIS Engine applications, include arcobjects.jar located in the <ARCGISInstallDir>/java/lib directory. Use the -classpath option of the javac and java command to include arcobjects.jar at the command prompt or add it as a library by any appropriate method for your development environment. See the following examples:
- javac -classpath c:\ArcGIS\java\lib\arcobjects.jar myEngineApplication.java
- java -classpath c:\ArcGIS\java\lib\arcobjects.jar myEngineApplication
When running Esri provided samples from a command line or shell, it is not required to set the classpath option for arcobjects.jar since it is already included in the jar file's manifest. For more information, see Samples.
Configuring Arcgisant
The ArcGIS Engine SDK for the Java platform includes numerous sample applications, each of which is delivered with Ant scripts, as well as executable Java Archive (JAR) files. Ant is a Java-based build tool that uses build scripts written in Extensible Markup Language (XML). Load these samples into your preferred development environment, use the Ant scripts to compile and run the samples, or import the samples into your IDE as a project (each sample is bundled as an Eclipse IDE project).
If you want to use the Ant scripts, you need a working Ant installation. For the ArcGIS Engine samples, Ant version 1.6 or higher is required. For your convenience, a version of Ant, arcgisant, is included under the %AGSDEVKITJAVA%\java\tools\ant directory.
The Ant scripts included with the samples require an ANT_HOME system environment variable that points to your Ant installation (that is, %AGSDEVKITJAVA%\java\tools\ant\bin) and the ANT_HOME environment variable should be appended to your Path system environment variable.
Solaris and Linux developers can source AGSDEVKITJAVA/java/tools/setenv_ant.csh or setenv_ant.sh, which sets this variable and includes arcgisant's bin directory in the path.
It is also required to set up the Java environment to compile and run Esri provided samples using Ant.
See Also:
SamplesHow to install ArcGIS plug-ins