In this topic
About ESRIRegAsm
- RegSvr32.exe for native code
- RegAsm.exe for managed code
At ArcGIS 10, it was decided to move away from the COM component category approach. The replacement consists of a new registration utility (ESRIRegAsm.exe) and an Extensible Markup Language (XML) database stored in published per product and version configuration folders, independent of the system registry; therefore, the registration of component and category information for a developer's assembly or dynamic-link library (DLL) is achieved using the Esri-provided utility called ESRIRegAsm.
ESRIRegAsm performs registration on both native COM DLLs and managed COM assemblies, and as previously discussed, does not write the component category portion of the registration information into the system registry.
The registration logic within existing libraries does not need to be rewritten (categories are still identified using globally unique identifiers [GUIDs]), but existing libraries must be re-registered with ESRIRegAsm.exe or they will not function with any installation of ArcGIS after version 9.3.1.
ESRIRegAsm.exe can also be called from a setup program to register and unregister DLLs, or assemblies as part of a custom install.
- ESRIRegAsm.exe is located in the ~:\Program Files\Common Files\ArcGIS\bin folder.
- The XML database generated by ESRIRegAsm.exe has a .ecfg file extension. It is a zipped XML file that can be unzipped and read.
- For ArcGIS Desktop, the .ecfg file is located at, ~:\Program Files\Common Files\ArcGIS\Desktop<version number>\Configuration\CATID.
- For ArcGIS Engine, the .ecfg file is located at, ~:\Program Files\Common Files\ArcGIS\Engine<version number>\Configuration\CATID.
ESRIRegAsm.exe must be used instead of the Microsoft utilities (RegAsm.exe and RegSvr32.exe).
ESRIRegAsm.exe command
Components are maintained on a per product and version basis; therefore, product information must be supplied when registering the component. The ESRIRegAsm utility supports the following command line arguments to control registration:
ESRIRegAsm.exe <assembly name> /p:<product name>  [Options]

The following are the options:
  /u - Unregister types
  /s - Silent (displays no dialog box)
  /e - Displays error console
  /v:<product version> - Version number
  /regfile[:fileName] - Exports to registry file
  /f:<category info file> - Category mapping file (.xml or .reg)
  /w:<dirPath> - Keep working files
The following table shows each value from the preceding command line with a description (some values are optional as shown in the table):
|
Value |
Description |
|
/p: |
Product string, for example, Desktop or Engine. If no product is supplied, a dialog box appears with a list of available installations. |
|
<assembly name> |
Full path to the native COM server DLL or managed COM assembly that needs to be registered. |
|
/v: |
Product version string, for example, 10.0 (optional). |
|
/u |
Unregister. Valid with /p: and /s (optional). |
|
/s |
Silent, displays no dialog box on success or error (optional). |
|
/e |
Displays an error console that shows more detailed information during the registration process (optional). |
|
/regfile[:fileName] |
Generates the specified .reg file with registry entries for the assembly. This only works with managed assemblies, and the generated .reg file will not contain any category information. If the file name is not specified, by default, it is generated in the same directory as the assembly and has the same name as the assembly with the .reg extension (optional). |
|
/f:<category mapping file> |
An input file listing classes requiring registration under specific component categories. This file can be a .xml file with the schema as shown in the following code example or a standard registry script. Note, a category mapping file is needed only when components do not contain component category registry information in their built-in registration logic (optional). |
|
/w:<dirPath> |
Generates a .xml file in the specified folder that can later be used to create a .ecfg file. Also, if a registry script was provided as input, this script is also copied to the output folder with the component category information stripped out. This option is useful to those wanting to create registration files for a custom installation program (optional). |
The following code example shows an XML category mapping file:
[XML] <?xml version="1.0"?>
<Categories ver="1">
<Category CATID="{62C8FE65-4EBB-45E7-B440-6E39B2CDBF29}">
<Class CLSID="{1502B6C9-B57C-36E0-BCC7-C4CFDD058082}"/>
</Category>
</Categories>
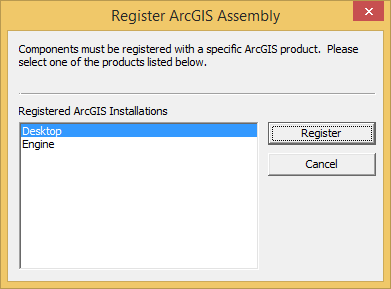
Explicitly supply the product argument in the utility. If no product is provided, a dialog box appears with a list of available installations. See the following screen shot:

The following examples show how to use the utility command to register and unregister a custom assembly (MyAssembly).
Register the assembly
- Desktop - ESRIRegAsm /p:desktop "C:\Test\MyAssembly.dll"
- Engine - ESRIRegAsm /p:engine "C:\Test\MyAssembly.dll"
Provide the .dll file with the full path when you register it. If the .dll file can be used with Desktop and Engine applications, you still need to register it separately. In addition, for command line arguments containing colon syntax, spaces are not allowed between the colon and string; otherwise, an error appears.
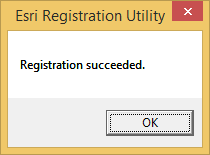
The following notification dialog box appears indicating if the registration is successful:

Unregister the assembly
- Desktop - ESRIRegAsm /p:desktop /u "C:\Test\MyAssembly.dll"
- Engine - ESRIRegAsm /p:engine /u "C:\Test\MyAssembly.dll"
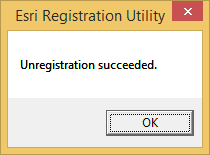
The following notification dialog box appears indicating if the unregistration is successful:

When arguments are suffixed with a colon (:), for example /p:, ensure there is no space between the colon and the specified string.
See Also:
How to register COM componentsRegistering classes in COM component categories
