
In this topic
About registering COM components
Additional product information must be supplied at registration using an Esri utility called ESRIRegAsm.exe. ESRIRegAsm.exe replaces the standard Microsoft RegAsm.exe utility.
ESRIRegAsm.exe is automatically invoked behind the scenes by the Visual Studio integrated development environment (IDE) templates provided by Esri, by the shell registration menu provided by Esri, and by the Customize dialog box in ArcGIS standard applications. If you need to register your component library manually - for example, from a setup program - call ESRIRegAsm.exe directly, supplying the appropriate product target as an arguments.
Using ArcGIS class library project templates
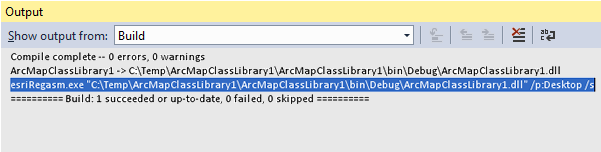
Projects based on one of the ArcGIS class library templates (available in the ArcObjects .NET software development kit [SDK]), automatically register the assembly during compilation. When the project is built, esriRegAsm.exe is called at the end of the build in the Output window. See the following screen shot:
Ensure you have the ArcObjects .NET SDK installed.
Registering by menu option
When building a project from the beginning, without using ArcGIS class library project templates or testing the component on a deployment machine, use the Register ArcGIS Assembly registration menu option that is automatically available with the ArcObjects .NET SDK installation. Complete the following steps to register your component with this menu option:
- Right-click an assembly and select Register. The Register ArcGIS Assembly dialog box appears.
- Select an ArcGIS product, then click the Register button.
See the following screen shot: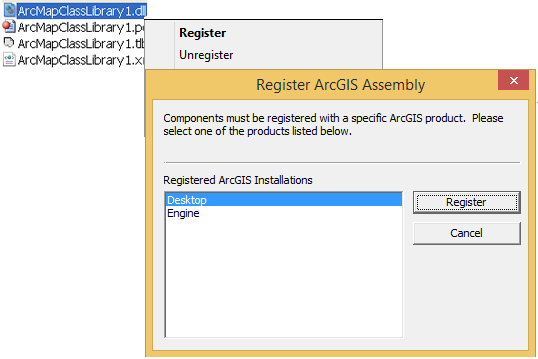
Registering by command line
To register the component library manually - for example, in a setup program - call ESRIRegAsm.exe directly. In this case, supply the appropriate product target as an argument. This utility can be found in your installation location, for example, C:\Program Files\Common Files\ArcGIS\bin. For more information, see ESRIRegAsm utility.
Registering by dialog box
You can use the Add from File button on the Customize dialog box to register commands and toolbars with ArcGIS Desktop applications. This option allows you to directly browse for native code, such as COM related .dlls, .ocxs, and .tlbs files. For managed code, use the .tlb file generated by Visual Studio (RegAsm.exe) instead of the .net assembly file.