Symbols are used to draw geographic features, text, and graphics on maps. When you are ready to apply a symbol to features in a layer or a graphic on a map or layout, you use the Symbol Selector dialog box to choose a symbol from one of the available styles, modify it if necessary, then apply it.
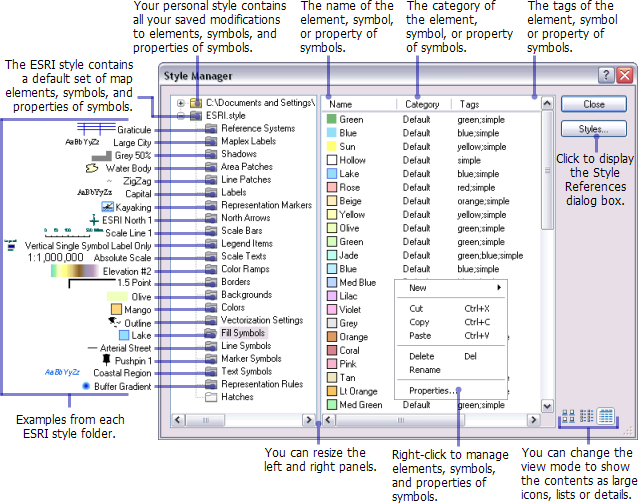
Styles are collections of symbols and other reusable map elements. You use the Style Manager dialog box to view, create, and modify styles and their contents.
This topic outlines some of the key dialog boxes that you will use when working with symbols and styles.
Finding and applying symbols to features and graphics
Features, graphics, and text appear on your map when they are drawn with symbols. To find appropriate symbols to apply to these elements, you browse or search for available symbols in the Symbol Selector dialog boxes. There is a different dialog box for each symbol type—marker, line, fill, or text—but they all operate the same way. Which dialog box you see depends on which type of element you are symbolizing.
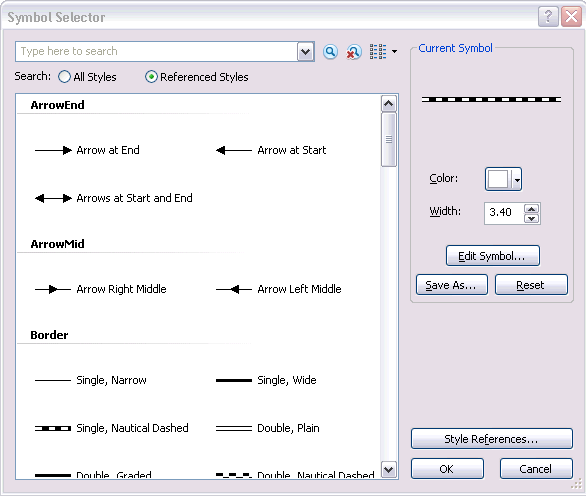
You will usually access the Symbol Selector dialog boxes by clicking symbols in the table of contents or in the Layer Properties dialog box when you are symbolizing features or annotation. You will also encounter Symbol Selector dialog boxes when working with graphic elements.
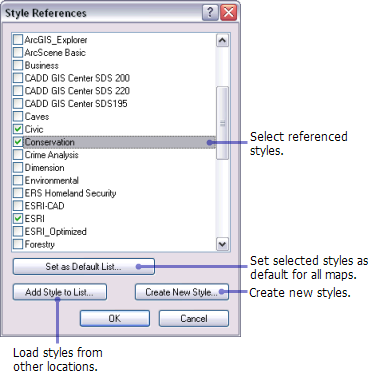
The Symbol Selector dialog boxes show a palette of all the symbols of the current type that reside in any of the currently referenced styles or in your personal style. You typically reference the styles that you are required to use for a specific map or those styles that you are most likely to use frequently. Referencing a style means that its symbols will be readily available in the Symbol Selector dialog boxes for you to browse and choose. However, you are always free to choose a symbol from any style, whether that style is referenced or not. Manage the list of referenced symbols by clicking the Style References button on the Symbol Selector dialog box to open the Style References dialog box.
If an appropriate symbol is not present in the palette or is difficult to find, you can search for one by symbol name, category, tags, or in some cases color, from all available styles.
Learn more about searching for symbols
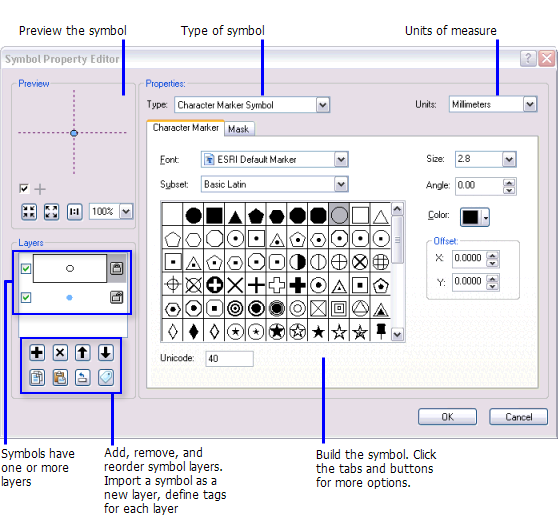
Once you find the appropriate symbol, you can apply it as is, you can modify it by changing basic properties such as size and color directly on the Symbol Selector dialog box, or you can click the Edit Symbol button to access all of its symbol properties in the Symbol Property Editor dialog box. The modified symbol will be applied to the current element, but the original symbol stored in the style will not change. Optionally, you can save the customized symbol to a style if you plan to reuse it, modify it again later, or share it with someone else.
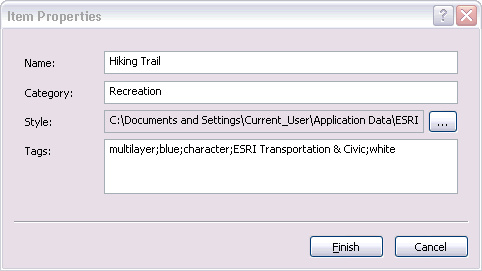
When saving a symbol, you first give it an appropriate name. You can type a category as well. Categories are used to group symbols within a style; you can change the view of the symbol palette in the Symbol Selector dialog boxes to group available symbols by category. You can choose to store the new symbol in your personal style or browse to a different style. You can modify and add to the descriptive tags if desired.
Creating and modifying symbols
When you select symbols to apply to features or graphics, you have an opportunity to modify them first to better suit your needs. You can change simple properties, like color or size, from the Current Symbol box on the Symbol Selector dialog box once you've found a symbol that closely meets your needs.
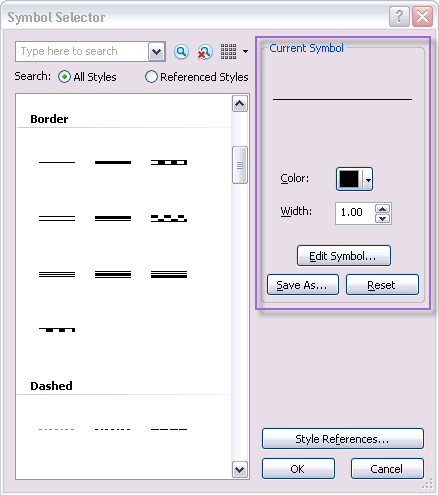
To change additional properties of a symbol before applying or saving it, click the Edit Symbol button on the Symbol Selector dialog box to open the Symbol Property Editor dialog box.
Managing symbols and elements in styles
Using the Style Manager dialog box, you can view, create, and modify styles and their contents.
