Available with Location Referencing license.
Events within the same geodatabase as the LRS are managed as feature classes. ArcGIS Pipeline Referencing manages the shape of the event features based on the route, measure, and to and from dates. This provides increased performance in ArcGIS for mapping and spatial query of the event data. When registering an event that will be in the same geodatabase as the LRS, you can model the feature class in advance within the geodatabase with the LRS, have Pipeline Referencing create the new feature class for you in the geodatabase with the LRS, or copy the schema from another table or feature class to the new feature class created in the geodatabase as the LRS. Once an event is registered with Pipeline Referencing, any existing event records can be loaded using the Append Events tool.
Once an event in the geodatabase is registered, Pipeline Referencing will manage the event moving forward. When edits made to a route have an impact on event measures via the event measure behavior configuration, the changes are made directly to the event feature class. After performing and saving edits with the Pipeline Referencing editing tools in ArcGIS Pro, the Apply Event Behaviors geoprocessing tool should be executed to update any affected events.
Registering with Create a new feature class option
If the event feature class is not modeled in advance, it can be created while the event is registered within the LRS geodatabase. When the event registration wizard completes with this option selected, a feature class will be created within the geodatabase and will be registered with the LRS.
- Start ArcMap and open the Catalog window.
- Expand the LRS that contains the LRS Network for which you want to add event layers, right-click the LRS Network, and click New > LRS Event.
The LRS Event Setup wizard appears.
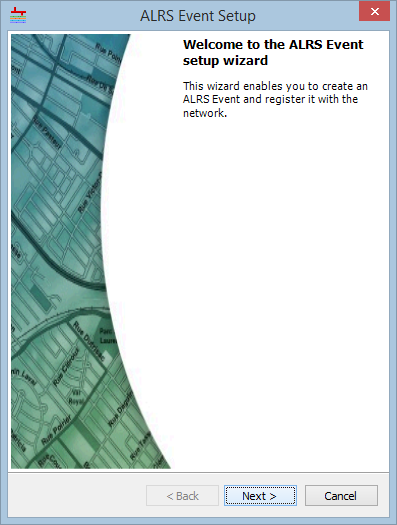
- Click Next.
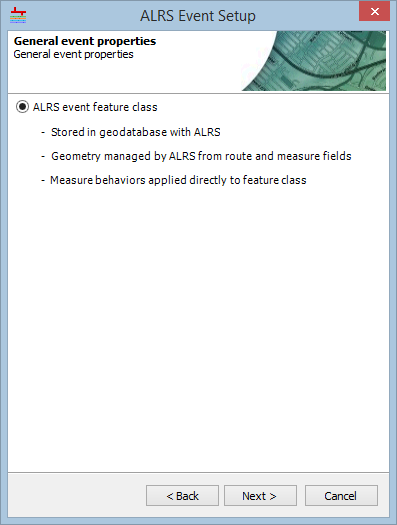
- Choose the ALRS event feature class option.
- Click Next.
- Choose the Create a new feature class option.
- Type a name in the New feature class name text box.
- Type an alias for the feature class in the New feature class alias text box. This alias will appear within the LRS tree in the Catalog window.
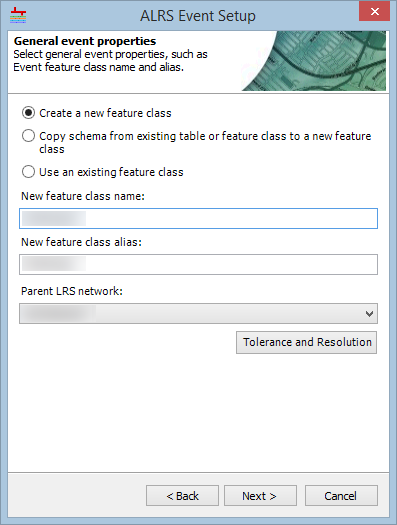
- Click the Parent LRS network drop-down arrow and choose the network to which the event belongs.
- Click Tolerance Properties to view the tolerance properties.
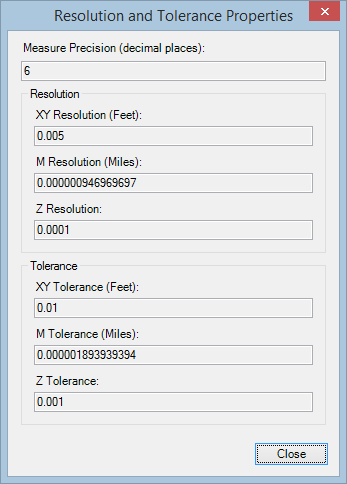
- Click Close.
- Click Next.
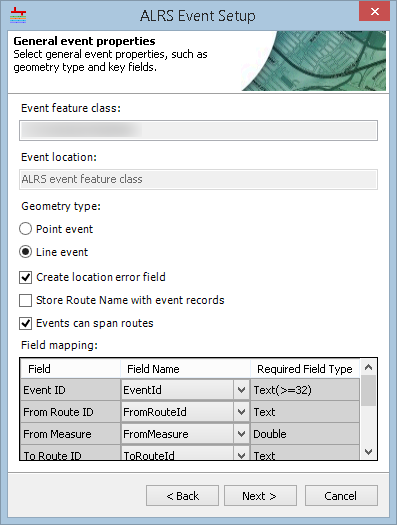
- Choose a Geometry type option for the event.
- If the Route Name (or From and To Route Name) fields will be stored in the event feature class, check the Store Route Name with event records check box.
- If the network the event is being registered with supports lines, the Events can span routes check box will appear. If the events will span routes, check the box. If events will not span routes, leave the box unchecked.
- Populate the Field Name column for each of the required fields.
- Change the Event ID field name as needed.
- Change the Route ID field name as needed.
- If you have a point event, change the Measure field name as needed.
- If your event will span routes, change the To Route ID field name as needed.
- If you have a line event, change the From Measure field name as needed.
- If you have a line event, change the To Measure field name as needed.
- Change the From Date field name as needed.
- Change the To Date field name as needed.
- If the route name is being stored with your event, change the Route Name field name as needed.
- If the route name is being stored with your event and the event will span routes, change the To Route Name field name as needed.
- Change the Location Error field name as needed.
- Click Next.
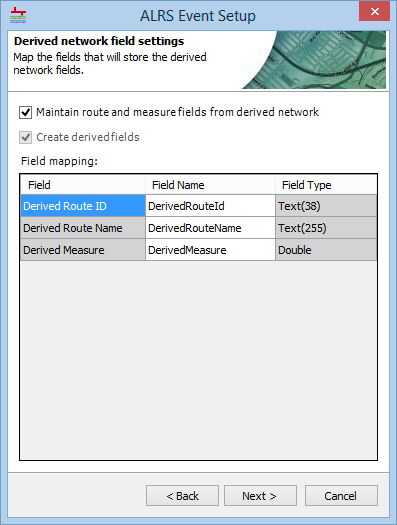
- If the event has to store the derived network route and measure fields, then check the Maintain route and measure fields from derived network check box. For more information, see Creating an LRS Derived Network.
- Click Next.
- If the event is a stationing event, check the Use this event feature class for stationing support check box to register the event as a stationing event. For more information about stationing events, see Stationing events.
- Click the Station Measure Units drop-down arrow and choose the unit of measure for the station measures.
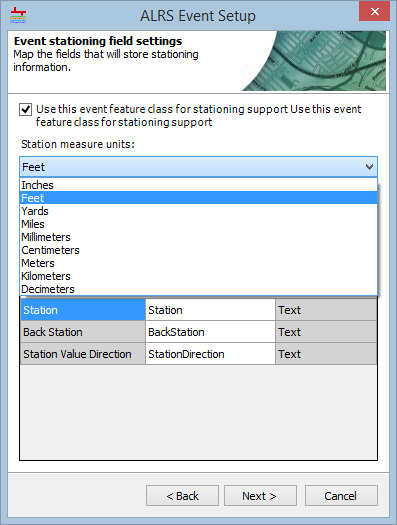
- Populate the Field Name column for each of the required fields.
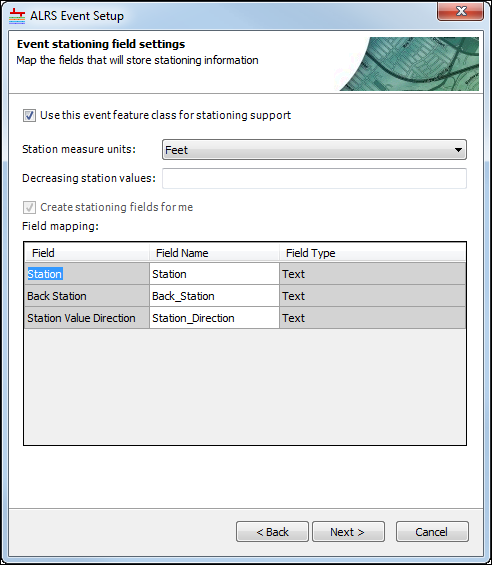
- Change the Station field name as needed.
- Change the Back Station field name as needed.
- Change the Station Value Direction field name as needed.
- Click Next.
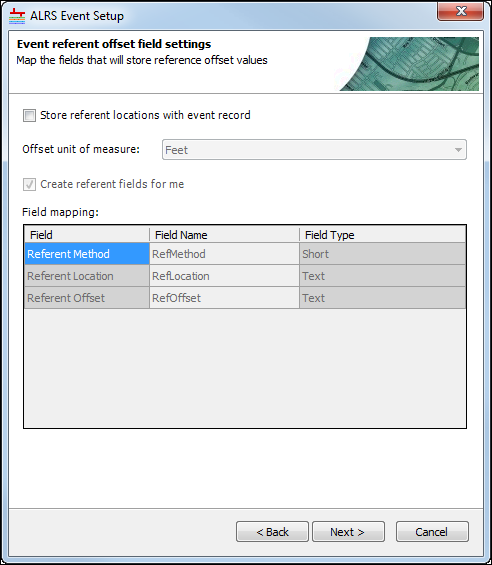
- If the event will have support storing referent offsets, check the Store referent locations with event record check box. If the event will not store referent offsets, skip to step 16. For more information about referent offsets, see Storing referent and offset information for event location
- Click the Offset unit of measure drop-down arrow and choose the unit of measure for the offset values.
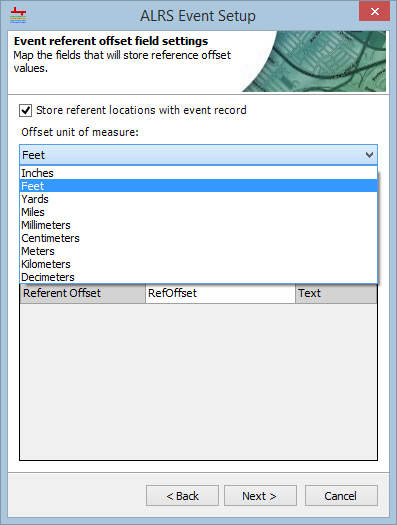
- Populate the Field Name column for each of the required fields.
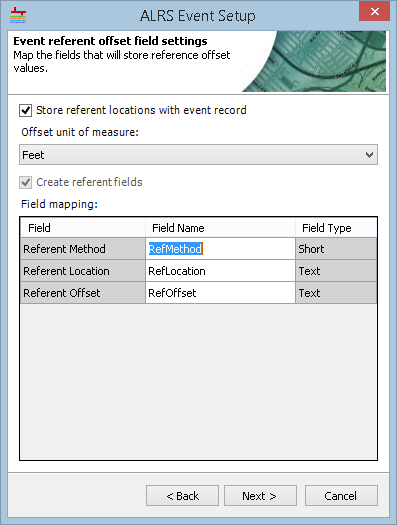
- If you have a point event, change the Referent Method field name as needed.
- If you have a point event, change the Referent Location field name as needed.
- If you have a point event, change the Referent Offset field name as needed.
- If you have a line event, change the From Referent Method field name as needed.
- If you have a line event, change the From Referent Location field name as needed.
- If you have a line event, change the From Referent Offset field name as needed.
- If you have a line event, change the To Referent Method field name as needed.
- If you have a line event, change the To Referent Location field name as needed.
- If you have a line event, change the To Referent Offset field name as needed.
- Click Next.
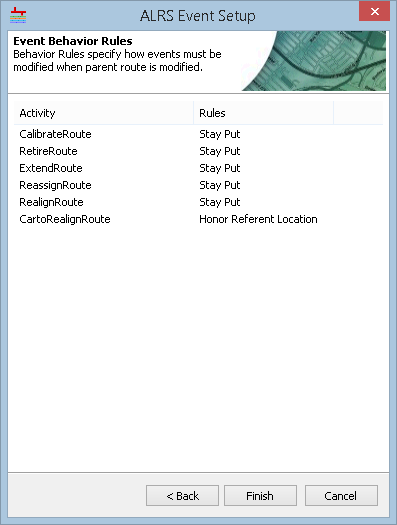
- Configure the Event Behavior Rules of each edit activity for the event. For more information about event behaviors, see Event behaviors.
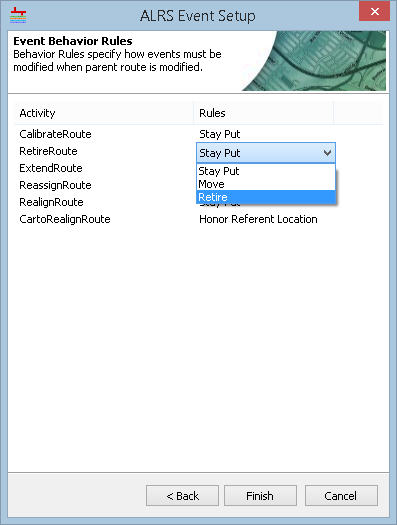
- Click Finish.
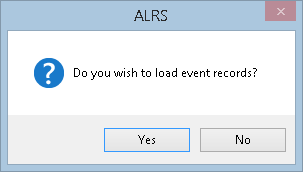
The event feature class is created and registered with Pipeline Referencing. Click Yes on the Do you wish to load event records? dialog box to open the Append Events tool, or click No to return to ArcMap.
Registering with the Copy schema from existing table or feature class to a new feature class option
If the schema that will be used for the event being registered is already modeled in an existing feature class or table, but you want a new feature class for the event within the LRS geodatabase, the Copy schema from existing table or feature class to a new feature class option produces this result. This option is useful if your existing event data that will be migrated to Pipeline Referencing is available, because any additional columns and fields in your event data will be added to the event feature class within the LRS geodatabase. When the event registration wizard completes with this option selected, a feature class will be created within the LRS geodatabase, with the schema copied from the existing table or feature class, and the feature class will be registered with the LRS.
- Start ArcMap and open the Catalog window.
- Expand the LRS that contains the LRS Network for which you want to add event layers, right-click the LRS Network, and click New > LRS Event.
The ALRS Event Setup wizard appears.

- Click Next.
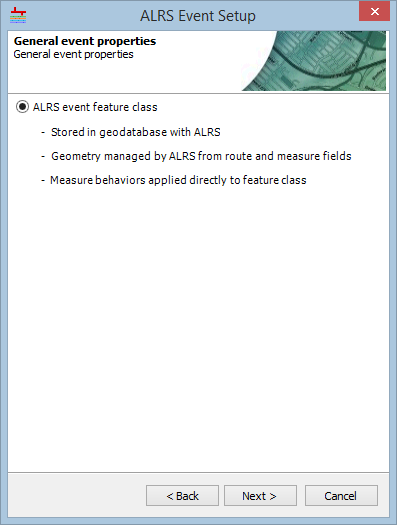
- Choose the ALRS event feature class option.
- Click Next.
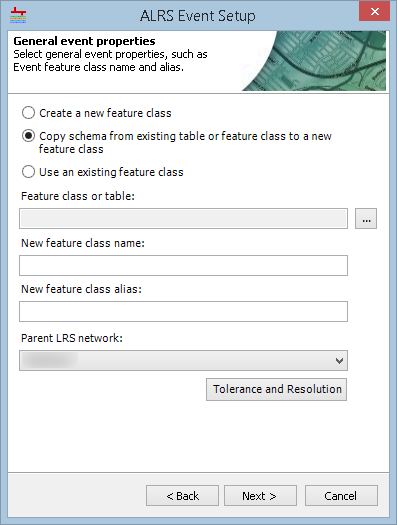
- Choose the Copy schema from an existing table or feature class to a new feature class option.
- Click the browse button
 next to the Feature class or table text box and select the feature class or table with the schema that will be copied to the new event feature class.
 - Type a name in the New feature class name text box.
- Type an alias for the features class in the New feature class alias text box. This alias will appear within the LRS tree in the Catalog window.
- Click the Parent LRS network drop-down arrow and choose the network to which the event belongs.
- Click Tolerance Properties to view the tolerance properties.

- Click Close.
- Click the browse button
- Click Next.

- Choose a Geometry type option for the event.
- If the feature class or table being used to copy the schema does not have a Location Error field, check the Create location error field check box to have one added to the Field mapping table. If the location error field is already present, leave the box unchecked.
- If the Route Name (or From and To Route Name) fields will be stored in the event feature class, check the Store Route Name with event records check box.
- If the network the event is being registered with supports lines, the Events can span routes check box will appear. If the events will span routes, check the box. If events will not span routes, leave the box unchecked.
- Verify and update the Field mapping table as needed.
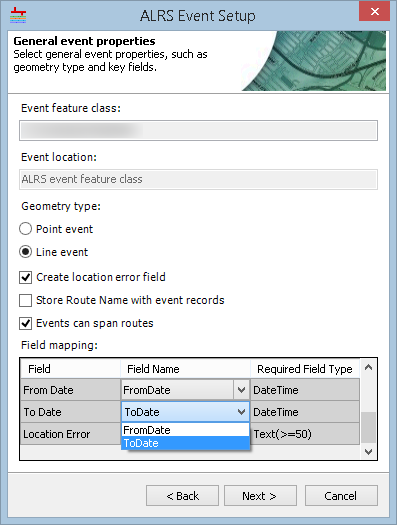
- Click the Event ID drop-down arrow and choose a value.
- Click the Route ID drop-down arrow and choose a value.
- If you have a point event, click the Measure drop-down arrow and choose a value.
- If you have a line event, click the From Measure drop-down arrow and choose a value.
- If your event will span routes, change the To Route ID field name as needed.
- If you have a line event, click the To Measure drop-down arrow and choose a value.
- Click the From Date drop-down arrow and choose a value.
- Click the To Date drop-down arrow and choose a value.
- If the route name is being stored with your event, click the Route Name drop-down arrow and choose a value.
- If the route name is being stored with your event and the event will span routes, click the To Route Name drop-down arrow and choose a value.
- Click the Location Error drop-down arrow and choose a value.
- Click Next.
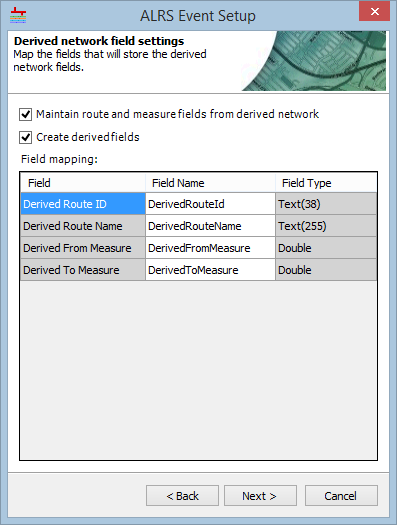
- If the event has to store the derived network route and measure fields, then check the Maintain route and measure fields from derived network check box. If the existing table or feature class doesn't have fields to store derived network fields, then check the Create derived fields for me check box. For more information, see Creating an LRS Derived Network.
- Click Next.
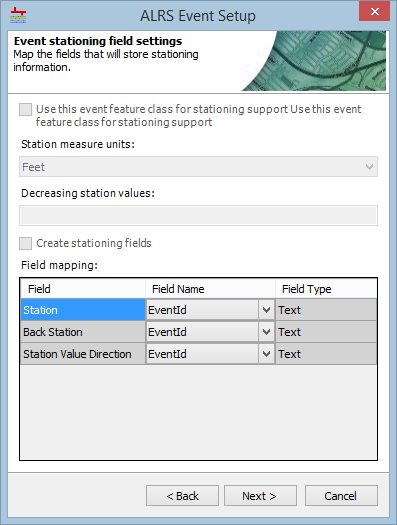
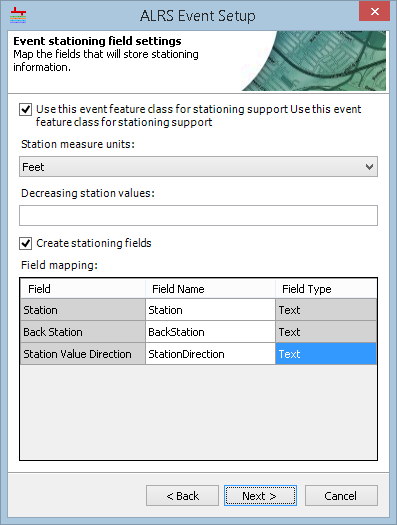
- If the event is a stationing event, check the Use this event feature class for stationing support to register the event as a stationing event. For more information about stationing events, see Stationing events.
- Click the Station Measure Units drop-down arrow and choose the unit of measure for the station measures.
- If the feature class or table being used to copy the schema does not have the stationing fields, check the Create stationing fields for me check box to have the fields added to the Field mapping table. If the stationing fields are already present in the source feature class or table, leave the box unchecked.
- If Create stationing fields for me is checked, populate the Field Name column for each of the required fields.
- If Create stationing fields for me is unchecked, verify and update the Field Name column as needed.
- Click Next.
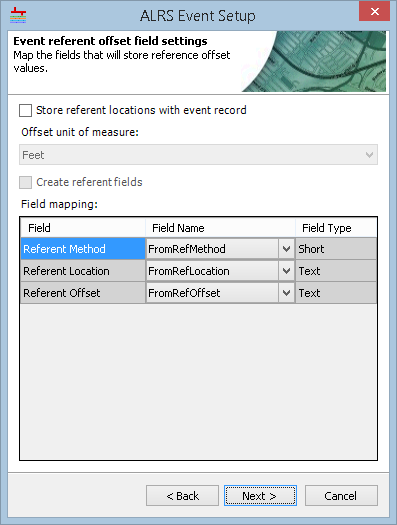
- If the event will support storing referent offsets, check the Store referent locations with event record check box. If the event will not store referent offsets, leave the box unchecked and skip to step 19. For more information about referent offsets, see Storing referent and offset information for event location.
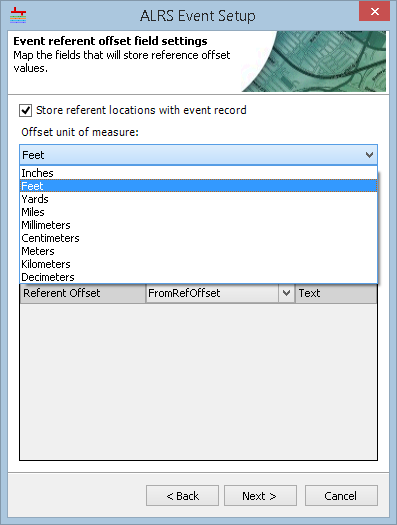
- Click the Offset unit of measure drop-down arrow and choose the unit of measure for the offset values.
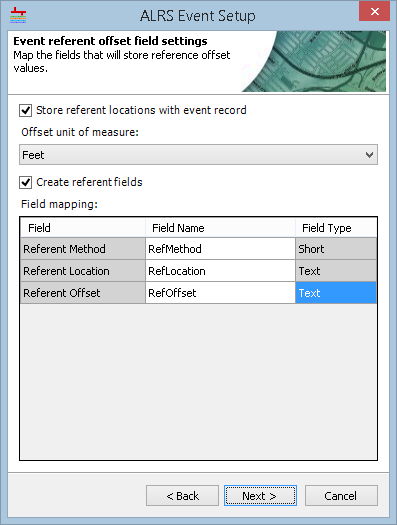
- If the feature class or table being used to copy the schema does not have the referent offset fields, check the Create referent fields for me check box to have the fields added to the Field mapping table. If the referent fields are already present in the source feature class or table, leave the box unchecked.
- If Create referent fields for me is checked, populate the Field Name column for each of the required fields.
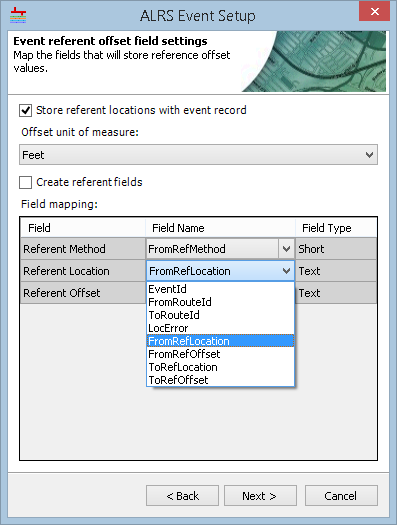
- If Create referent fields for me is unchecked, verify and update the Field Name column as needed.
- If Create referent fields for me is checked, populate the Field Name column for each of the required fields.
- Click Next.

- Configure the Event Behavior Rules of each edit activity for the event. For more information about event behaviors, see Event behaviors.

- Click Finish.
The event feature class, with the copied schema, is created and registered with Pipeline Referencing. Click Yes on the Do you wish to load event records? dialog box to open the Append Events tool, or click No to return to ArcMap.

Registering with the Use an existing feature class option
If the event feature class being registered with Pipeline Referencing is already present in the geodatabase with the LRS, it still must be registered with the LRS. This option is useful if the geodatabase that will contain the LRS is modeled in advance. When the event registration wizard completes with this option selected, the event feature class will be registered with the LRS.
- Start ArcMap and open the Catalog window.
- Expand the LRS that contains the LRS Network for which you want to add event layers, right-click the LRS Network, and click New > LRS Event.
The ALRS Event Setup wizard appears.

- Click Next.

- Click the ALRS event feature class option.
- Click Next.

- Choose the Use an existing feature class option.
- Click the Browse button
 next to the Feature class or table text box and choose the feature class or table with the schema that will be copied to the new event feature class.
 - Type a feature class alias in the New feature class alias text box. This alias will appear in the ALRS tree in the Catalog window.
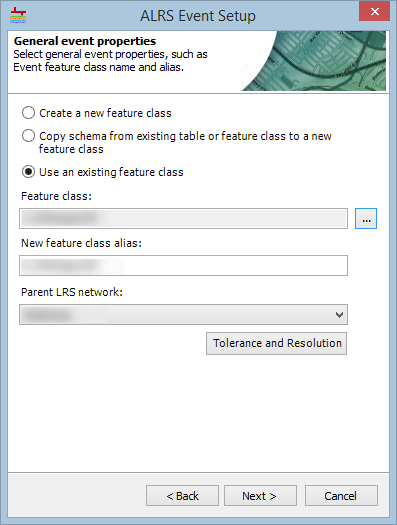
- Click the Parent LRS network drop-down arrow and choose the network to which the event belongs.
- Click Tolerance and Resolution to view the tolerance properties.

- Click Close.
- Click the Browse button
- Click Next.
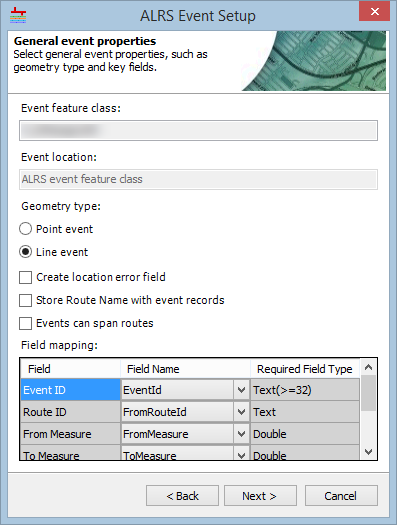
- If the feature class does not have a Location Error field, check the Create location error field check box to have one added to the Field mapping table. If the location error field is already present, leave the box unchecked.
- If the Route Name (or From and To Route Name) fields will be stored in the event feature class, check the Store Route Name with event records check box.
- If the network the event is being registered with supports lines, the Events can span routes check box will appear. If the events will span routes, check the box. If events will not span routes, leave the box unchecked.
- Verify and update the Field mapping table as needed.
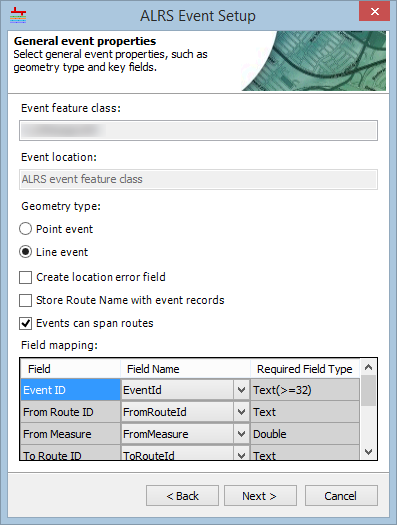
- Click the Event ID drop-down arrow and choose a value.
- If you have a point event, click the Route ID drop-down arrow and choose a value.
- If you have a point event, click the Measure drop-down arrow and choose a value.
- If you have a line event, click the From Measure drop-down arrow and choose a value.
- If your event will span routes, change the To Route ID field name as needed.
- If you have a line event, click the To Measure drop-down arrow and choose a value.
- Click the From Date drop-down arrow and choose a value.
- Click the To Date drop-down arrow and choose a value.
- If the route name is being stored with your event, click the Route Name drop-down arrow and choose a value.
- If the route name is being stored with your event, and the event will span routes, click the To Route Name drop-down arrow and choose a value.
- Click the Location Error drop-down arrow and choose a value.
- Click Next.

- If the event has to store the derived network route and measure fields, then check the Maintain route and measure fields from derived network check box. If the existing table or feature class doesn't have fields to store derived network fields, then check the Create derived fields for me check box. For more information, see Creating an LRS Derived Network.
- Click Next.

- If the event is a stationing event, check the Use this event feature class for stationing support to register the event as a stationing event. For more information about stationing events, see Stationing events.
- Click the Station Measure Units drop-down arrow and choose the unit of measure for the station measures.
- If the feature class does not have the stationing fields, check the Create stationing fields for me check box to have the fields added to the Field mapping table. If the stationing fields are already present in the feature class, leave the box unchecked.
- If Create stationing fields for me is checked, populate the Field Name column for each of the required fields.
- If Create stationing fields for me is unchecked, verify and update the Field Name column as needed.
- Click Next.
- If the event will support storing referent offsets, check the Store referent locations with event record check box. If the event will not store referent offsets, leave the box unchecked and skip to step 19. For more information about referent offsets, see Storing referent and offset information for event location.
- Click the Offset unit of measure drop-down arrow and choose the unit of measure for the offset values.

- If the feature class does not have the referent offset fields, check the Create referent fields for me check box to have the fields added to the Field mapping table. If the referent fields are already present in the feature class, leave the box unchecked.
- If Create referent fields for me is checked, populate the Field Name column for each of the required fields.
- If Create referent fields for me is unchecked, verify and update the Field Name column as needed.
- Click Next.

- Configure the Event Behavior Rules of each edit activity for the event. For more information about event behaviors, see Event behaviors.

- Click Finish.
The event feature class is registered with Pipeline Referencing. Click Yes on the Do you wish to load event records? dialog box to open the Append Events tool, or click No to return to ArcMap.
