You can add or update routes in an existing LRS Network. For example, routes from a county or municipality that need to be loaded into an existing state route network to create a complete statewide LRM. These additional and updated routes can be added to your network using the Load Routes tool.
The Load Routes tool compares the route IDs of the feature class containing additional or updated routes to the existing network feature class. Any route IDs in the new or updated routes feature class not already present in the existing network feature class are treated as new routes and loaded into the LRS Network. Any route IDs in the new or updated routes feature class already present in the network feature class are treated as an updated version. The existing route is removed from the LRS Network, centerline feature class, centerline sequence, and route tables. Routes in the new or updated routes feature class are loaded into the network and minimum schema items.
Before you load your new or updated routes, use the Detect Feature Changes tool to determine which routes are new, have updated shapes, updated attributes, or haven't changed compared to the existing routes in your LRS Network. Comparing the new or updated routes against the existing network feature class produces an output of which routes are new, have spatial attribute (shape) changes, have attribute changes, or no changes at all.

Similar to the Loading Routes tool, the additional or updated routes you use while loading route updates should have at least one text field with the route ID. If your network has a concatenated route ID of more than one field, your source routes still need a text field composed of all those fields concatenated together to complete data loading. Each route in your additional or updated routes should have a single route ID for each record. If your additional or updated routes have more than one record with the same route ID and from date, only one record for each route ID loads. If your additional or updated routes have multipart features or routes with physical gaps, they can still load using the Load Routes tool as long as there is a single route ID for each record in the additional or updated routes, whether it is a single or multipart feature. Consider editing your additional or updated routes using geoprocessing tools, such as Dissolve or Create Routes, to ensure there is a single record for each route ID before using the Load Routes tool.
To load route updates and calibrate them properly, source data should not contain any curves. If your additional or updated routes contain curves, run the Densify geoprocessing tool on the routes before loading route updates to ensure they load and calibrate properly.
- Start ArcMap.
- In the Catalog window, expand the LRS in the target geodatabase.
- Right-click the LRS Network and click Load Routes.
The LRS will detect that routes are present in the LRS Network and the Load Route Updates dialog box appears.

- Click the browse button next to Polyline Feature Class and choose your additional or updated source polyline routes feature class.
- The additional or updated source polyline routes feature class does not need to be in the same geodatabase as your LRS.
- Your source polyline routes feature class should have the same spatial reference and x,y and z (if the feature class is z-enabled) tolerance and resolution as the network feature class the routes are being loaded into. Keeping the tolerance settings the same ensures routes and measures stay in alignment within Roads and Highways tolerance and resolution.
- If you have a large additional or updated source polyline routes feature class and your LRS is in a multiuser geodatabase, the database may run out of memory during the route loading process. Contact your database administrator to increase the memory before loading large datasets.
- If your additional or updated source routes have subtypes or coded value domains for fields in the route ID that match those in the network feature class, they are copied to the LRS Network.
- Click the Route ID Field drop-down arrow and choose the route ID that contains the additional or updated routes from your polyline feature class. This field should match the field used when you completed initial loading of routes for this network.
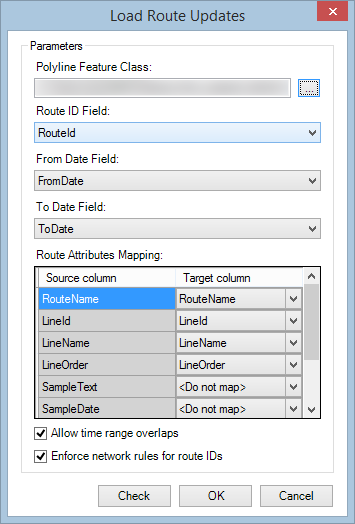
- All string fields within the selected polyline feature class are available in the drop-down list.
- If you chose multiple fields to create your route ID during LRS Network creation, the concatenated network route ID must match the route ID you choose from your source polyline feature class. If it does not match, your updated routes are not loaded.
- If the route ID for the routes that are updated does not match the route ID for the routes they are intended to replace, the routes load as new routes, and the routes intended to be replaced remain in the network.
- If your source data has multiple records with the same RouteID and From Date values, only one record for each route ID loads. To ensure all records in the source data load correctly, consider using the Dissolve geoprocessing tool to get a single route for each route ID. For more information, see Using concatenated route identifiers.
- If your additional or updated routes have temporality, do the following:
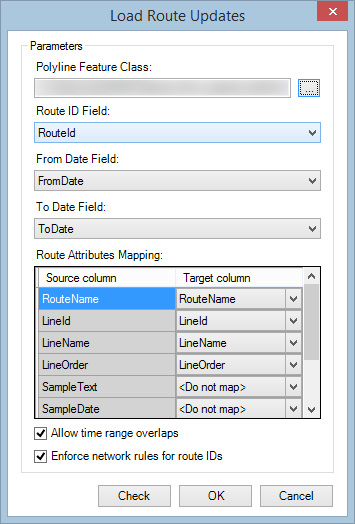
- Click the From Date Field drop-down arrow and choose the field for the from date for the polyline feature class.
This field should match the field used when you completed initial loading of routes for this network.
- Click the To Date Field drop-down arrow and select the field with the to date from the polyline feature class.
This field should match the field used when you completed initial loading of routes for this network.
If your routes do not have temporality, leave this field blank and your additional or updated routes will automatically be assigned a null value.
- Click the From Date Field drop-down arrow and choose the field for the from date for the polyline feature class.
- Click the Target column drop-down arrow in the Route Attributes Mapping area and choose an option to match the field in your polyline feature class with the field in the route table on the Route Attributes Mapping dialog box.
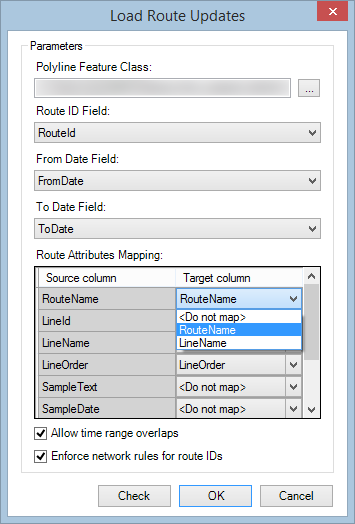
- If the column from your source data is already present in the route table, choose that field using the Target column drop-down arrow.
- If you want to load the column from your source data to a different column in your route table, choose that field in the Target column drop-down. Only fields of the same type and less than or equal to the length of the field in your source data appear in the Target column list.
- If the column from your source data is not present in the route table, and you want it to be created on the route table and have source data added, choose <Add to Network> in the Target column list.
- If you do not want the source data for a column to be added to the route table and network feature class, choose <Do not map> in the Target column list.
- If your LRS Network has a concatenated route ID of multiple fields, each of those fields needs to be selected so the records are added to the route table and network feature class correctly. If you leave any of the fields composing the concatenated route ID empty, you receive an error message and will not be able to proceed until you select all fields composing the route ID. If any of those fields are missing from your additional or updated routes, they need to be created to load route updates.
- If your additional or updated routes have any new fields that you want to add to the route table and network feature class, choose them and they load with the additional or updated routes.
- If your additional or updated routes have any fields missing that were previously added to the route table and network feature class and are not part of the concatenated route ID, they appear as null once loaded.
- If the additional or updated routes in your polyline feature class have temporality, you can optionally check the Allow time range overlaps check box to allow routes with identical route IDs and overlapping time ranges to load.
- Any additional or updated routes with the same route ID as an existing route replaces the existing route.
- If your additional or updated routes contain multiple records with the same route ID and overlapping temporality ranges and you do not want those additional or updated routes to load, uncheck this check box. If you don’t have routes with identical route IDs or overlapping time ranges in your additional or updated routes, leave the check box checked.
- If your additional or updated source routes contain multiple records with identical route IDs and overlapping time ranges and you uncheck the check box, the Load Route Updates tool will not allow you to complete the loading process.
- If your data is production level and you want to ensure the route IDs of your additional or updated routes match the padding and null settings for the network, check the Enforce network rules for route IDs check box. If any route IDs do not match the network settings, the data load fails and a list of records that do not match the settings are provided. If this route loading is in a non-production environment and you want to ignore the network settings, uncheck the check box.
- To check for any duplicate route IDs in your source routes, click Check.
- If no duplicates are returned, proceed to the next step.
- If duplicates are returned, close the tool, edit your source routes to eliminate any duplicates, then launch the Load Route Updates tool to load your routes.
- Click OK.
In addition to loading data into the centerline feature class, centerline sequence table, and route table, the Load Route Updates tool rebuilds indexes to improve performance when creating calibration points and events in your LRS Network. Depending on the size of your dataset, the route updates loading process could take more than an hour to complete.
A progress dialog box appears and shows the steps and progress of route loading. When the loading is complete, the Calibration Options dialog box appears.
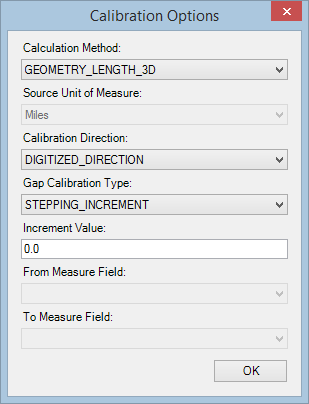
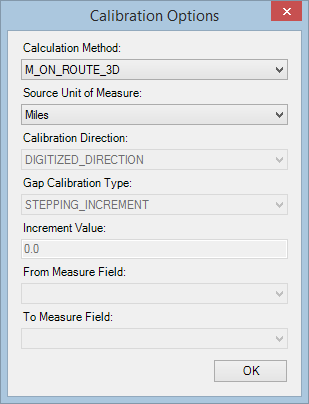
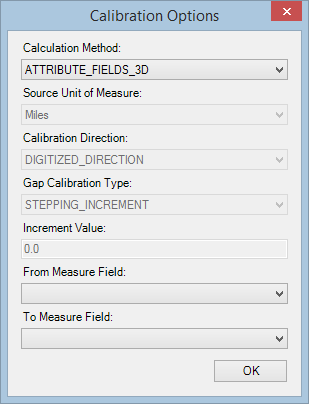
- Choose the Calculation Method for your calibration points.
The chosen method should match the method used when generating the calibration points for the initial route loading process to ensure consistency of calibration for all routes in the network.
- If you selected M_ON_ROUTE_2D or M_ON_ROUTE_3D as your calibration method, choose Source Unit of Measure for your calibration points.
- If you selected GEOMETRY_LENGTH_2D or GEOMETRY_LENGTH_3D as your calibration method, choose the calibration direction for your calibration points.
- If you selected GEOMETRY_LENGTH_2D or GEOMETRY_LENGTH_3D as your calibration method, choose the gap calibration type for your calibration points. The method should match the type selected during LRS Network creation.
- If you selected STEPPING_INCREMENT or ADDING_INCREMENT for the Gap Calibration Type parameter, choose the Increment Value you want for routes with physical gaps. This increment should match the increment selected during LRS Network creation.
- If you selected ATTRIBUTE_FIELDS_2D or ATTRIBUTE_FIELDS_3D as your calibration method, choose the fields for the From Measure Field and To Measure Field using the drop-down arrows. The list of fields comes from the polyline feature class selected in step 3.
- Click OK.
Calibration points are created for the additional or updated routes.
- Click Done.
The Question dialog box appears.
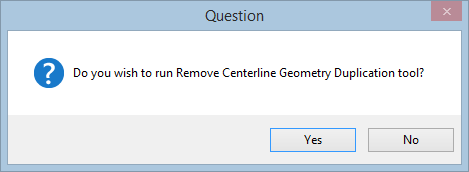
- Click Yes to run the Remove Centerline Geometry Duplication tool or No to return to ArcMap.